.more It's cable reimagined No DVR space limits. No long-term contract. No hidden fees. No cable box. No problems. The capacitor is the module in a fan that starts the motor on its highest. Ceiling fans are easy to control, add a nice rustic flair to your home, and also can help move around air. Unfortunately, tech is only good when it works, and that includes ceiling fans. One of the more common problems deals with a bad capacitor. So, how do you diagnose it?
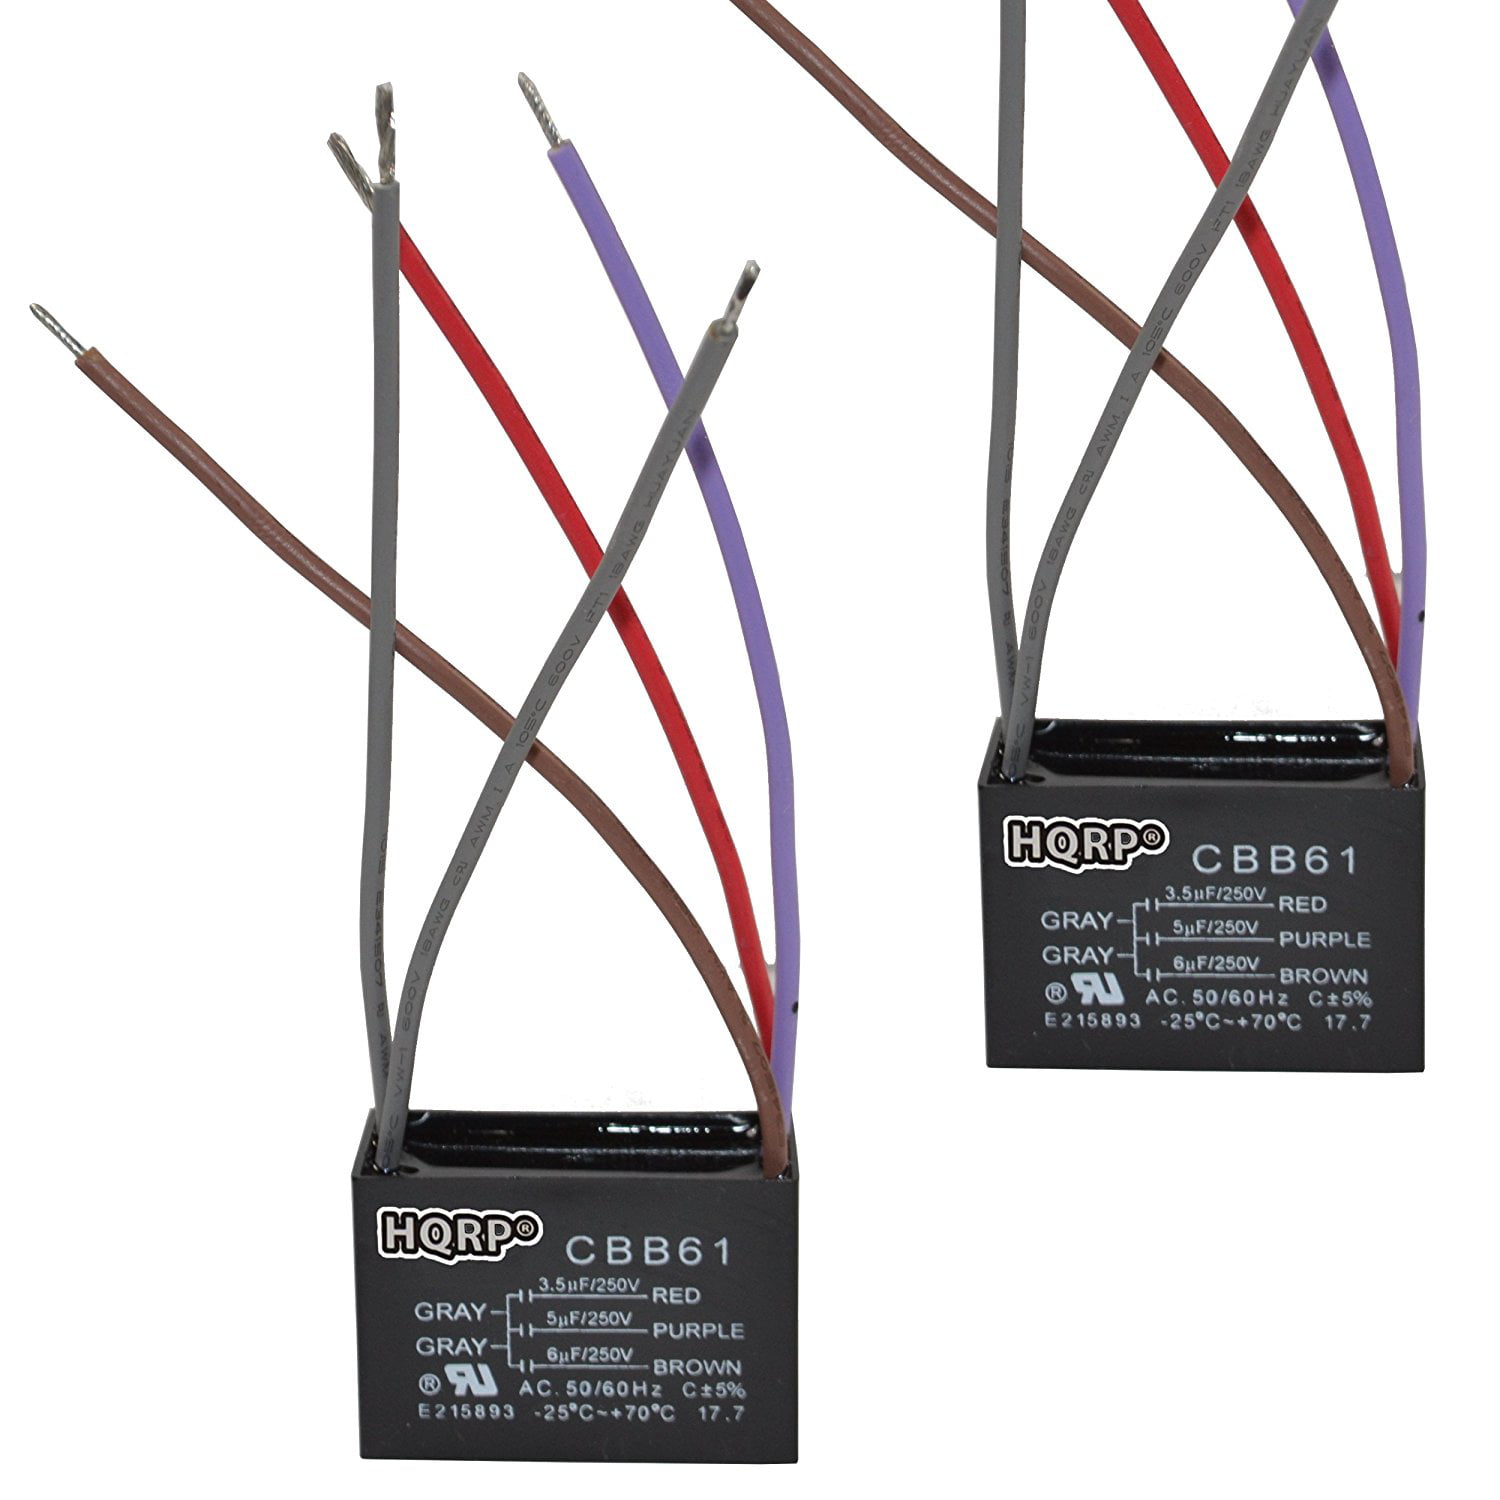
HQRP Ceiling Fan Capacitor CBB61 2.5uf+3.5uf+4uf 5 Wire plus HQRP Coaster
Intro Ceiling Fan Speed Problem Solved / How To Repalce the Capacitor ZipZapDIY 16.7K subscribers Subscribe Subscribed 1.2M views 6 years ago This video will give some insight into replacing. Replacing a ceiling fan capacitor is a manageable DIY task that can restore your fan's functionality. Follow the step-by-step guide, match the specifications, and test the new capacitor for smooth operation. Prioritize safety, gather the right tools, and turn off the power supply before replacing a ceiling fan capacitor. Simply to the point, there is a single phase (split phase induction) motor in ceiling fan where we need a starting capacitor to split the phase angle between starting and running windings to produce a magnetic field. A capacitor just do it as it provide leading phase shift by 90° (as some current flow through the staring winding). Most ceiling fans use a type of motor known as a "permanent split capacitor motor. These motors have two coils, a start and run winding. A capacitor is connected in series with the start winding to insert a phase shift, but once the motor is up to speed it becomes an auxiliary winding.
How to replace ceiling fan Capacitor Sparkrey
Step 2: Replace the ceiling fan capacitor. When a ceiling fan capacitor goes bad, the fan may not work at all. Multi-speed operation may also be erratic. Step 3: Check to make sure your ceiling fan's motor isn't getting too hot. To do this, allow your fan to run for about 10 minutes, then turn the fan off. How to repair a slow moving ceiling fan! The most common parts failure is a part that costs less than $10, and you can replace it yourself!Here is a link to. DISCLAIMER: When replacing a capacitor, make sure the new capacitor has same exact uf ratings as the old capacitor, and can handle same voltage or higher as the old capacitor, and make sure. Repaired my 52 inch Harbor Breeze by replacing the melted capacitor with a new one and it works perfectly.. Saves me from having to buy a new one!ALL MY PLAY.
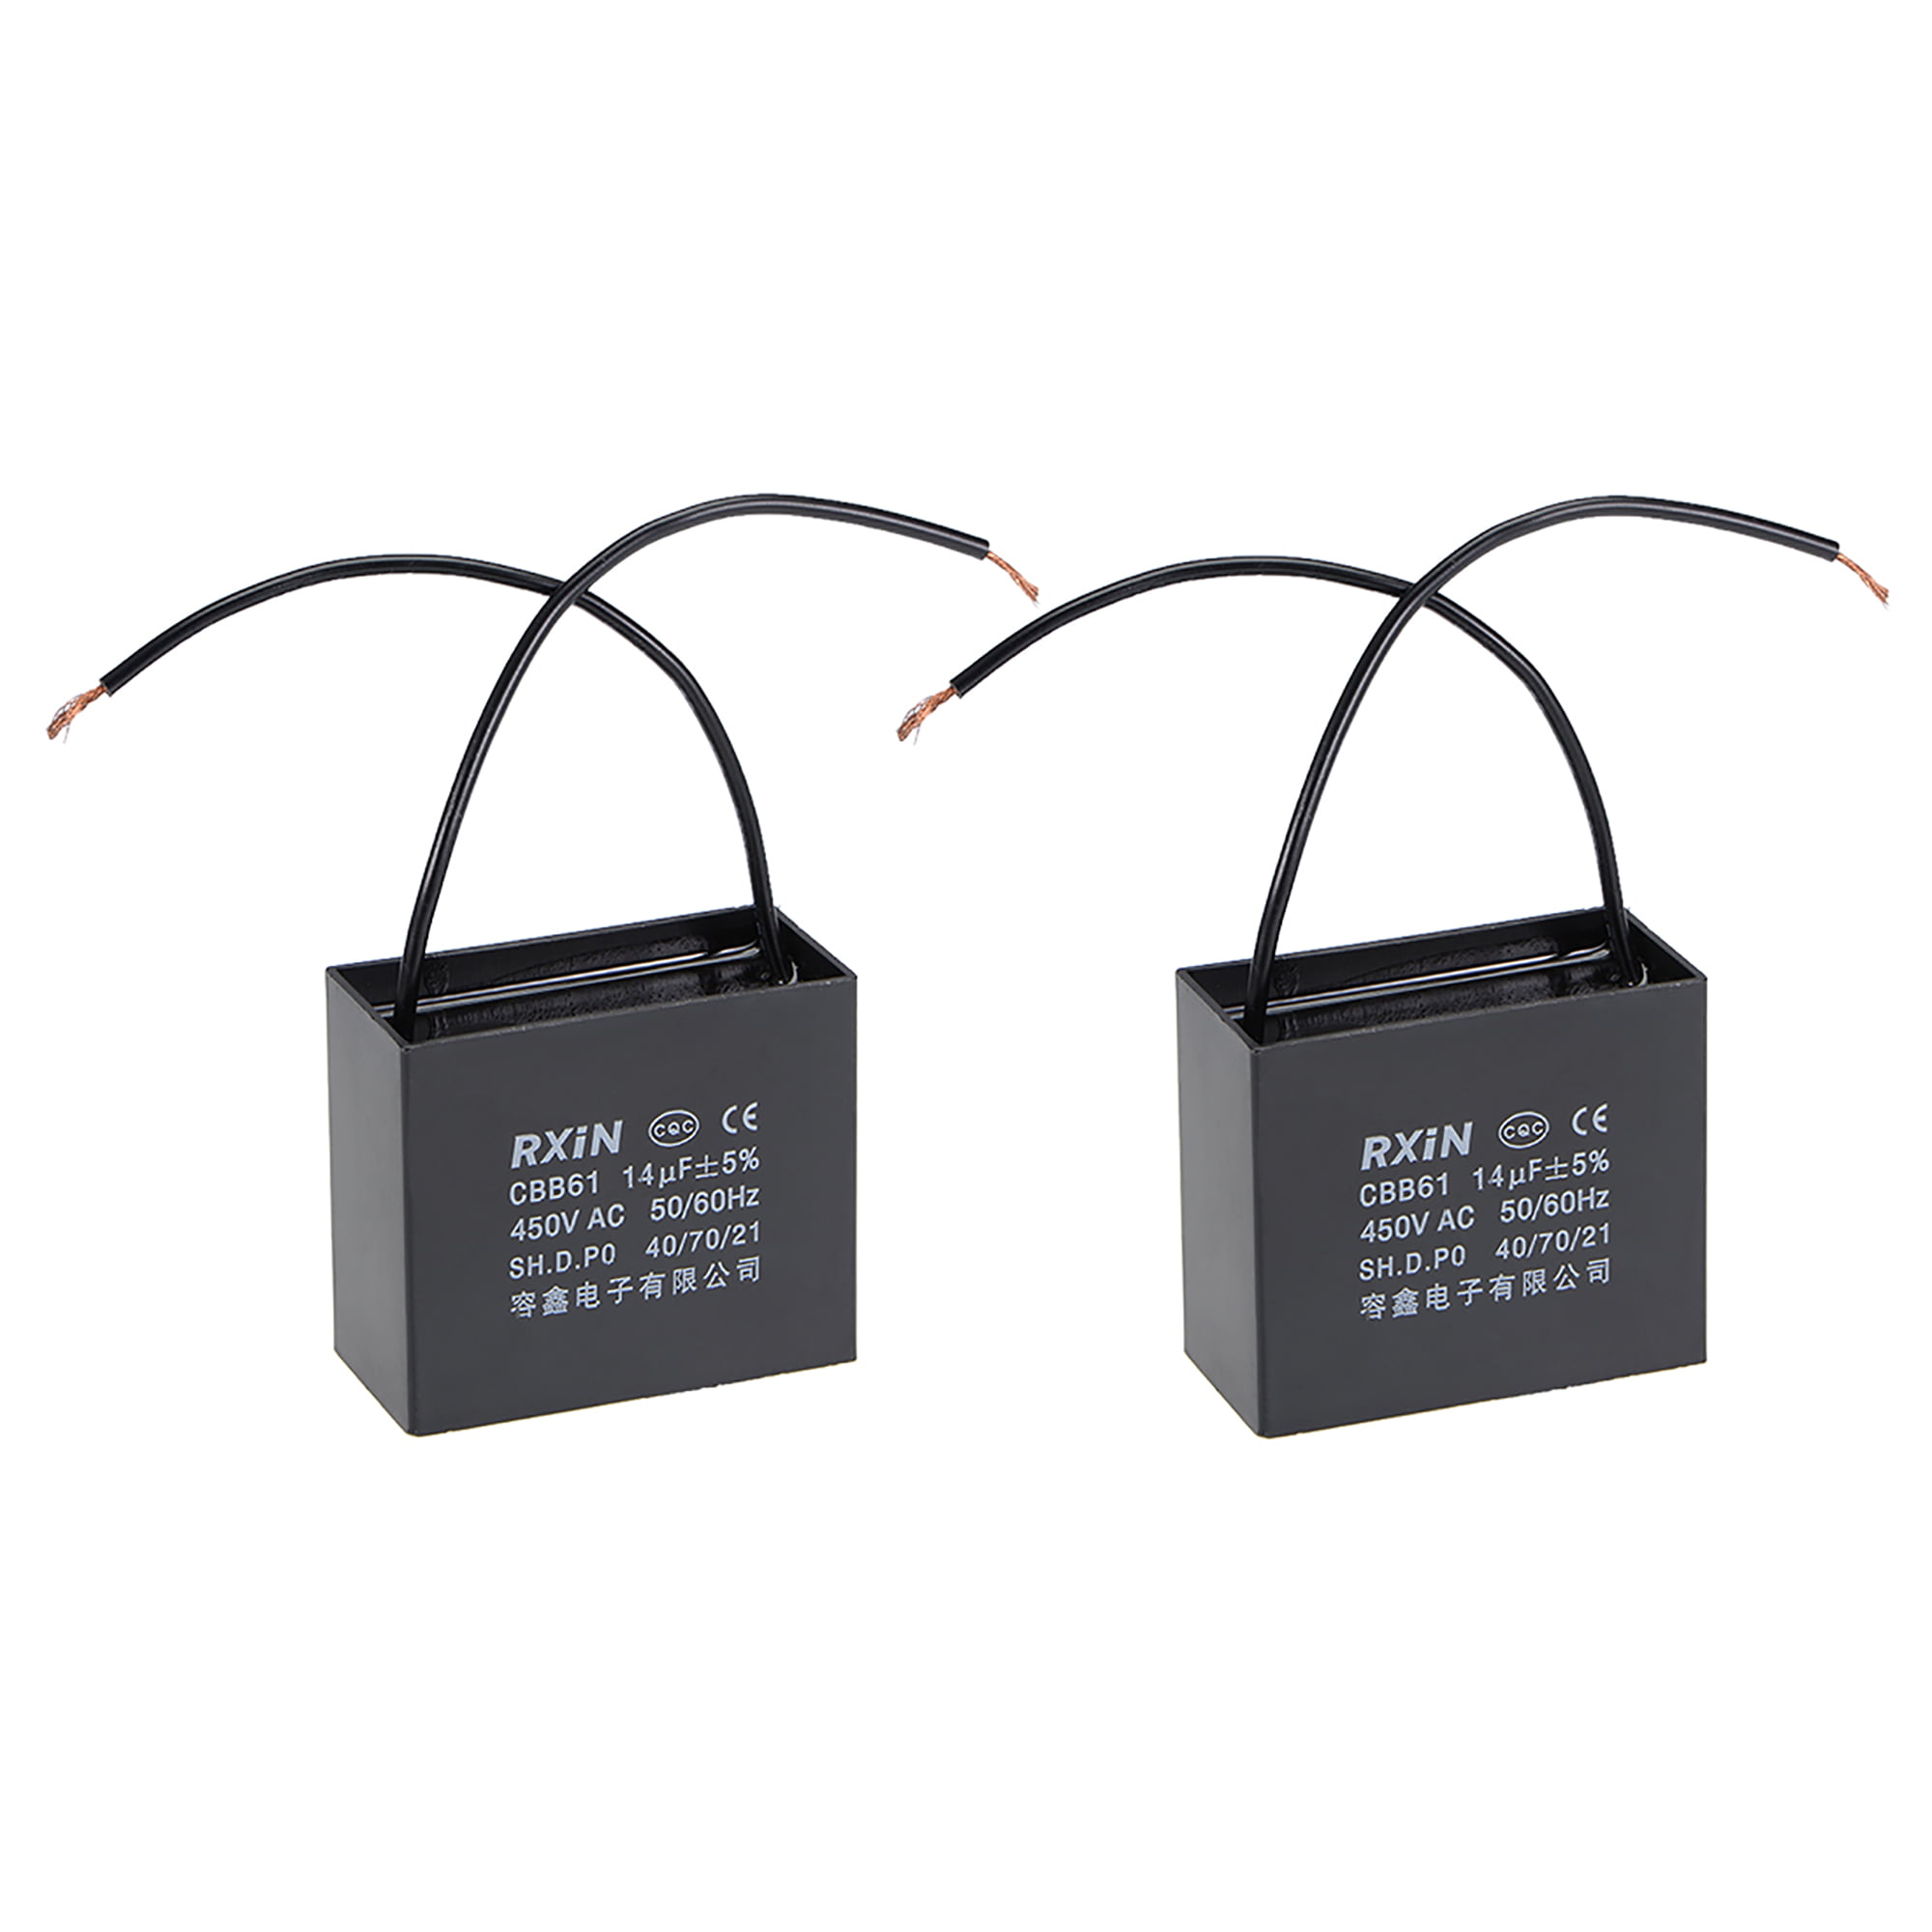
2 Wire CBB61 Ceiling Fan Capacitor 14uF 450V AC, Metallized Polypropylene Film Capacitors 2pcs
Ceiling fans manufactured after January 1, 2007 may have two black boxes that resemble a capacitor: 1) start/run motor capacitor and 2) light kit power limiter to restrict the total light bulb wattage to not more than 190 watts. Aside: The Energy Policy Act of 2005 requires that all ceiling fan lamps have not more than 190 total watts. Most ceiling fans use a type of motor known as a "permanent split capacitor motor". These motors have two coils, a "start" and a "run" winding. A capacitor is connected in series with the start winding to insert a phase shift, but once the motor is up to speed it becomes an auxiliary winding.
Ceiling fan capacitor replacement is always the best option to keep the fan running in good condition again. A ceiling fan is a single-phase motor that needs a starting capacitor to split the phase angle between starting and running winding to produce a magnetic field. A capacitor in the ceiling fan provides the leading phase shift of 90°. ceiling-fan replacement Share Improve this question asked Jul 9, 2023 at 17:25 cr0 1,345 1 21 48 1 Before you go changing the capacitor, make sure it's not a mechanical problem with the fan motor itself, such as dry or dusty bearings.

HQRP 887774403032024 Capacitor CBB61 fits Harbor Breeze Ceiling Fan 3.7uf+4uf+5.5uf 4Wire
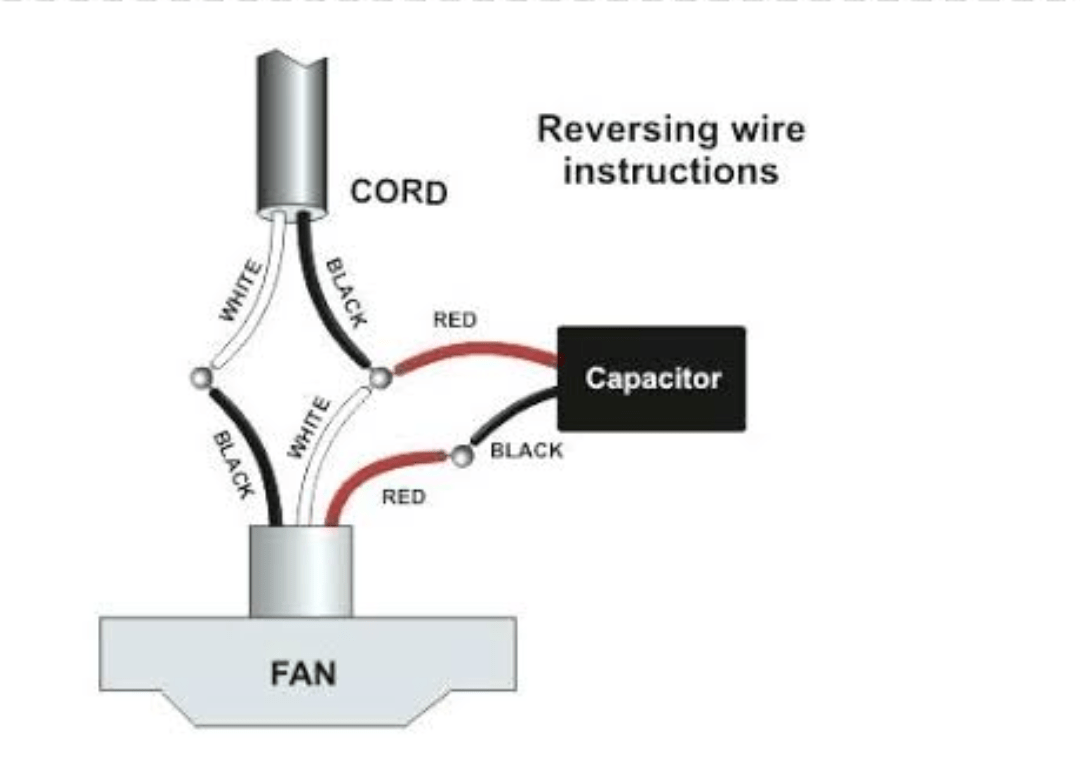
Take your new capacitor out of the box and affix the metal strap around it so that it is affixed to the AC unit. Attach each wire to the new capacitor in the same configuration as the old capacitor. Return the breaker to the breaker box, turn the main power on, and turn on the thermostat. Step 3: Locate the Capacitor. Now that you've exposed the fan's motor housing, you should be able to spot the capacitor. It typically appears as a cylindrical or box-like component with wires connected to it. Take note of the wiring connections and snap a quick picture or create a diagram to facilitate reassembly later.
