Learn How to draw a Chair for kids, easy and step by step. Draw this Chair by following this drawing lesson. Method 1 A Basic Chair (Angled) Download Article 1 Sample angled chair. 2 Draw four vertical lines. 3 Draw a lateral line connecting all four vertical lines in the middle. This would look like a parallelogram. 4 Draw a square on top of the parallelogram. Darken the vertical lines below the parallelogram this will serve as the chair's legs. 5

How to Draw a Chair
How to draw a chair Shoo Rayner Drawing 254K subscribers Subscribe Subscribed 611 Share 159K views 11 years ago How to draw furniture A chair is easy to draw if you think of it as a. 140K subscribers Subscribe Subscribed 169K views 11 years ago How to Draw a Chair - Easy Things To Draw Here we will discuss how to draw a chair. We will discuss different methods to draw. Step 1: Begin by Drawing the First Leg of Your Chair To start your chair sketching process, you are going to need to find the center of your drawing area. Slightly to the right of the central point, you can draw the first leg of the chair. To do this, draw two straight and parallel vertical lines, and then a slightly angled line on the left. With a few simple steps, any beginner can learn to draw a chair. This easy drawing chair tutorial is perfect for artists who are just starting out, or for those who want to brush up on their basic skills. So grab your drawing materials, and let's get started! Gather Your Materials
Chair Drawing — How To Draw A Chair Step By Step
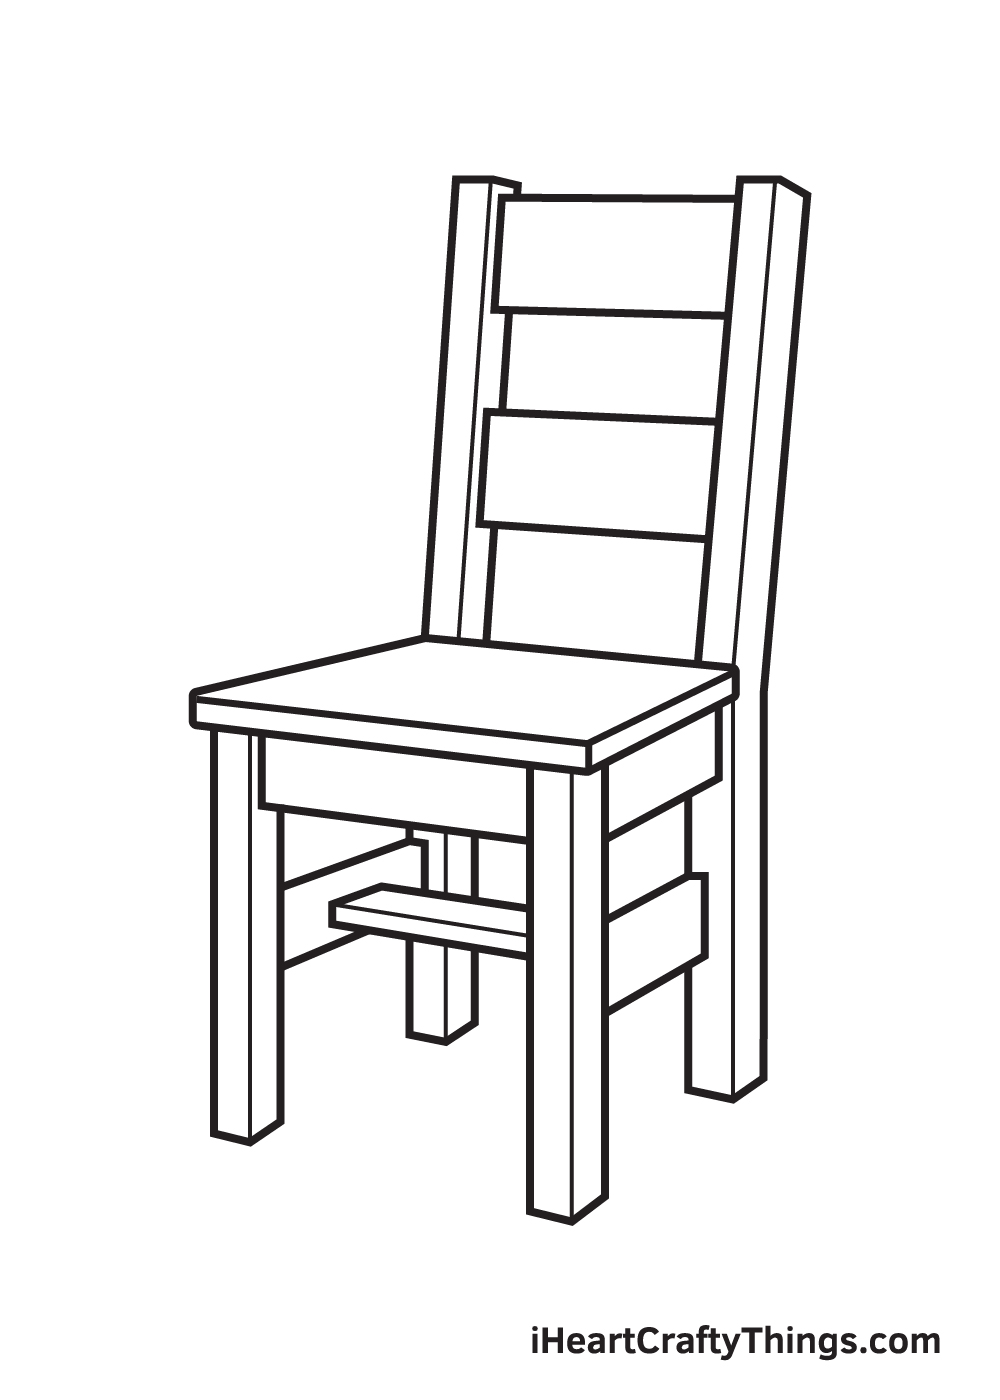
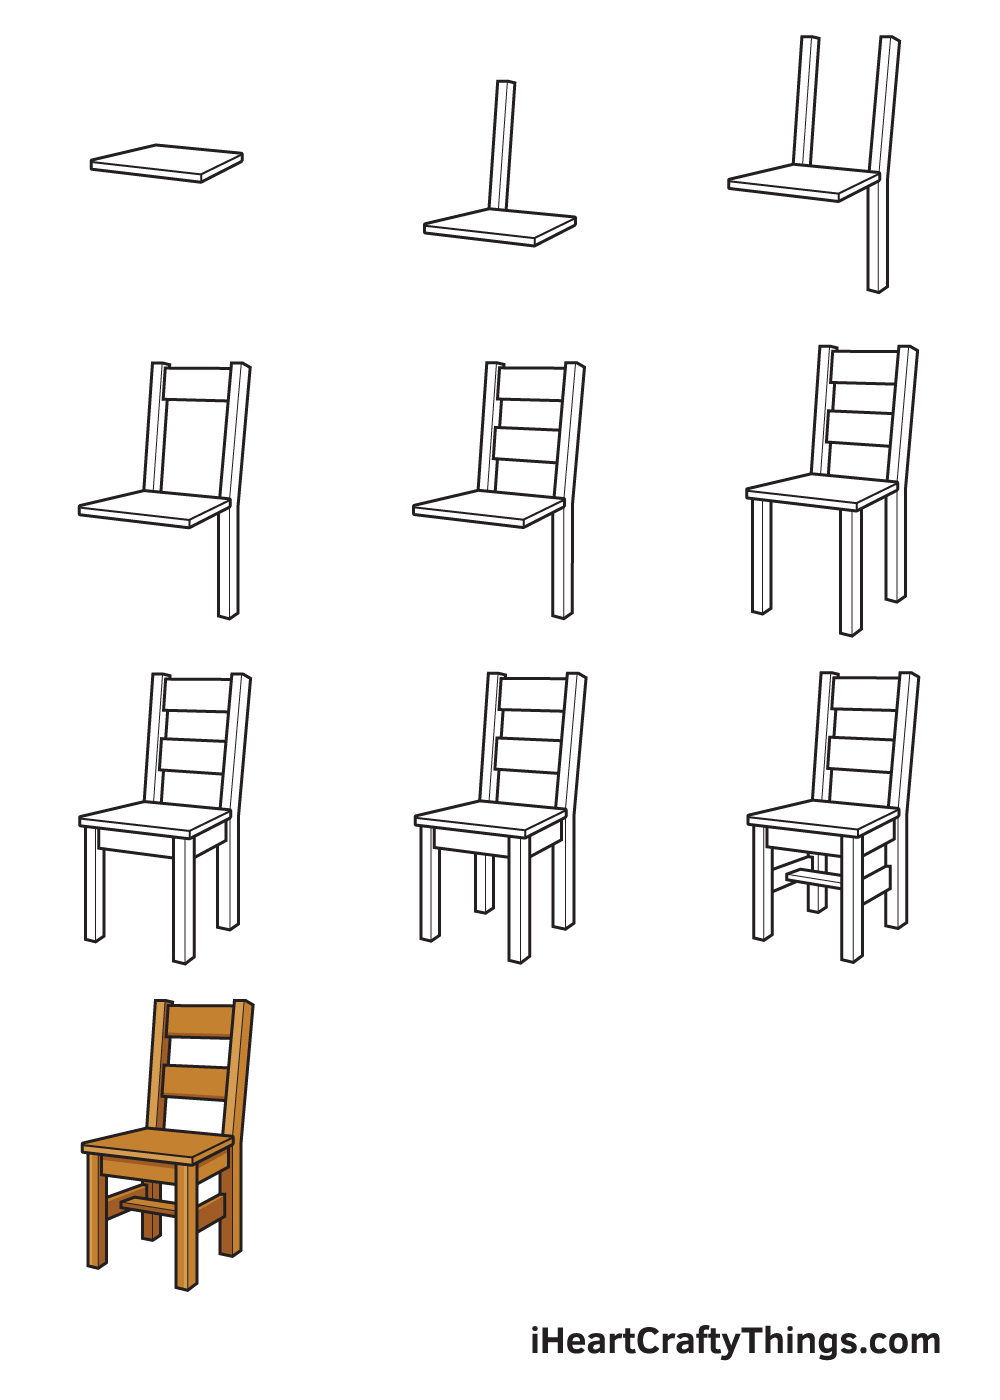
Step 1 Starting in the very middle of your paper, draw the seat of the chair. It is the part of the chair that directly touches our bottoms whenever we sit down. Here's a useful tip: draw a vertical and a horizontal line across your paper to create reference lines. The point where the two lines meet is where you should draw the seat of the chair. Materials Pencil Drawing Paper Crayons or Colored Pencils Black Marker (optional) Chair Drawing (easy) Printable PDF (see bottom of lesson) This step by step lesson will teach you how to draw a very simple chair. Let's pay attention to the shapes of each part so that the drawing is easy to follow. Perhaps a ruler will help too? How to Draw a Chair Kids will have fun learning how to draw a chair in today's art lesson. Create along with these simple 6 drawing steps. You'll learn the basics for drawing a chair. This lesson only takes about 20 minutes and has a PDF near the bottom of the lesson you can easily print or download. 1. Begin by drawing the seat of the chair. First, use four curved lines to outline a parallelogram with rounded corners. Then, transform the shape into a three-dimensional seat by drawing curved lines parallel to the near sides. Easy Chair Drawing - Step 2 2. Draw the sides of the chair. Extend three short lines from beneath the seat.
Chair Drawing — How To Draw A Chair Step By Step
Time needed: 25 minutes How to Draw a Chair Draw a rounded diamond as shown. Add a side edge below it. Start two poles at the back. Add a rounded rectangle for the back. Add an edge to the side. Draw the front left leg. Draw the front right leg. Finish with two back legs. Trace with a marker and color. More Fun Home Things to Draw How to Draw a Bed 2. Sketch the Frame. Draw one vertical line on either side of the horizontal lines. These lines will later be used as part of the outer frame and legs of the chair. 3. Add More Lines. Draw in two vertical lines right beside the other two lines and connect them. 4.
Draw two lines at the bottom corners of the seat. These lines will be the front legs. Then, draw two more lines at the back of the chair for the back legs. The length of these lines will determine how high the seat will be off the ground. If you want your chair to have arms, draw two lines extending from the top of the front legs. Simple Guide on How to Draw a Chair Draw a parallelogram on your paper, then connect two long vertical lines on the shape's upper two corners. Enclose the vertical lines by connecting them through a horizontal line. Add details to the back post of the chair by drawing a square inside the rectangular shape.
How to Draw Chair Step by Step (Very Easy) YouTube
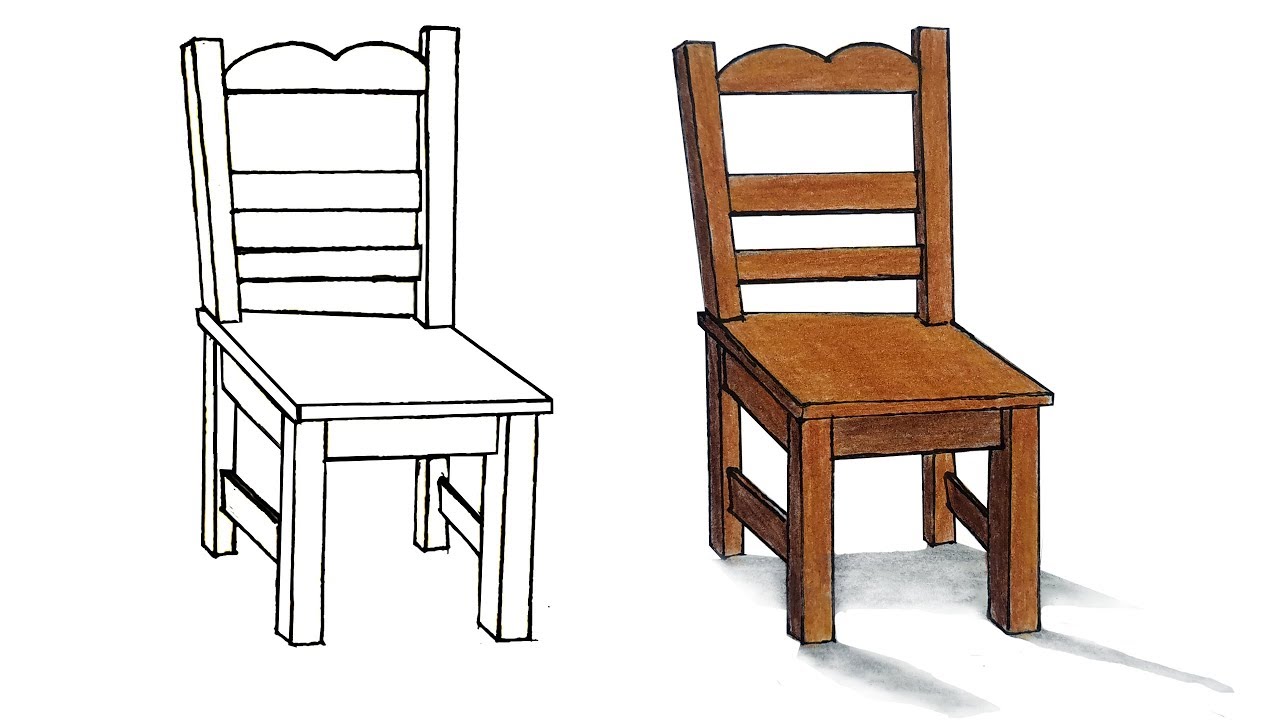
Step 3: Draw 3 rectangles inside the back stand of the chair and on both sides of the chair. Step 4: Draw few parallel lines in the backrest. Add some simple lines in the leg of a chair and side woods. Step 5: Give a rounded shape to the top seat of the chair and erase the lower border of the rectangle drawn in the first step. Step 6: Give a finishing touch to the handle and legs of the chair. How to Draw a Chair Start drawing the chair seat. To do this step you have to draw two horizontal straight parallel lines of different sizes. Draw a part of the chair back. Above one of the previously drawn straight lines add two same straight lines slightly oblique. Add the top of the chair back.
