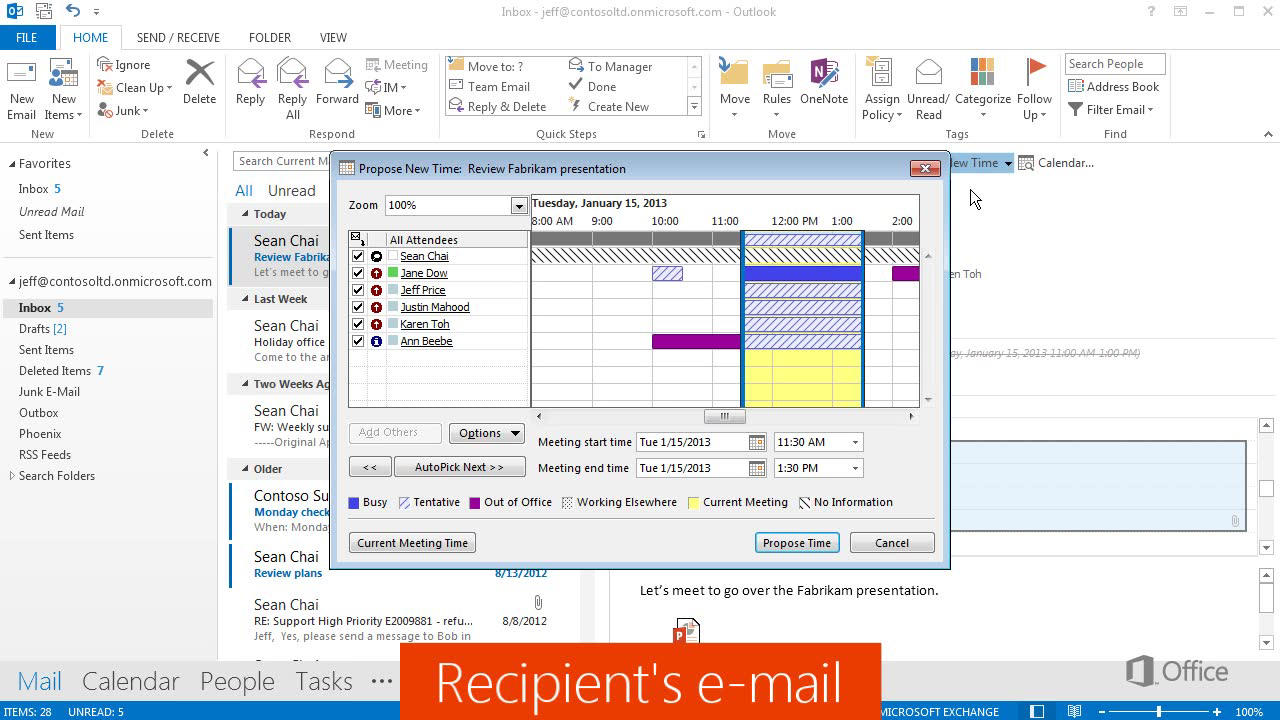
Recipients who use Outlook also have the option of proposing a new time. If they click Tentative and Propose New Time, they get a dialog box that looks a lot like the Scheduling Assistant. They can change the Start or End times, and click Propose Time. Then, they can add a message and click Send. Use the Room Finder In a new meeting, select Browse more rooms under the Add a location section, and then select Room Finder.. Next, browse for a building in the city where you'd like to meet by using the drop-down menu in the Building field or search by typing in the Building field.. After selecting a building, you can browse and filter the rooms in that building by Type, Capacity, Floor, and.
How to Use Outlook Scheduling Assistant?
Follow these four steps to use the Scheduling Assistant in Outlook Calendar (desktop version). Step 1: Open Outlook Calendar and Select "New Meeting" Open Outlook Calendar by clicking on the Calendar icon while logged into your account, and select "Meeting" at the top left corner of the screen. Scheduling Assistant isn't enabled. Make sure to enable Scheduling Assistant as an Outlook add-in and add it to your Outlook ribbon before creating a new event. Attendees are outside of your organization. Outlook—and by extension, Scheduling Assistant—can't display or process scheduling information for people who are outside of your. Outlook's Scheduling Assistant helps users plan meetings and send out invitations to attendees. The Scheduling Assistant can be found in Outlook's Meeting tab. The tool allows you to set a time, date, location, and attendees. You can also create a custom note to send to the people you want to invite to the meeting. Tired of emails or Teams chats back and forth trying to decide when is a good time for you and your coworkers to have a meeting? Use Scheduling Assistant ins.
How to use Scheduling Assistant in Outlook Zapier
The scheduling assistant shows your overlapping free times in order to quickly decide on an appropriate meeting. Via Web Browser. Below are the steps to use the Scheduling Assistant for Outlook in a web browser. This widget is most effective when you first fill in the times you are busy (i.e. entering times you are in class/meetings). In this video, Anthony from The HBP Group explains how to use the scheduling assistant when booking meetings in Outlook. From your "Calendar" in Microsoft Teams select "New Meeting" on the top right-hand side of your screen. Add the necessary or optional participants in your meeting then click "Scheduling Assistant" above. Step Two. You will now see the "Scheduling Assistant" Interface which looks slightly different from Outlook. To open the Scheduling Assistant, do one of the following: On the Home tab, in the New group, click New Meeting. On the Appointment or Meeting tab, in the Options group, click Scheduling Assistant. The Scheduling Assistant opens and displays your calendar for the next seven days.

How to use Scheduling Assistant in Outlook Zapier
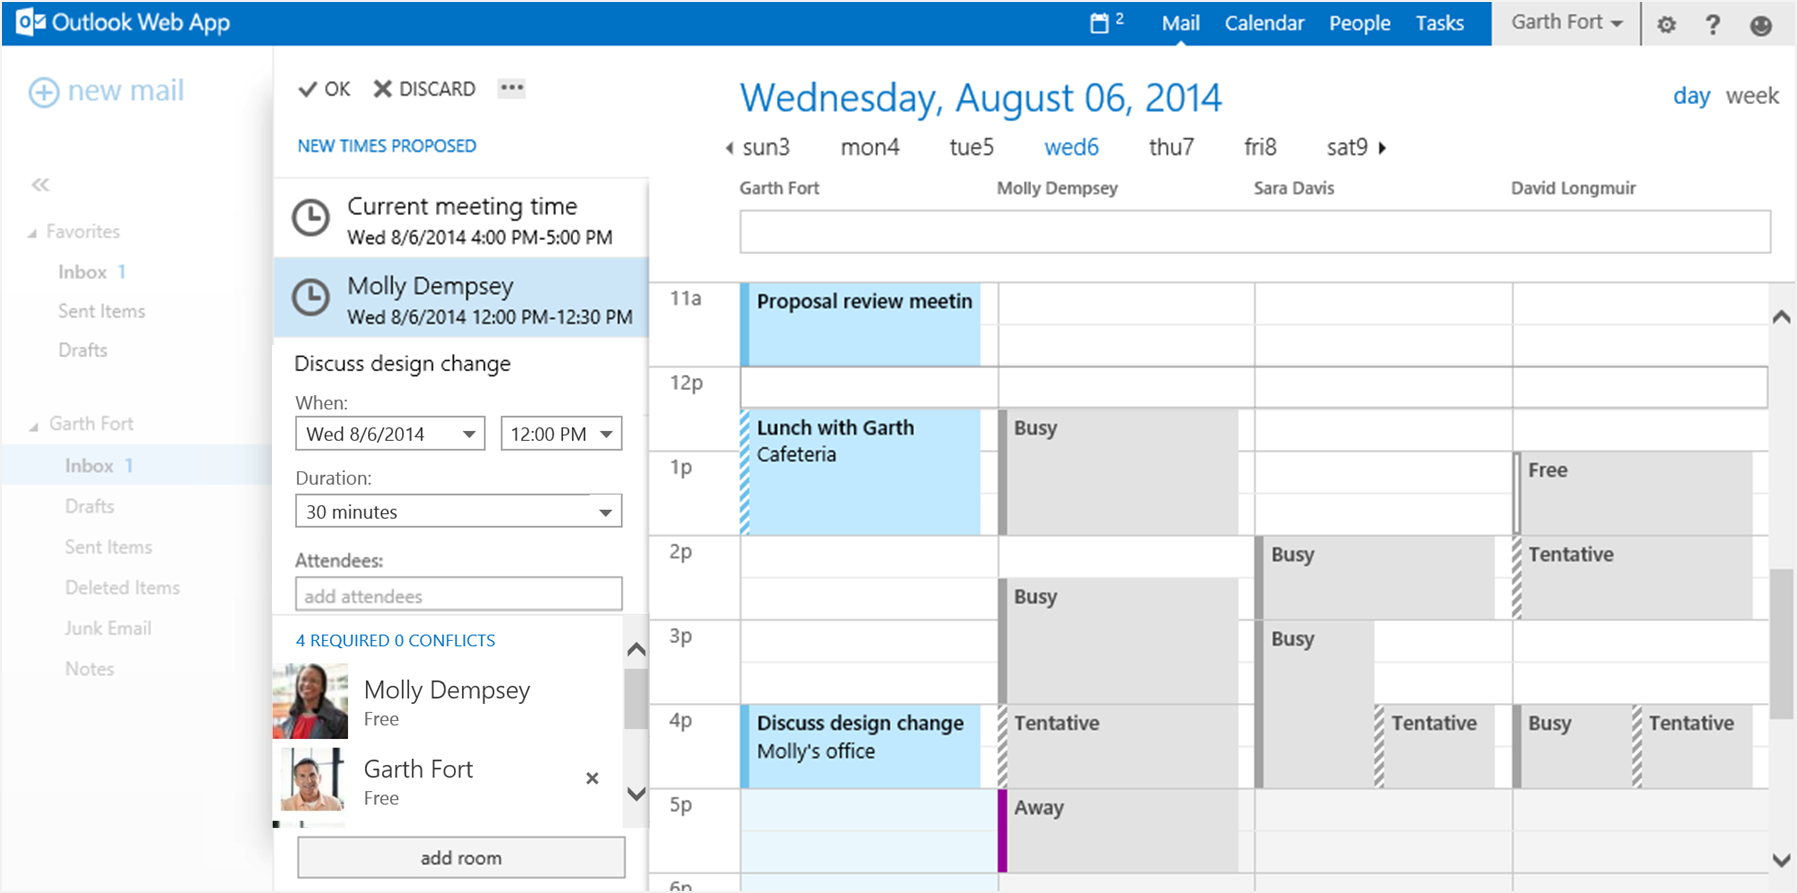
With the Scheduling Assistant, you can now easily see your coworkers' availability and find a time that works for everyone.. Outlook will let you know right away if the time works for everyone. Note the green icon above the time, indicating everyone is available. If you need to pick a better time, tap the date picker. Create a meeting or appointment in Outlook for Mac. Create, modify, or delete a meeting request or appointment in Outlook.com. Schedule a calendar event or meeting with Outlook on the web. Set Skype for Business Meetings options. Change participant settings for Skype for Business meetings. Preload attachments for a Skype for Business meeting
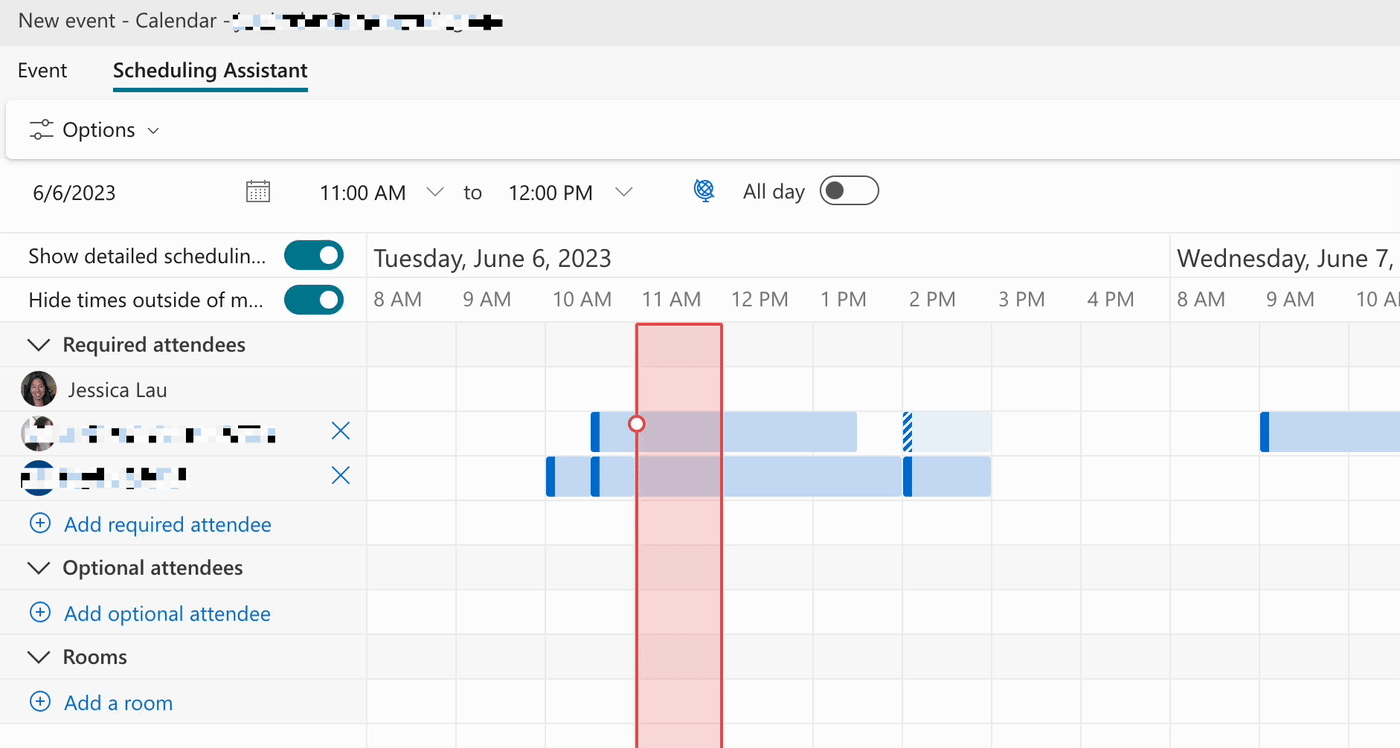
The use case is being able to see Scheduling Assistant on meetings that I have accepted from somebody else. With the Outlook desktop app, I have Scheduling Assistant available for these meetings and, if I need to reschedule the meeting, I can see when other attendees are free. So I can suggest a new time slot that is available for other people. In the Scheduling Assistant, either click the box under your name and type an attendee's name or email address or click the Add Attendees button to bring up your address book.. Click the icon next to the attendee's name in the Scheduling Assistant to mark a specific attendee as a Required Attendee,Optional Attendee, or a Resource.When you start typing a attendee's name, Outlook will provide.
Propose New Time—a new feature for Outlook Web App in Office 365 Microsoft 365 Blog
Scheduling a meeting can be difficult, but Outlook's Scheduling Assistant makes it easy! In this video I'll show you how to use the Scheduling Assistant to e. Outlook Scheduling Assistant Timescale View I recently installed Office 2016 (via O365 Pro Plus), and the time scale view in Outlook's scheduling assistant tab changed from 30 minutes to 60 minutes, which makes it very difficult to see meeting details and causes unnecessary back and forth checks between my calendar and the scheduling assistant.
