The Z offset is an essential setting in a 3D printer that ensures that the nozzle is at the correct distance from the bed surface. Even if you have one of the best 3D printers, if the. 3D Printer Z Offset: Simply Explained by Benjamin Goldschmidt Updated Jul 2, 2023 If you're struggling to get your 3D prints to stick or want to print on top of an existing model, Z offset is the answer. Learn more! Advertisement with personalized ads Accept and continue
Tune your First Layer Z Offsets Tutorial Australia
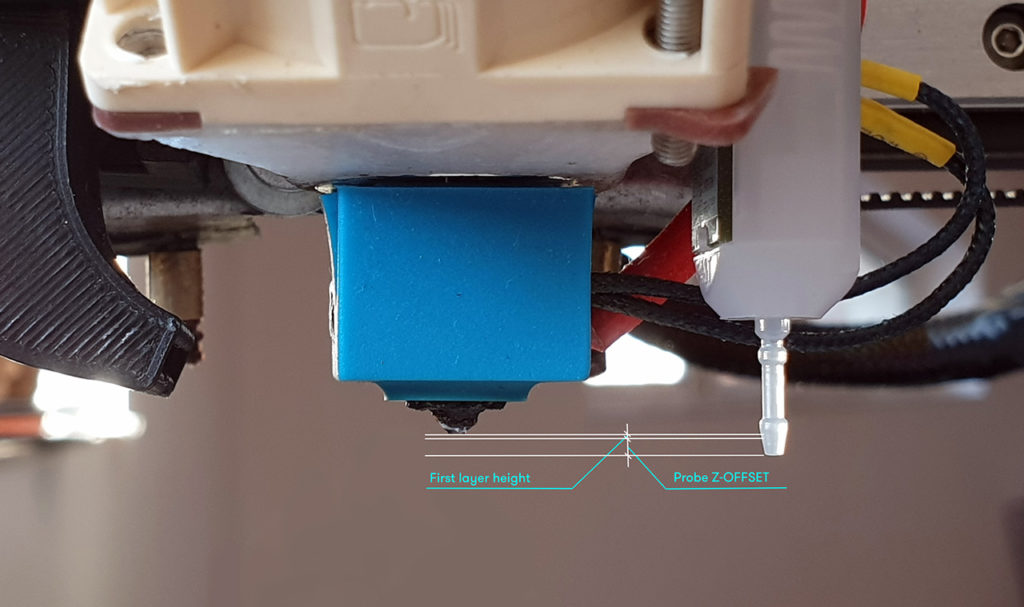
The Z-offset setting of your 3D printer is the distance between the Z home position and the hot end. Calibrating this setting is a key element of attaining the perfect first layer. The Z-offset can also be manipulated to add extra print bed material or to a model on top of another. Find the command that sets the initial Z position, "G92.". After the G92 command, add Z0.1 to give the Z offset a value of 0.1mm. After adding the command, the line should read "G92 Z0.1.". Save the Gcode and send it to your printer. You can raise the Z offset using a negative value like "Z-0.1.". What is Z-Offset on a 3D Printer? 3D printing Z-offset refers to the distance between the printer's nozzle and the build plate. Calibrating Z-offset is crucial that ensures accurate positioning for printing and promotes good adhesion of the first layer. This is an absolute beginner's tutorial on setting a 3D printer's z offset when you have a bed leveling probe installed such as the BL Touch or CR Touch. I.
Z Offset (3D Printing) How to Adjust It All3DP
The Z offset is an essential setting in a 3D printer that ensures the nozzle is the correct distance from the print bed surface. Even if you own one of the best 3D printers, if the nozzle is too close, the filament may not be able to flow properly, resulting in a print failure. Worse still, the nozzle could also damage the bed. The Z offset is a significant setting on a 3D printer that determines the distance between the printer's nozzle and the print bed. It represents the height at which the nozzle begins printing the first layer of a 3D model. This distance is critical to achieving proper adhesion and print quality. Z offset is an important 3D printer setting that allows users to perfect their first layer. It can be adjusted in slicer software or by inputting G-code commands. Adjustment of the 3D printer's Z offset is a way to achieve successful prints in a variety of situations. It is primarily used to ensure the correct distance between the nozzle and. The Z-offset setting can also be used to significantly adjust the height of the first layer. This allows you to print on top of existing prints. Unfortunately, doing so will require the top of the existing model to be flat. You will also need to know the height of the existing mode with a lot of precision to avoid any scenario where the print.

3d
Cura: Z Offset - Simply Explained. by Larry Wood. Updated Aug 22, 2021. Z offset control can be useful in a number of ways, including printing on top of an object. Learn how to adjust Cura's Z offset setting! The purpose of setting the Z home offset value is to specify how far off the nozzle is from the print bed when it homes and triggers the endstop, which will allow the 3D printer to use this value to bring the printhead to its true zero position after homing.
Z offset is a setting for 3D printers that controls how far away the printhead moves away from its home position along the vertical axis (Z axis). It's important to remember that this offset is only digital and is not the same as the position of the physical Z-axis endstop (limit switch) on your Ender 3. Go to "Prepare", then "Move Axis" and select the Z axis and select 1mm. Scroll the wheel left to lower the print head until it touches the paper (The paper should be able to slide around, but there should be some grip on it from the nozzle). Go back to the previous menu and this time select 0.1mm and adjust the nozzle slightly until.
BLtouch sensor for ABL on SKR 32bit board
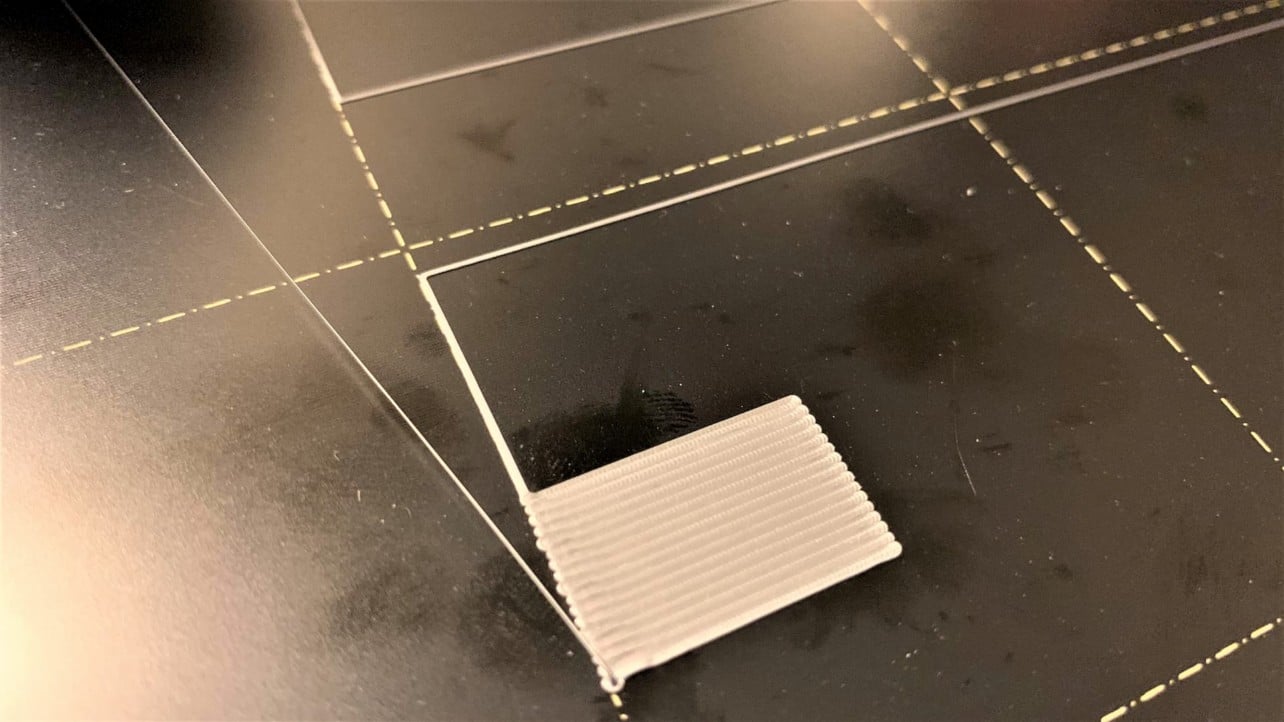
Knowing the exact position of the nozzle and the position (height) of the trigger point of the leveling sensor, the Z-offset can be calculated and set. That height is then put into the M851 G-code command to set the Z-offset. This is exactly how you would do this manually other than you usually use a sheet of paper or a feeler gauge between the. A big letter x 0.2 mm thick to help you test Z-Offset. As you are printing, manually change the Z-Probe Offset from Control->Motion->Probe Z Offset. Once you are satisfied, go to Control->Store Settings to save it.
