What does this mean? It means you should choose a camera that has the best high-ISO capabilities you can afford. That way, you'll be able to boost the ISO without experiencing a lot of noise (which, in turn, will help you keep your shutter speed sufficiently high for sharp images!). 15 Low Light Photography Tips 1. Understand the exposure triangle 2. Use your histogram, not just your camera's LCD 3. Learn how your shutter speed can affect your photographs 4. Zoom in to 100% 5. Use a wider aperture 6. Buy a faster lens 7. Increase your ISO 8. Shoot RAW

Six Indoor Photography Tips That Will Improve Your Shots Emma Gutteridge
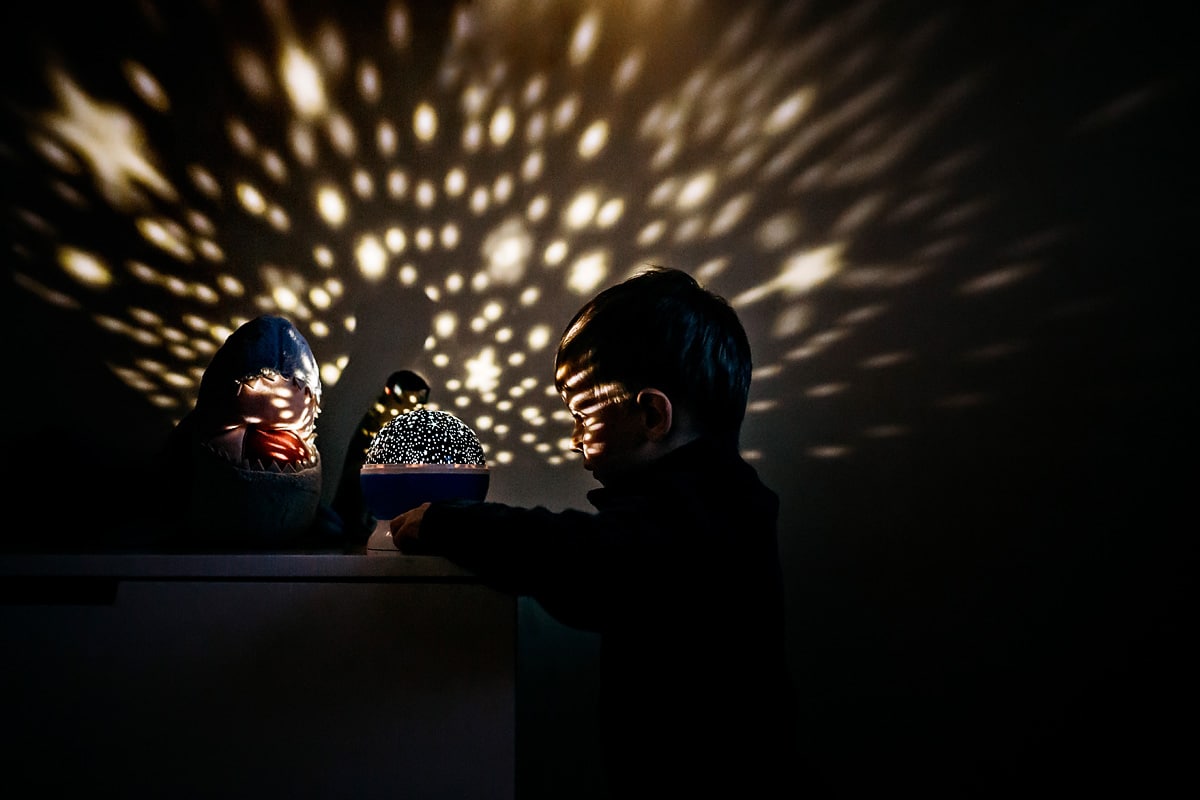
1. Normal Low-Light Conditions Low-light photography is not just about taking photos in the dead of night. In fact, even indoors in the middle of the day is usually "low light" as the camera sees it. And you can get really bad image quality in those situations unless you know what you're doing. 1. Crank up the ISO ISO refers to your camera's sensitivity to light, and as one of the three pillars of the exposure triangle, ISO settings for low light photography are essential. Represented by a number, the higher the number is, the more sensitive your camera is to light. Low Light Photography Tips: Low Light Photography: Still Subjects Versus Moving Subjects How to Prevent Camera Shake in Low Light Situations: 5 Tips How to Prevent Motion Blur in Low Light Situations: 3 Tips Low Light Photography: Still Subjects Versus Moving Subjects Low light photography comes with two unique challenges for photographers: 13 Tips for Shooting in Low Light: How to Take Photos With Low Light Written by MasterClass Last updated: Jun 7, 2021 • 6 min read Getting the best available light is one of the biggest challenges to taking good pictures. But there are a few tricks to making the most of less than ideal lighting conditions.

Low Light Tips How to Get Good Lighting for Indoor Photos Cool lighting, Photography
1. Changing your ISO for Low Light Photography A good rule of thumb is to photograph with as low of an ISO as possible. When shooting in low light, your first reaction should be to raise your ISO to a higher number. But a larger ISO will add noise to your images, especially in dark areas. Possible solutions For static subjects And moving subjects Ideal settings for indoor/low-light photography The right equipment for these situations Photo accessories Difficulties of shooting in low light conditions Tip #1: Use a tripod and shutter release cable Tip #2: Use your camera's RAW setting whenever possible Tip #3: Consider a wider aperture or a faster lens Tip #4: Increase your camera's ISO setting and use DeNoise AI to remove the resulting noise Tip #5: Take bracketed exposures for HDR tone-mapping Wrapping it up Introduction Indoor Photo Tip #1 - Turn off the lights, use natural window light only. The number 1 mistake I see people making with their indoor photography is that they have the lights on. This leads to two problems. First, lights are often overhead, creating harsh shadows and unflattering light (just like if the sun where directly overhead, we don't.
7 Indoor Photography Ideas That Make You Look Like a Pro
1. Use a Higher ISO for Beautiful Exposures For indoor photography, you're going to have to bump your ISO numbers up. Most photographers refer to ISO as the camera sensor's sensitivity to light. While this isn't exactly right, it is a useful way to think for the purposes of indoor photography. . Feeling frustrated with indoor photography? Want to know how you can capture beautiful indoor photos with only natural light? Working with natural light indoors can be tricky. So in this article, I'm going to share plenty of tips and tricks I use in my own photography.
How to get sharp photos when it's dark? We're gonna cover all these challenges but let's start with the different types of low light situations. Types of Low Light Daylight During the day you might encounter challenging lighting conditions when you're in large shadowy areas created by buildings or trees. 3. Adjust the Aperture. While ISO determines the speed of which light reaches your camera's image sensor, the aperture determines how much light it allows in - because if this, a wide aperture (small f-stop number) can also help you capture decent low light photographs without the use of a flash. 4. Reduce Camera Shake.
Lowlight and indoor photography tips, advice and equipement
Simply put, slowing down your shutter speed, keeps it open longer and allows more light to the sensor, in turn giving you a brighter image. As a general rule of thumb, I try not to go any slower than 1/50 of a second hand held. Any slower and you risk camera shake while the shutter is open giving you a blurry image. Put the camera on a sturdy platform so it wouldn't shake. 2. Keep a good hold of your camera! Keep your hands strong, lomographers! 3. Don't be nervous. As long your fingers press the shutter button properly, the camera wouldn't shake. 4. Take a deep breath before shooting.
