The Arduino can create a file in an SD card to write and save data using the SD library. There are different models from different suppliers, but they all work in a similar way, using the SPI communication protocol. The module used in this tutorial is the one shown in figure below (front and back view). This module works with micro SD card. The SD library allows for reading from and writing to SD cards, e.g. on the Arduino Ethernet Shield. It is built on sdfatlib by William Greiman. The library supports FAT16 and FAT32 file systems on standard SD cards and SDHC cards. It uses short 8.3 names for files.
Arduino SD Card Module How to Read/Write Data StepbyStep Tutorial
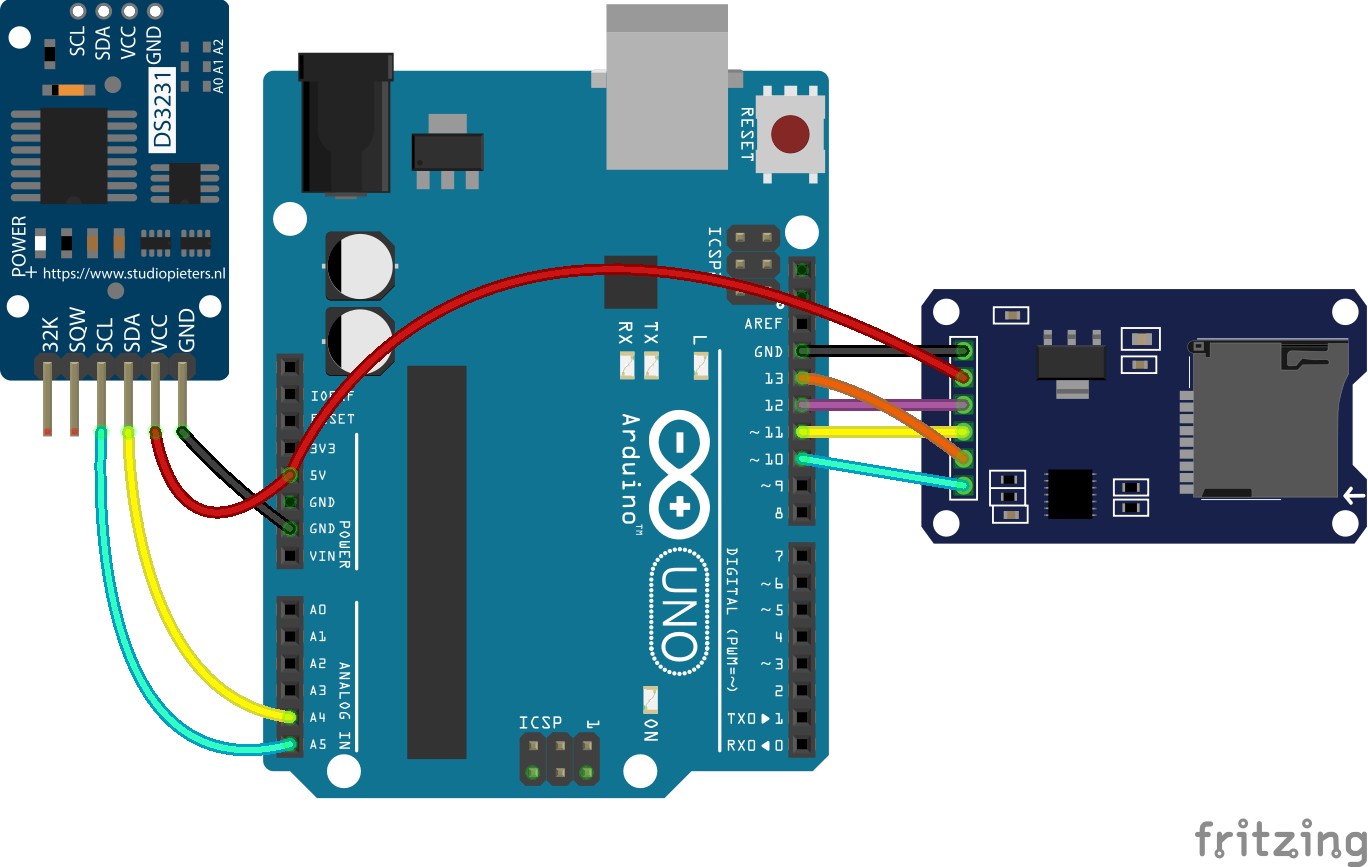
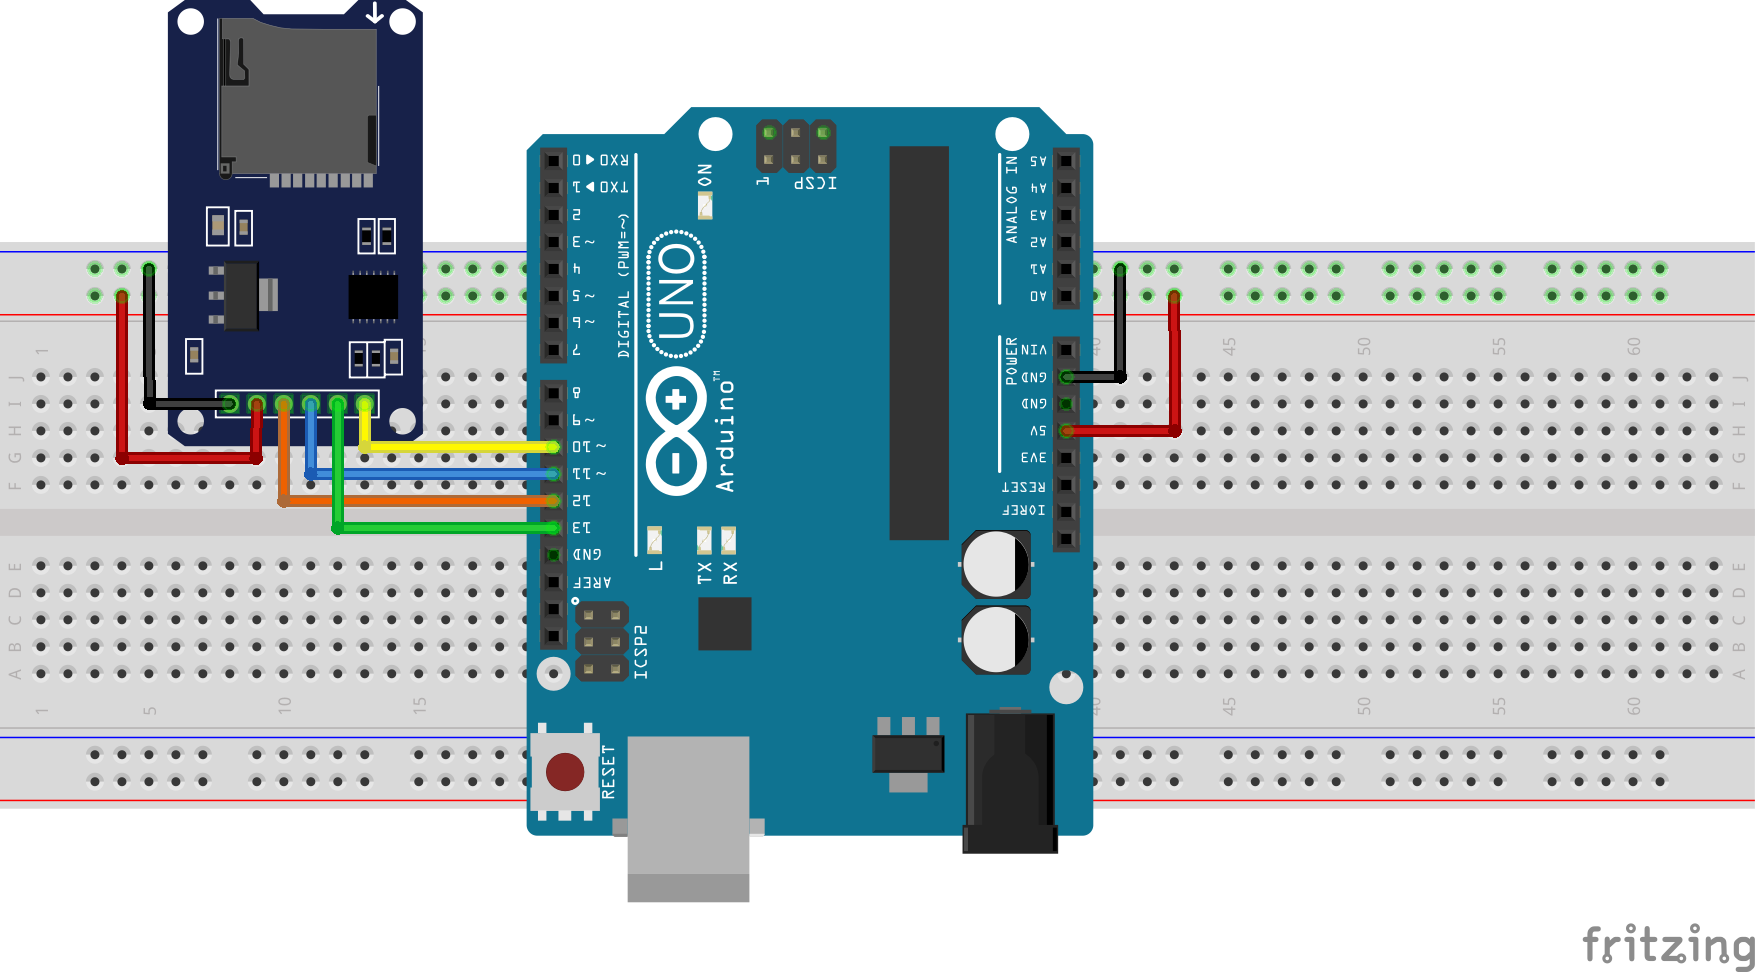
Insert the SD card. Examples Below are a series of examples Read and Write This example shows how to read and write data to and from an SD card. In setup() , create a new file with SD.open() named "test.txt". FILE_WRITE enables read and write access to the file, starting at the end. If a file "test.txt" Pinout Micro SD Card Module includes 6 pins: VCC pin: connect to the Arduino's 5V pin. GND pin: connect this pin to the Arduino's GND. MISO pin: (Master In Slave Out) connect this pin to the Arduino's MOSI pin. MOSI pin: (Master Out Slave In) connect this pin to the Arduino's MISO pin. SCK pin: connect this pin to the Arduino's SCK pin. Hence, Arduino and SD cards are a good combination for data logger projects. The SD cards can store many images which you can use in games, navigation menus, Point Of Sale terminals, and more. You can also store text files and display them in your e-Book reader project. SD Cards are tiny memory cards that provide you a lot of storage space. A Short Test Program After making the necessary connections, it's time to interface the SD card. The short test sketch lists the files present on the card. The code can be found as a zip file at the end of this article as sd_info. As you can see, most of the code handles the console output.
Interfacing Arduino with Micro SD card Module ElectronicsLab
26th January 2014 Just a quick walk through how to use the SD card module with Arduino. It is the same for Micro SD card modules. The Arduino official site provide a library for this purpose, and I will describe how I used this library and explain what each function does. Some of the links on this page are affiliate links. A standard microSD card has an operating voltage of 3.3 V. As a result, we cannot connect it directly to circuits that use 5V logic; in fact, any voltages above 3.6V may permanently damage the microSD card. That is why the module includes an onboard ultra-low dropout voltage regulator capable of regulating voltage to 3.3V. Using an SD card, we will create a data logger for the BMP280 connected to an Arduino. Generally, a data logger is an electronic device used to record data from sensors over time and stores it for further use or analysis. The BMP280 will be connected as I 2 C and the SD Card as SPI. Here's a basic example of Arduino code for reading and writing data to an SD card. In this example, we'll create a simple data logging system that records values to a text file on the SD card. #include
. File dataFile; const int chipSelect = 10; // Define the CS pin. void setup () {. // Open a serial connection. Serial.begin (9600); 
SD Card Arduino SD Card With Arduino YouTube
How to use SD and micro SD card with Arduino Writing data on SD card Reading data from SD card What is SD and Micro SD Card Module? The SD and micro SD card modules allow you to communicate with the memory card and write or read the information on them. The module interfaces in the SPI protocol. The Grand Central M4 has an onboard SD card slot, making it easy to read and write files from a micro SD card. To do this with Arduino, you'll need to plug in your micro SD card, install the Adafruit fork of the SdFat library and run the provided example code. 512MB micro SD Memory Card.
To write and read from the SD card, we include the SPI and SD libraries. 1. 2. #include . #include . We have to initialize the SD card module at the Chip Select (CS) pin 10. 1. SD.begin(10); To open a new file in the SD card, we then create a file object that refers to the data file. Connecting the SD-card module to Arduino. After preliminary preparation of the SD card, we can begin to connect the microSD and Arduino expansion board. The expansion card makes the connection much easier. It has a regulator that converts the voltage of 3.3 - 6 V to 3.3 V (I2C). 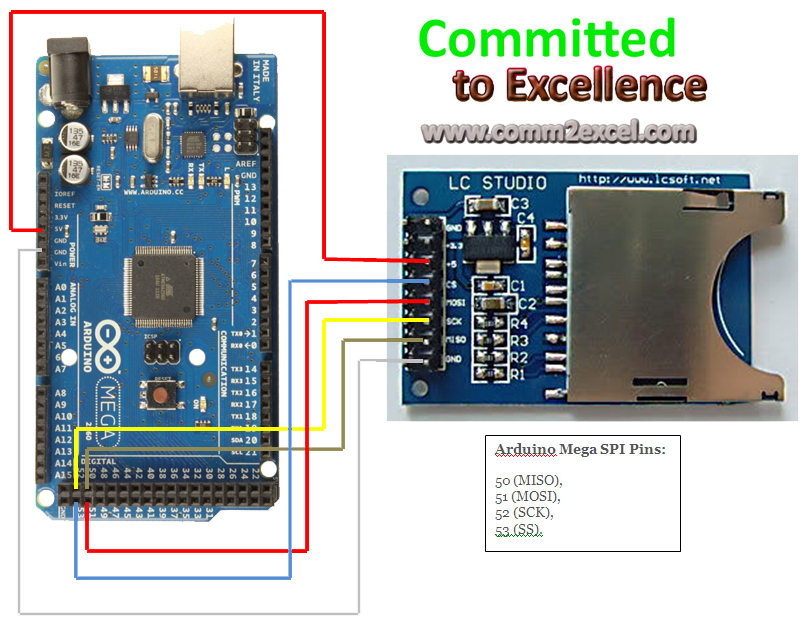
Arduino arduino mega 2560 connect SD
Arduino - Write Variable to SD Card In this tutorial, we are going to learn how to write variable to Micro SD Card with Arduino. In detail, we will learn: Arduino - How to write a string variable to Micro SD Card Arduino - How to write a int variable to Micro SD Card Arduino - How to write a float variable to Micro SD Card Arduino Code for Interfacing Micro SD Card Module with Arduino. The Arduino to read and write data from the SD card module is shown below. The code is very simple and easy to understand. The code checks if there exists a file name "data_log.txt" if the file exists then it proceeds to write the given information onto the SD card and if not.
