A Free Photography Course On How To Shoot & Create Stunning Photos - With Certificate. Empower Yourself And Your Career With Thousands Of Free, Accredited Courses. The best settings for food photography: the basics In this section, I take you through all the core food photography camera settings, starting with: The best camera mode for food photos I'll come right out and say it: The best camera mode for food photography is Manual mode.
:max_bytes(150000):strip_icc()/How-to-Shoot-Cocktail-Evi-Abeler-Photography-IMG_2462-56a30c8b3df78cf7727b9a9d.jpg)
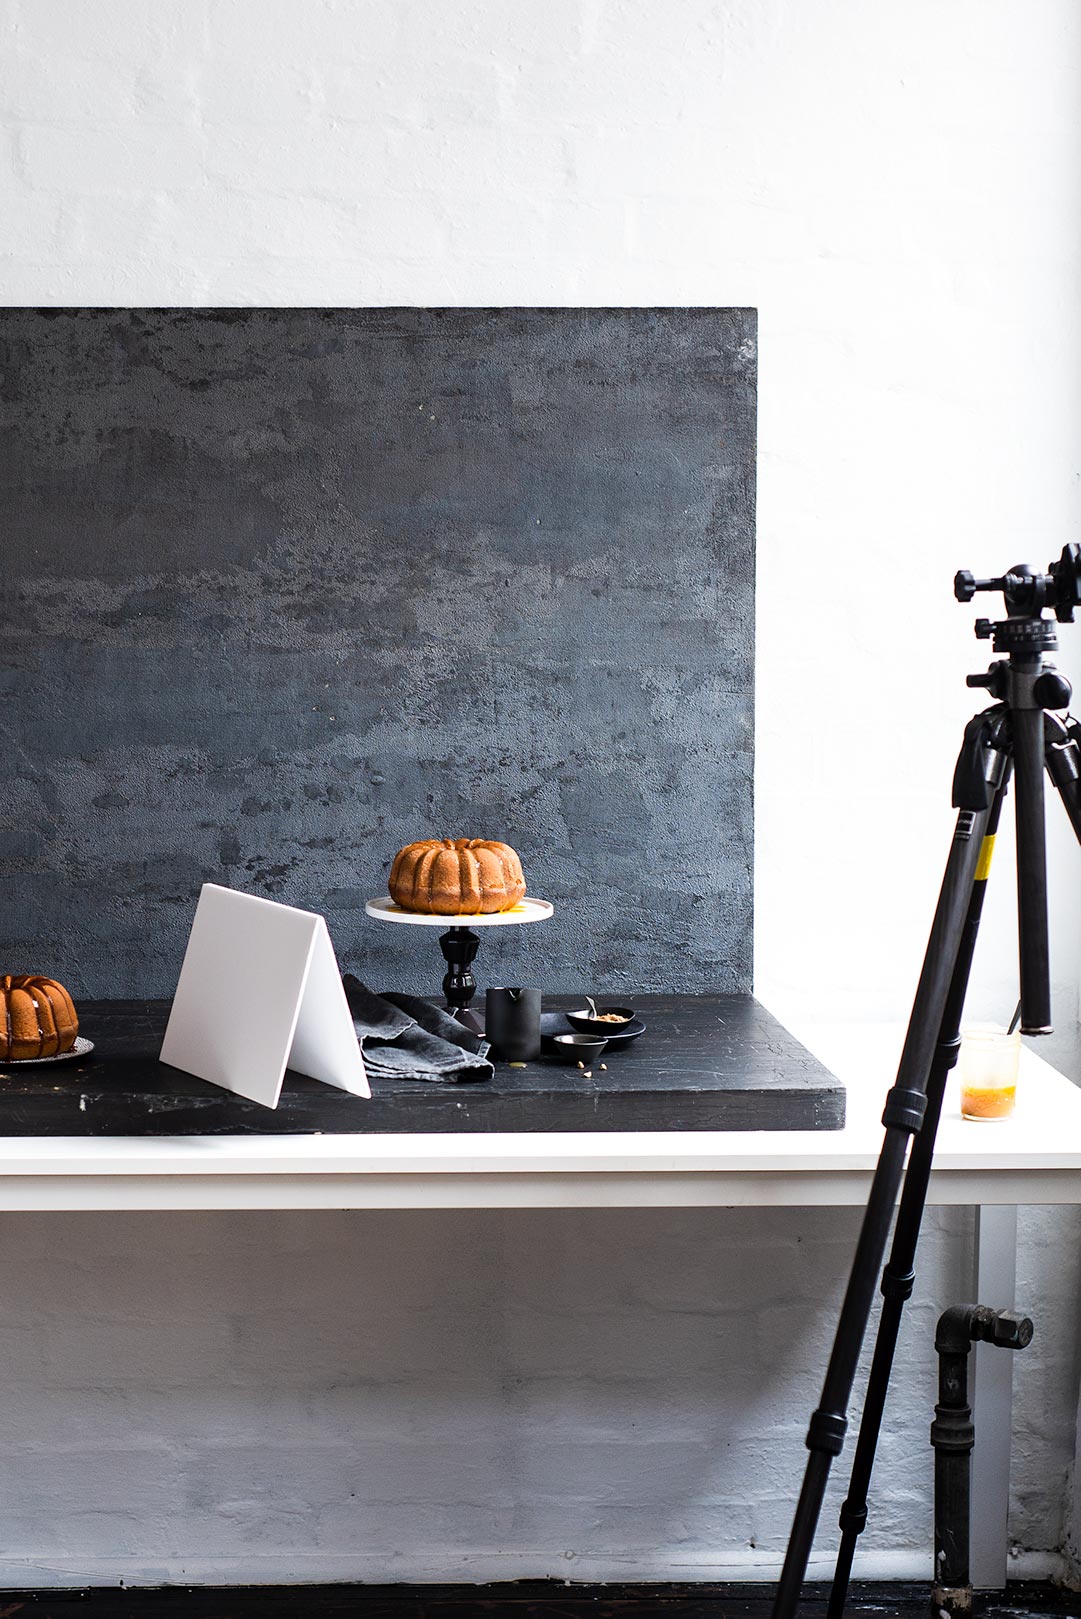
Try This Daylight Setup for Your Food Photography
Watch on Photography A beginner's guide to food photography. Try your hand at food photography with these insightful tips from experienced photographers. Explore Lightroom Not sure which apps are best for you? Take a minute. We'll help you figure it out. Get started Picture this: You're eating out at a beautiful restaurant. The basic setup for food photography to produce the soft light common in our niche is: Sidelight - the light source is next to your scene Diffuser - a placed between the light source and your subject Reflector - is placed opposite the light source to 'reflect' some light back onto your subject and scene. Step 4: Position food photography backdrops to make an 'L' frame. Food photography backdrops are an important part of getting the look. They are also a key part of the food photography set up process. A backdrop can be the base of a photo when shooting overhead, or you will need both a base and a board in the background to create an 'L. Set up for food photography is simple- just place the food on food photography background. However, food photographers usually use a food table or food platter to make the photo look more professional, inviting and natural. Use food photography backgrounds and food props with colour contrast.
How to Shoot Food Photography with Minimal Food Photography Setup
To show, share, persuade, and make your mouth water. This is our complete guide to all things food photography. We will look at the best cameras to use, the lenses that accompany them and the accessories you will need. Styling food will be as easy as pie with all our tips and techniques (and sneaky tricks) to make your food pop. Published August 14, 2023 Ever wondered how you can translate the flavors, textures, and aromas of your favorite meals into stunning photographs? When I first delved into food photography, I felt intimidated and overwhelmed. Food photography is a popular genre of photography, and for good reason - it's a great way to show off your culinary skills! But it can be tricky to get the food photography lighting just right. In this article, we'll give you some tips on how to create beautiful food photos with natural light. Diffused Lighting, Versatility . When it comes to food photography, the natural light look is highly sought after. However, it's difficult to create consistency with natural light because the sun is always moving. Most pro food photographers use artificial light to really take control of their lighting. Using artificial lighting doesn't have to be complicated, though.

Image result for artificial daylight setup Food photography tips, Photography lighting setup
You can only work with the camera you've got, but it's really going to come down to the camera settings to maximise the effect on your food photography. So, let's keep it simple: Shoot at your widest possible aperture (F/5.6 or wider). Use a small spot focus method and focus on your main subject. 7. Bring In Your Food And Start Shooting! Right before you bring in your food, take a shot and check your lights to make sure you got your exposure worked out. If you are using natural light, take a shot and adjust your exposure as it probably changed. Ok, now you are ready to shoot.
What goes into a Food Photography Studio Setup? You will need: Shooting Bay: an area large enough to shoot what you need, could be big enough for a tabletop or whole room set! Lighting: can be studio lights or a window for natural light (see what I recommend here) Photography props are also a helpful and important addition when it comes to food photography. Keeping some pretty dinnerware and ceramics on hand as well as fancy cutting boards and napkins can help you set up and style your shots and produce beautiful results. 4. Styling and Staging for Professional Food Photography.
The Basic Light Setup For Food Photography Two Loves Studio
Straight-On Food Photos. Finally, there are straight-on images. These work well for steam or process shots. While no more difficult to set up than a 45-degree photo, capturing the process bit is. Understanding your camera. The best starting lens to use for shooting your food is a 50mm f/1.8. This is the perfect go-to lens for us foodies and being reasonably priced; you'll definitely get your money's worth from it. At a later stage adding an 85mm f/1.8 and a macro lens to your kit also make for a great variation.
