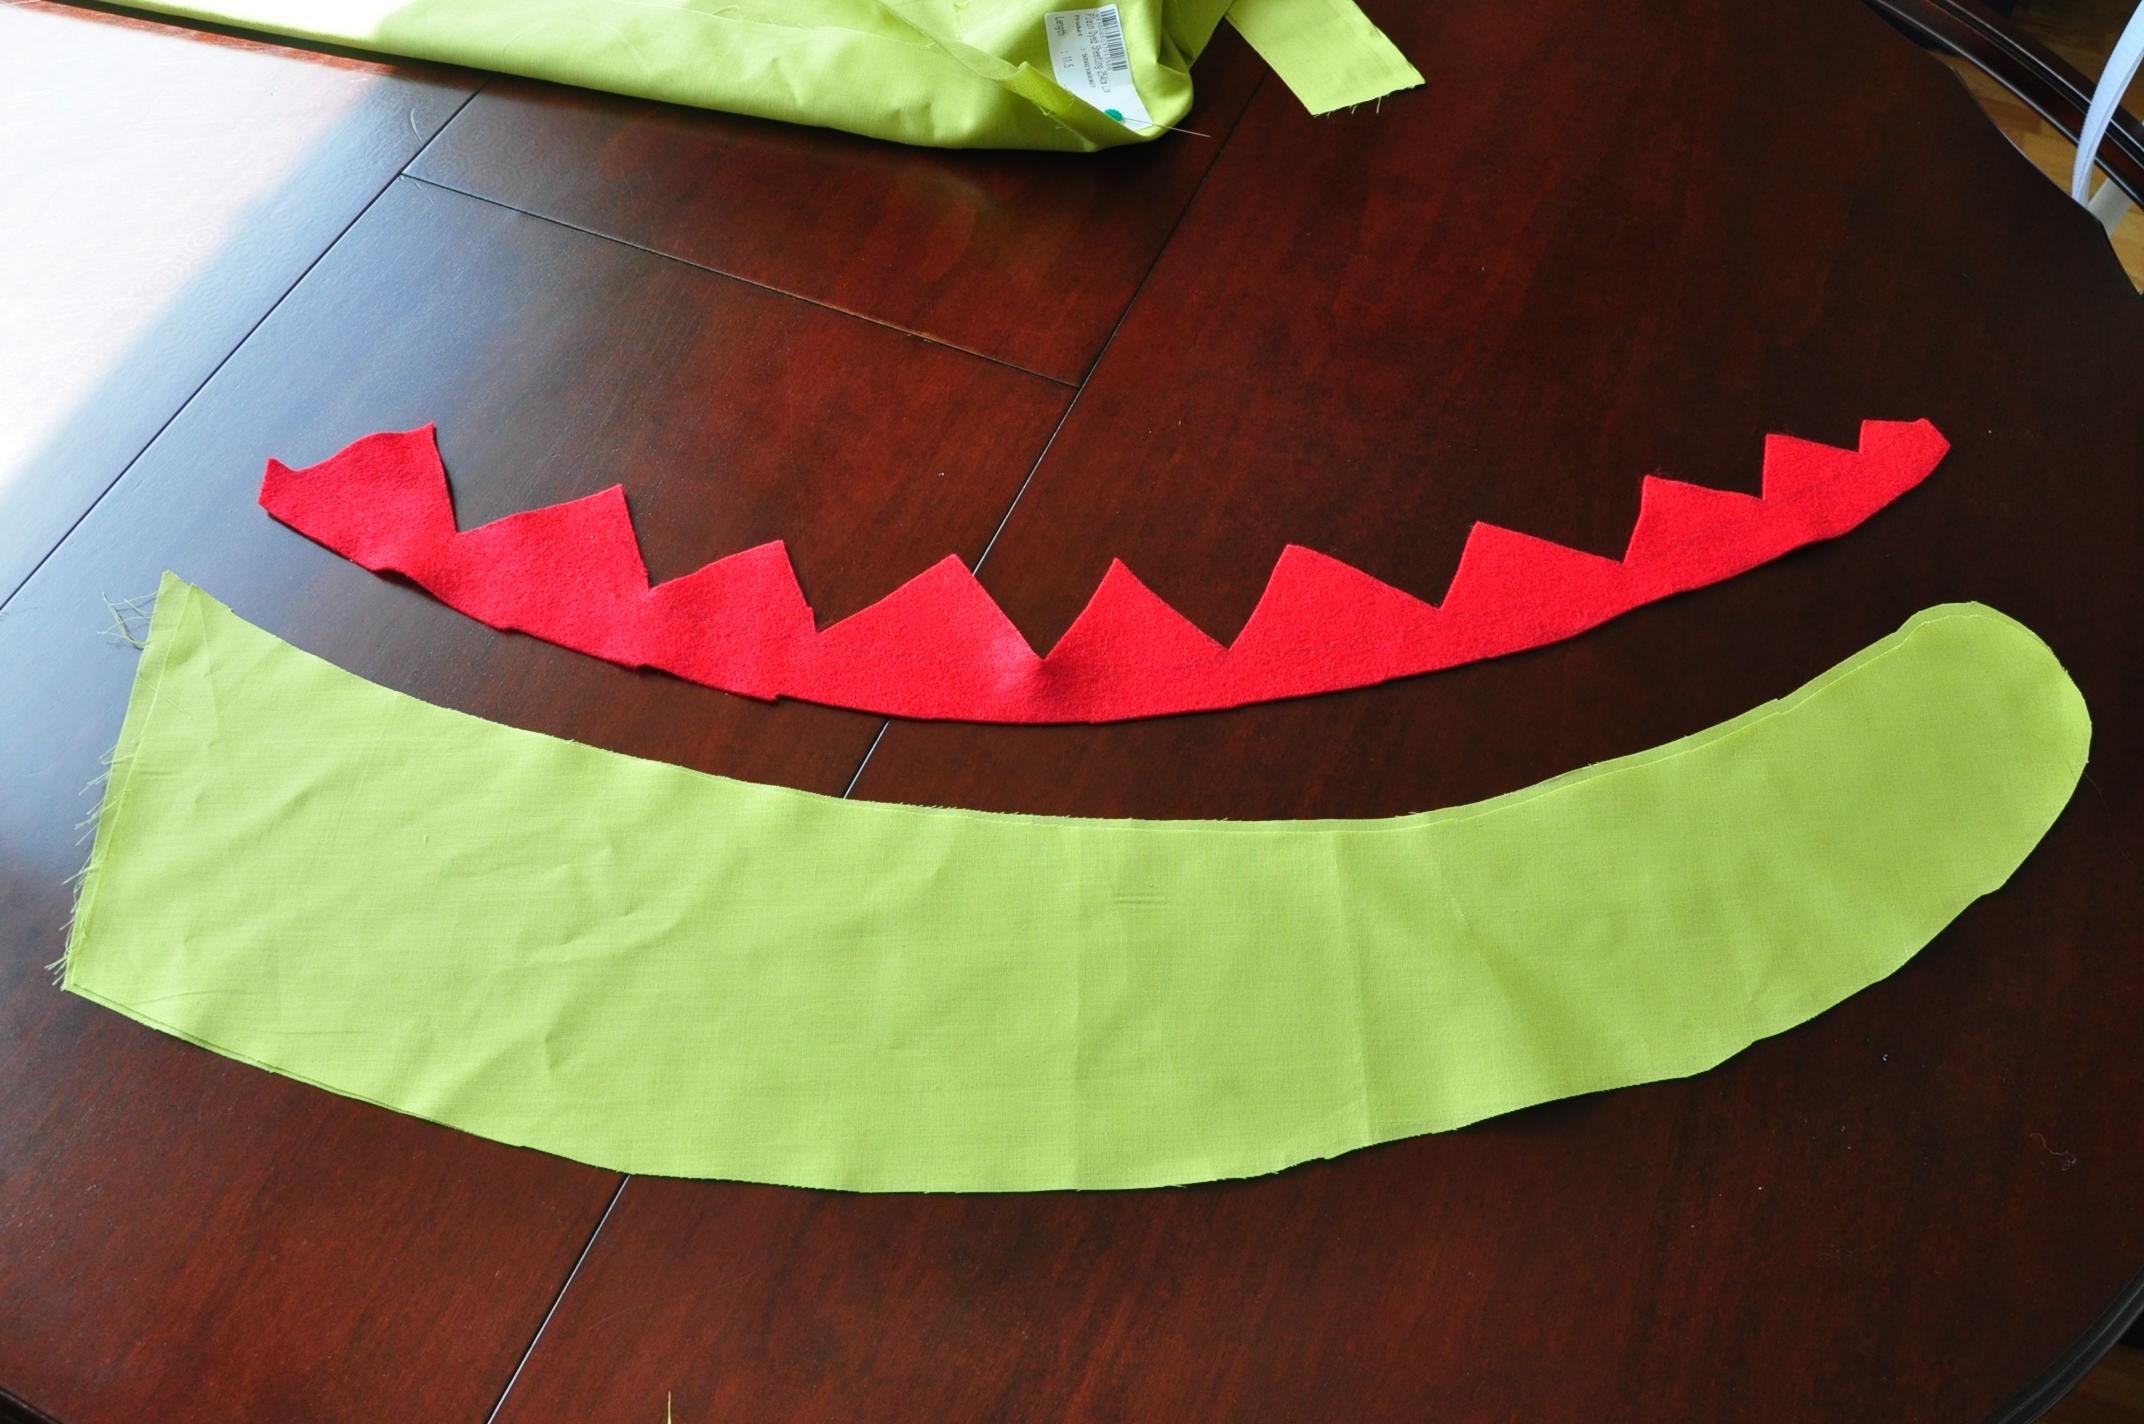
Looking for a full dinosaur costume? This Baby Dino Costume tutorial is adorable. Instructions Full step-by-step instructions and photos will help you make this easy DIY dinosaur tail (or, if you prefer, a DIY dragon tail). 1 Cut a series of triangles into a long strip of fabric. Snip out a line of connected triangles from the strip. The total length of the strip should be 24 inches (61 cm) by 2 inches (5.1 cm). When you're done, the felt should look like a miniature mountain range. Set this aside for later. [1]

DIY Dino Tail Tutorial Andrea's Notebook
First, roll up the fabric into a tube shape and stitch it together. Then, stuff the tail with fluff and sew the end closed. Finally, cut out triangles from felt and sew them to the top of the. Cut a series of triangles into a long strip of fabric. Snip out a line of connected triangles from the strip. The total length of the strip should be 24 inch. 1 row of spikes 1 belt 2. Line up the spikes to be in the middle of the tail, which will make it about 1 inch away from either end of the tail. 3. With right side up, lay one piece of the tail down, then lay the spikes with raw edge lined up with raw edge of tail. Then, lay second tail piece down with right side down to match. Make a no-sew dinosaur tail that doubles as a decoration AND a party favour Kidspot 99.7K subscribers Subscribe 16 Share 2.3K views 1 year ago Who else wants to throw a roar-some celebration.

How to Make a Dinosaur Tail Creating a NoSew Dinosaur Tail YouTube
hi everyone, welcome back to my channel. In this video I'll be showing you how to make dinosaur tail. Please do watch my previous videos, click the subscribe. First, use a craft knife to carefully cut one end of the pool noodle at an angle, creating the tapered shape of a dinosaur's tail. Then, wrap duct tape around the entire length of the noodle to add color and texture. You can even create spikes by folding triangles of duct tape over itself and sticking them onto the pool noodle. April 4, 2022Scott Kraus Finding Make a Dinosaur Tail Instructions It's make a dino Monday and today I've been checking out Tater Tots and Jello! I ran across the idea of making dinosaur tails through Pinterest and that sent me on a mission to finding easy to understand "make a dinosaur tail" instructions. 3. Cut off the tip of your tail making sure not to cut the stitching. 4. Measure some elastic around your waist and cut about 5 cm smaller than you! Take your elastic and pin to either side of the bottom circle facing inwards. Sew. 5. Use the reference method to pin the circle into the tail. 6. Carefully sew around it! 7. clip the curves of the.

How To Sew A Dino Tail Tutorial FREE sewing pattern for a dinosaur tail for kids Halloween
0:00 / 1:16 CBeebies: Make a Dinosaur Tail with CBeebies Presenters Andy and Alex CBeebies 2.68M subscribers Subscribe 22K views 9 years ago Watch this video to find out how to make a dinosaur. I saw a while back on the blog Running With Scissors, the dino-tail that Jessica made. I finally decided it was time to make one for both my boys. And you better believe it, my 4 year old was right next to me the whole time and made every decision for fabric and colors.
INSTRUCTIONS: 1. Trim tail strips Taking your two strips 22" x 11", lay them face down. On one end you'll measure 4.5" from each side. The two inches left in the middle will be the tip of the tail. On the other end, you'll measure 4" along the sides as a marker. Connect these two markings to create a diagonal for the cone shape of the tail. My 3 year old Grandson Weston would flip out if I made him this "DINO TAIL" because he is obsessed with dinosaurs. Jessica of "running with scissors" has a complete tutorial for you to follow on how to make these DIY easy Dinosaur Tails. She said you can call them dinosaur or dragon tails which makes them very versatile.
dinosaur tail tutorial Quiltylicious
Fancy dress, not your forte? Do not fear, the dinosaur tail is here! Snip and glue Craft Planet Felt Sheets into a magnificent masterpiece. Quick Method. 1. cut a large triangle from the Washi Paper. 2. cut a range of circles from the coloured tissue papers. 3. stitch or glue these to the large triangle. 4. sew the ribbon to the base of the triangle leaving enough ribbon to tie a around your little ones waist. TIP easiest way to stitch the circles is to use a large zigzag stitch.
