Navigation refers to the interactions that let users navigate across, into, and back out from the different pieces of content within your app. Android Jetpack's Navigation component includes the Navigation library, Safe Args Gradle plug-in , and tooling to help you implement app navigation. Learn how to implement common navigation requirements for Android apps. Navigation Components handle fragment transactions, up/back stack, navigation UI patterns like navigation drawers, deep links and more. You'll also explore the type safe args plugin and the Navigation Editor in Android Studio.
How To Create Navigation Drawer And Customize It In Android Studio Vrogue
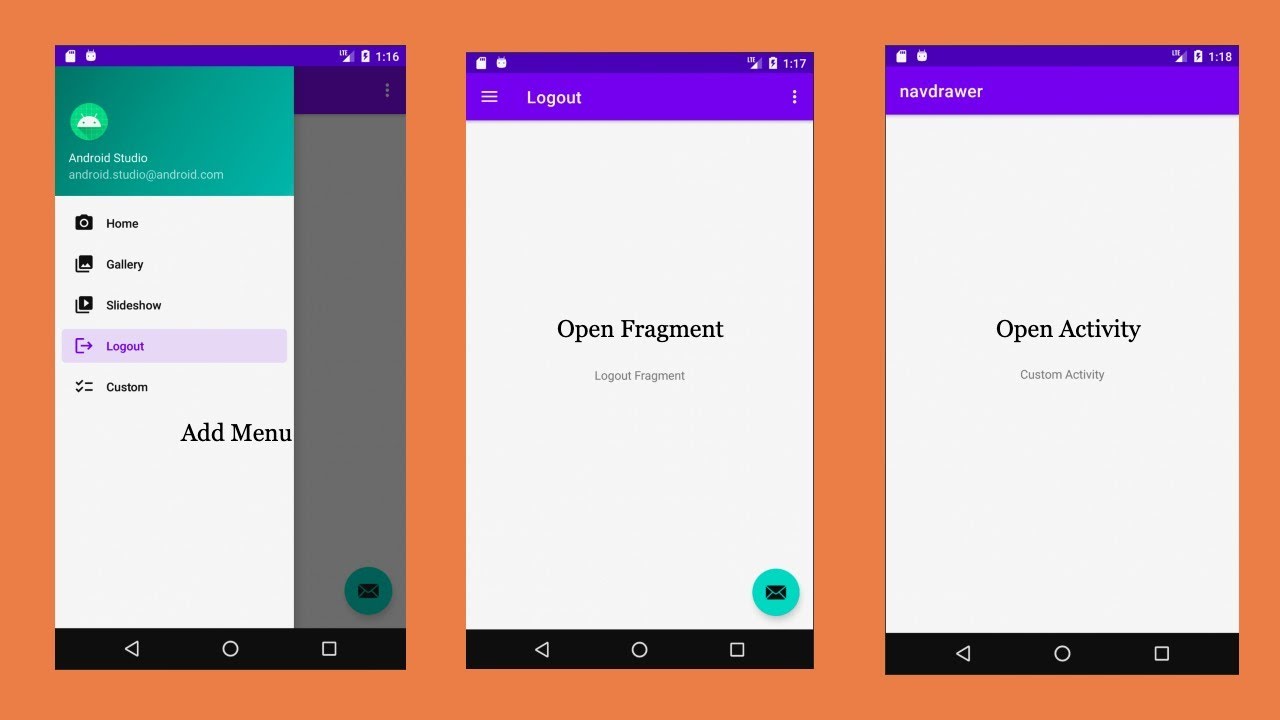
Android Jetpack is a set of components, tools, libraries and guidance to help developers to create a brilliant quality-oriented application. In this blog we are going to discuss the latest. The Navigation Architecture Component Tutorial: Getting Started Oct 3 2018, Kotlin 1.2, Android 5.0, Android Studio 3 In this tutorial, you'll learn how to use the Navigation Architecture Component, which simplifies the implementation of navigation in Android apps. By Ivan Kušt . 4.7 (31) · 1 Review Download materials Save for later In this tutorial we'll implement a Navigation Drawer in our android application. Android navigation drawer is a sliding menu and it's an important UI component. You will see navigation drawer in most of the android applications, it's like navigation menu bars in the websites. Android Navigation Drawer
The NavigationView essentially consists of two major components: HeaderView : This View is typically displayed at the top of the Navigation Drawer. It essentially holds the profile picture, name email address and a background cover pic.

Android Tutorial 9 The Navigation Drawer YouTube
Navigate Regardless of which UI framework you use, there is a single function you can use to navigate to a destination: NavController.navigate (). There are many overloads available for navigate (). The overload you should choose corresponds to your exact context. 🏆 My Online Courses ⭐Discount Coupon: LAUNCH-STEVDZA-SANhttps://stevdza-san.com🐱👤 Wanna become a member? Join!https://www.youtube.com/channel/UCYLAirIEMM. All Aboard. To begin using the Navigation Component, we need to create a navigation graph. This graph will act as our map, outlining the user flow in our application. To create one, right click on the res folder and create a new resource file. We will name ours: user_flow_graph.xml. Fire up Android Studio and create a new project (you can name it NavigationDrawer) with an empty activity called MainActivity. Make sure to also choose the Kotlin language. Add Project Dependencies Support for navigation requires some dependencies. Open the app build.gradle file and add the following dependencies.

Android NavigationView Tutorial With Example Tutorialwing
Android Navigation drawer official document says, Navigation drawers provide access to destinations and app functionality, such as switching accounts. They can either be permanently on-screen or. To implement Up navigation, the first step is to declare which activity is the appropriate parent for each activity. You can do it by specifying parentActivityName attribute in an activity. Its syntax is given below − android:parentActivityName = "com.example.test.MainActivity"
The Navigation Component is made up of three major parts: Navigation Graph (New XML resource) — This is a resource that collects all navigation-related data in one place. This includes all of the locations in your app, referred to as destinations, as well as the possible paths a user could take through your app. NavigationUI contains methods that automatically update content in your top app bar as users navigate through your app. For example, NavigationUI uses the destination labels from your navigation graph to keep the title of the top app bar up-to-date.
. 
Android Navigation Component Tutorial For Beginners (Navigation Graph) YouTube
Locate this file in the Project tool window ( Gradle Scripts -> build.gradle.kts (Module :app) ), double-click on it to load it into the code editor, and modify the dependencies section to add the navigation libraries. Also, take this opportunity to enable view binding for this module: Android Studio 3.2 is finally on the stable channel and that means we can try Android Jetpack without too much headache. The first thing I want to try is the Navigation Architecture Component (NAC)…
