Das weltweit größte Software- und App-Erkennungsziel. Ihre vertrauenswürdige Website! Die besten Downloads für jedes Gerät. Neue Apps. Kostenfreier Download Riesenauswahl an Markenqualität. Folge Deiner Leidenschaft bei eBay! Kostenloser Versand verfügbar. Kauf auf eBay. eBay-Garantie!
How to Use Locked Folder in Google Photos Guiding Tech
On your computer, open photos.google.com. On the left, click Locked Folder. Tap Set up Locked Folder . Your Locked Folder password is the same as your Google Account password. You. When you turn on backup for Locked Folder, you'll be able to access that content across your devices when you sign in to Google Photos and open Locked Folder with your device's passcode. And, as always, all the content you backup in Google Photos is protected by one of the world's most advanced security infrastructures. 1. Launch Google Photos on your phone. 2. Select the Library tab at the bottom of the page. 3. Tap the Utilities button. (Image credit: Android Central) 4. Find and select Set up Locked. This help content & information General Help Center experience. Search. Clear search
How to enable and use Locked Folder in Google Photos Android Central
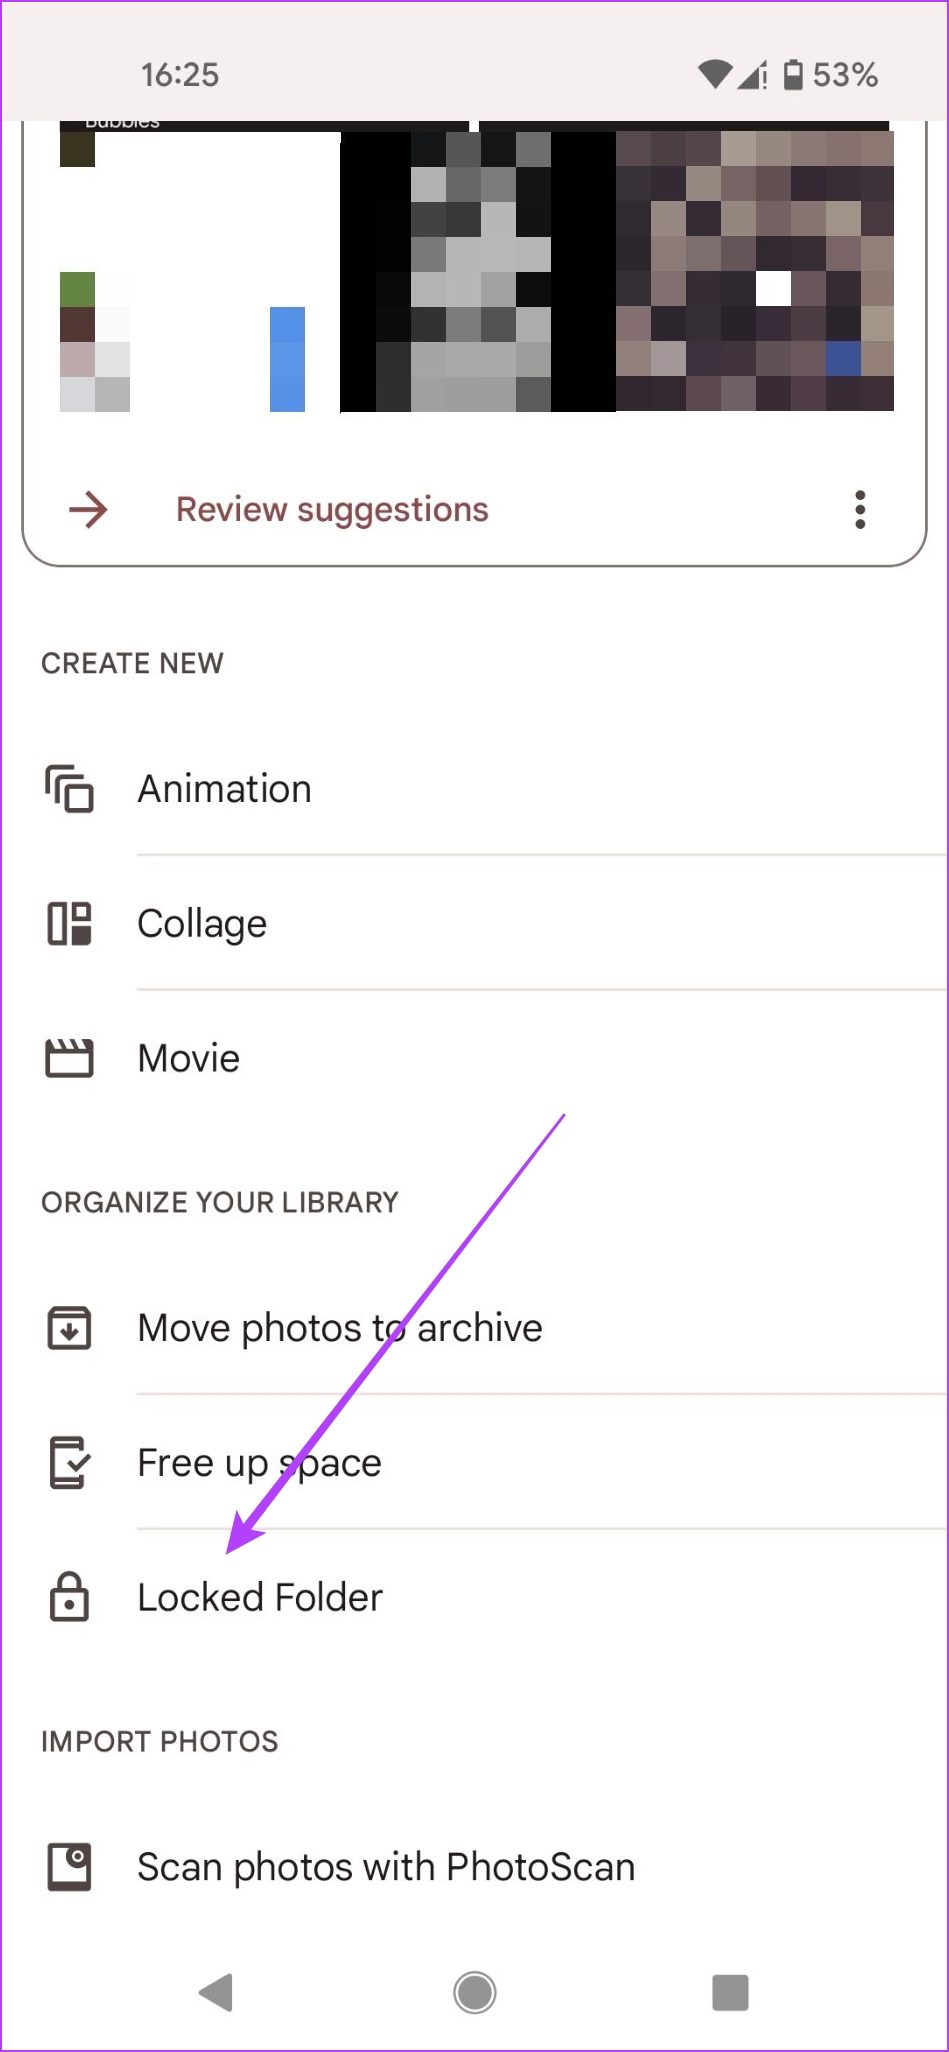
The Locked Folder idea is pretty simple: it's a passcode-protected place where you can save photos separately, so they don't show up in your Google Photos feed (or any other apps on your. You can set up and access the Locked Folder by going to Google Photos > Library > Utilities > Locked Folder . Pixel 3 and newer models can easily capture and send pictures to the Locked Folder directly from the Camera app. 1. Open Google Photos Open Google Photos on your Android device. From the main window, tap Utilities. The Google Photos main window on Android 12. Jack Wallen/ZDNET 2. Set up your. First, you need to know where the Locked Folder is located. Here's how to get to the Locked Folder: Head into Google Photos on your Android device. Towards the bottom tap the Library.

How to Use Google Photos Locked Folder TechWiser
Open the latest version of the Google Photos app. Go to Library > Utilities > Locked Folder. Tap Set up Locked Folder. Follow the on-screen prompts. You'll be asked to unlock your. Apps Apps Guides How to back up Google Photos Locked Folders to access from any device By Max Freeman-Mills Updated Nov 22, 2023 If you want to access your private folders from.
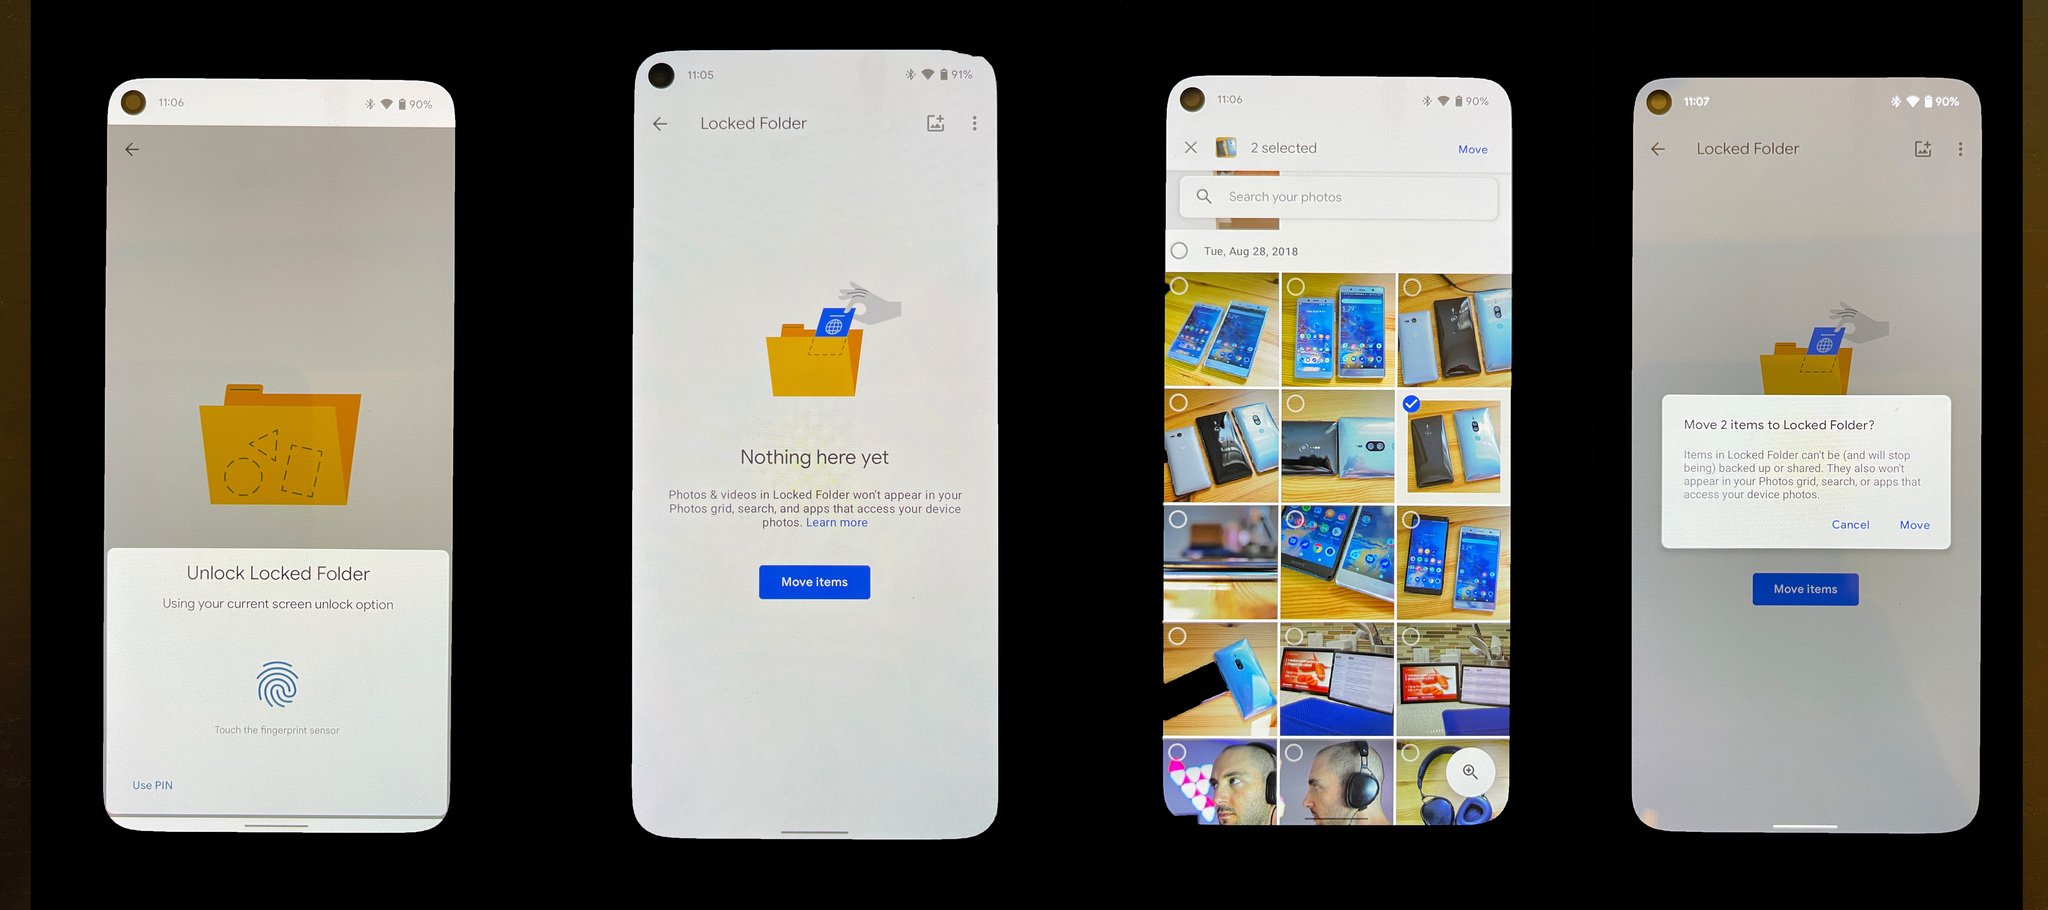
Select all the photos you want to move to the Locked Folder and tap "Move" in the top-right corner. You can also add a photo to the Locked Folder while viewing it. Tap the three-dot menu icon in the top-right corner. Then, select "Move to Locked Folder." Save Directly to the Locked Folder from the Camera Go into Utitiles Press on Set up Locked Folder, if you haven't done it before you may see a prompt, like is shown in the picture above Simply fill it with any photos or screenshots, and keep.

How to Create a Locked Folder in Google Photos on Android?
1. The folder owner needs to open Google Photos and navigate to the locked folder. 2. Once in the locked folder, they can select the specific photos or videos they want to share. 3. Next, the owner needs to click on the share icon, usually represented by an upward arrow or the word "Share". 4. Open the Google Photos app on your phone or tablet. Tap on your profile picture in the top right corner. Select "Google Photos settings" from the dropdown menu. Scroll down to "Privacy & Sharing" and tap on "Locked Folder". If the feature is not yet enabled, you will be prompted to set up the Locked Folder.
