Step 1: Color Correction. When you're new to editing, Premiere Pro color grading tools are a great place to start. Making sure that all of your shots have a matching and consistent look is an important first step. Any color grading that you do after will need to be applied across every shot, so cleaning everything up first will save you time. Colour grading in cinema (and TV) can be controversial especially as cinemas and TV look to formats such as HDR. An example of where a colour grade was potentially pushed too far was the Game of Thrones episode The Long Night. Here a beautifully graded episode in the colour suite was rendered muddy and blocky by people watching the episode on.
Color Grading vs. Color Correction Process What Is The Difference
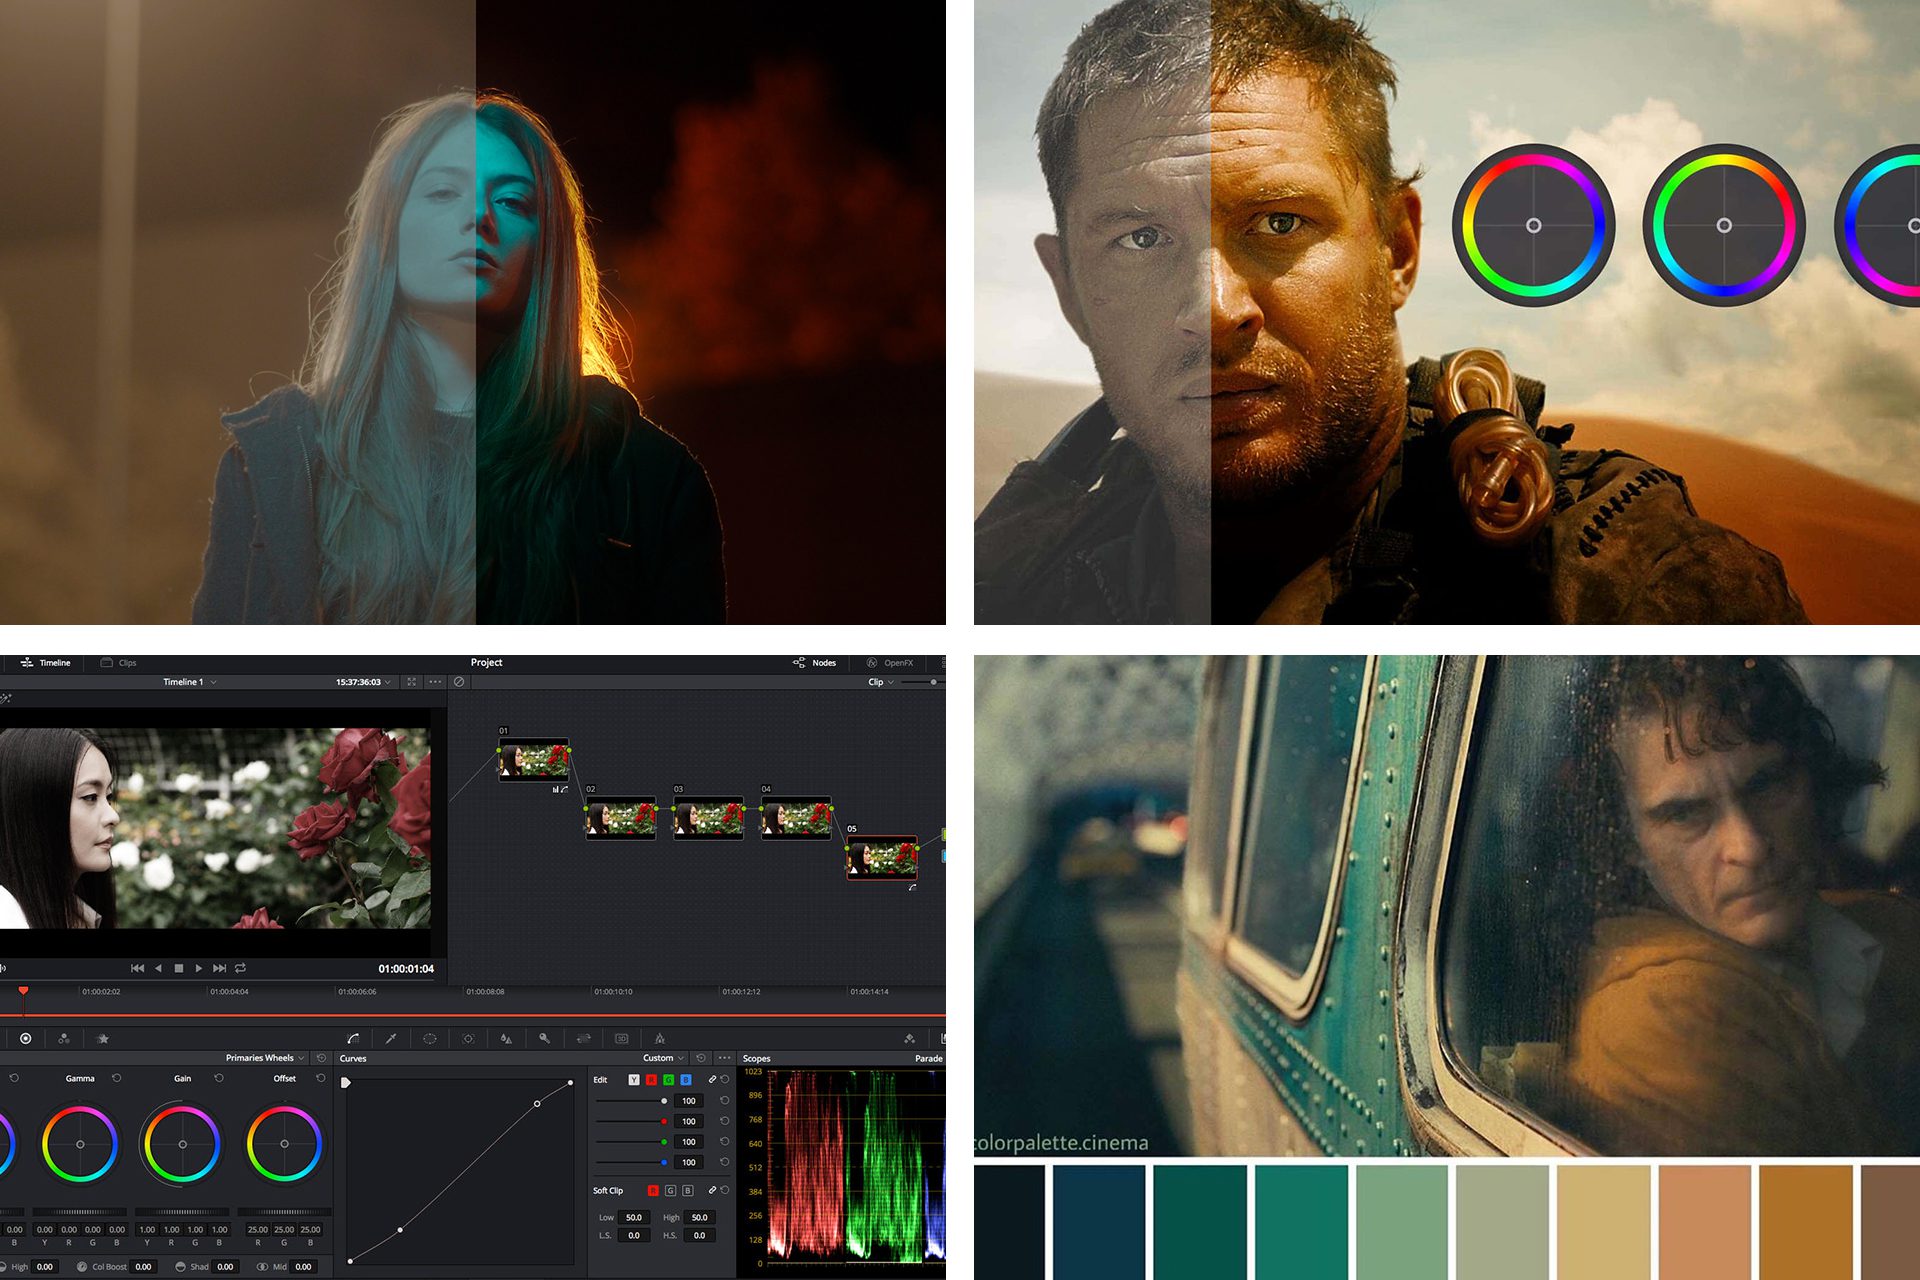
A photograph color graded into orange and teal, complementary colors commonly used in Hollywood films. Color grading is a post-production process common to filmmaking and video editing of altering the appearance of an image for presentation in different environments on different devices. Various attributes of an image such as contrast, color, saturation, detail, black level, and white balance. Example of associative colors in The Empire Strikes Back (1980) movie. These colors combined to convey an emotional state from the character. Black and red are violent and menacing where blue and white are cool and comforting. When a recurring film palette or color represents a character or larger theme in the film. Alex Jordan, the founder of Learn Color Grading, is here to show everyone seven essential styles he thinks all filmmakers should learn. Considering the extreme wealth of knowledge Jordan shares on his channel, this is well worth a watch. 1. Low Key Blue. Number one is the quite easy low key blue. While color grading is the process described above - enhancing and altering the color of footage to achieve a desired visual effect - color correction is different.. Take the series Better Call Saul as a fantastic example. The color grade for this series works so well because of its lack of color. The black and white flashforwards work.
Color Grading vs. Color Correction Process for Video
Color grading is an essential step in video and photography post-production. Learn the difference between correction & grading, and how to do it properly.. For example, many people refer to this process as color correction. However, there is a difference between color correction and color grading - I'll talk about that later in the article. Color grading has boomed in the last few years, so Film Riot has gone back to basics to give filmmakers a necessary (re)introduction. CREDIT: Film Riot. Jourdan Aldredge. May 17, 2022. Since the earliest days of cinema history, color grading has been an integral part of the filmmaking process…. 3.3 VIDEO and film color grading Color Grade Examples. Here are some great examples of professional color grades. In the first example, from Black Hawk Down, the blue is much more saturated and the brightness is definitely turned down, with the highlights lowered as well. This is a great look for sci-fi footage, or even a nice David Fincher. Hopefully, in this article, you'll find some insight and inspiration into how to find and execute correct color grading. 1. Camera negative: RAW and LOG formats. As technology has come on leaps and bounds in video recording and post-processing, we can get a great deal of information or latitude stored on the camera's memory card.

Why color grading matters in video
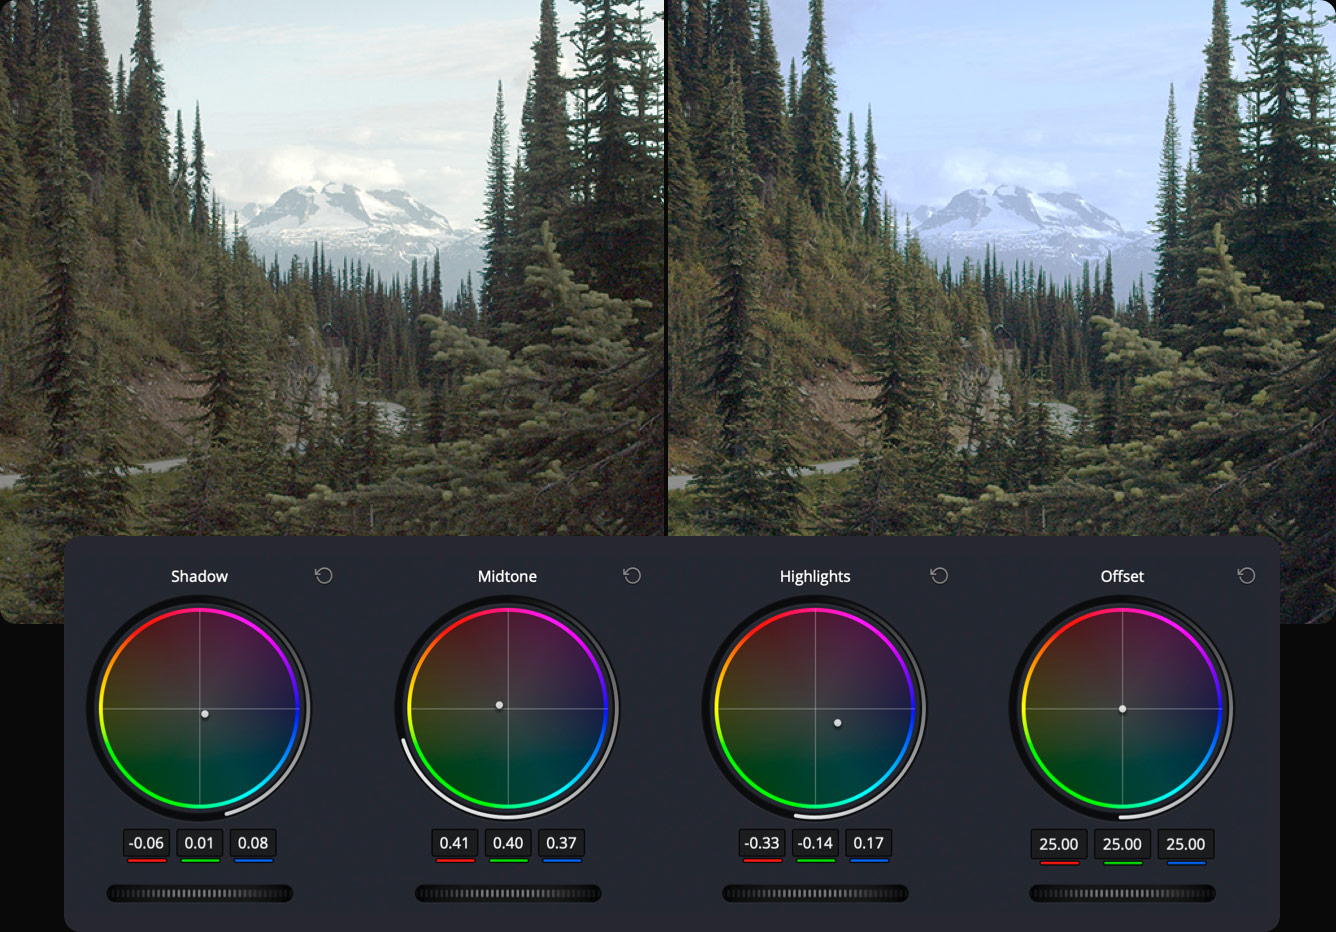
Color Wheels are an industry standard control, including in Adobe Premiere's Lumetri Color panel. The Color Grading interface, showing the 3-Way view (left) and the Midtones detail view (right). Across the top of the panel, you will see a row of icons to set the view. On desktop applications, the first view is 3-Way, which shows the Shadows. Color Grading Example. In this particular example, I've added some yellow (warmth) to the highlights, and some blue (cool) to the shadows. This helps make the sunlight hitting my image very warm and inviting, and gives the shadows a colder, blue look. Using the color wheels is actually quite simple. Simply click and drag anywhere inside the.
Cinematic Lut COLOR GRADING examples Make your shots more cinematic. Film LUTs can help your footage mimic 35mm film so you don't spend your entire day adjusting sliders and color wheels. First, it's important to determine the look of your footage. Log exposure works better with Log specific film LUTs, while there are some film LUTs designed. Color grading examples of that cinematic look. Famous films are often color graded to palettes that set the mood or fit the style and theme. David Fincher's films feature a color palette that brings out the dreary realism of modern-day urban settings in gray, dark blue, and brown. We see the dull tones reflect the monotonous life through the.
DaVinci Resolve 17 Color Blackmagic Design
Step 3: Color Grade the Video. You can hit "Filter" to select and apply a video filter to the video footage and go back to "Adjust" and make detailed color grading adjustments like Hue, Saturation, Brightness, etc. Color grade a video using both video filter and adjustment tool. Scroll down to the Colour Grading Panel on the right. The icons at the top of the panel let you display different colour wheel views. You can view Shadows, Midtones or Highlight colours, or all three at once. There's also a global wheel that lets you add a universal colour tint. Step 2 - Colour grading wheels.
