Simple Paper Bag Vest Rachel Campbell-Maher 123 subscribers Subscribe Subscribed 348 Share 98K views 5 years ago Quick and easy paper bag vest tutorial for the kindergarten (or preschool!). What do you need for the basic vest? Yep. Just a paper bag and scissors! The Trader Joe's bags are a little smaller than most grocery store bags and fit my 3yo and 5yo just perfect. Pick your bag accordingly! Now let's get to work… Cut straight up the middle of one broad side of the bag.

Paper Bag Safari Vest Safari vest, Safari crafts, Safari
Introduction 3/28/20 Craft Project Video #1- Paper Bag Vest ArtzHub NC 690 subscribers Subscribe Subscribed 1K 133K views 3 years ago Did you know that a regular brown paper grocery bag. Cut out the holes you drew through both sides of the bag. Cut a straight line up the front of the bag from the bottom to the neck hole. Flip the bag over and tape down the fold that is the bottom of the bag if it were opened with a line of masking tape. Carefully turn the bag inside out so that the tape is inside. Anyone can make a safari vest from a paper bag, as Andrea so skillfully demonstrates. Step 1 Cover the table with the plastic tablecloth to protect it from glue and paint. Lay out all the decorating supplies. Video of the Day Step 2 Cut the bag down the front for the opening of the vest. Step 3 Cut a circle in the bottom about twice the circumference of the child's neck. Step 4

Retro Paper Bag Vest
Step 1: Lay the bag flat and cut out the neckline from the bottom of the bag. Step 2: Cut up the front of the bag to create the vest. Step 3: Cut the arm holes and trim the vest opening. Step 4: Turn the vest inside out so any print is facing in. Step 5: Use your marker to decorate the vest. DIY Binoculars for Dramatic Play Camping Theme Scissors Instructions Cut sides out of paper bag and then cut a hole large enough for the child's head to fit through. Using the photo as a reference, cut fringe on the bottom of the vest. Decorate your vest with markers. Research Native American tribes and symbols. Click here for a printable pattern for a Native American Headdress. The first step is to cut your vest from the paper bag. This might look a bit complicated, but I promise it's not. I usually do not draw lines when I'm cutting the vest, but I did here for visualization. You want to cut arm holes on each side of the bag, about 3-4 inches in. Then cut a neck hole at the top, about 4-5 inches. 1 Cut down the center. Cut down the center of the paper bag from the open end to the bottom of the bag. 2 Cut a hole. Cut out a large circle in the bottom of the bag for your head to fit through. 3 Cut two more holes. Cut an arm hole on either side of the bag. You may want to ask an adult for some help! 4 Cut fringe.

1 Sew Green Mama Little Indian Vests from Paper Bags
Step One: To begin the process of how to make a vest out of a paper bag, you will need the paper bag itself. Paper bags are usually available at your home after you do grocery shopping. But if you do not have one, you can always buy one from nearby local stores. by Johan Jokich | Aug 29, 2023 | Bag Making Are you ready to create a fashion statement that's as unique as it is eco-friendly? Consider wearing a stylish Indian vest made entirely of brown paper bags. Your curiosity will lead you on a crafting journey that combines sustainability and creativity into a single piece of wearable art.
Paper Bag Vest. Materials. Large brown paper bag Scissors Paint ; Directions. Make a vest from a brown paper bag by cutting a head hole, arm holes, and a fringe along the bottom. Your child can paint and decorate the vest. When the vest is dry, your child can wear it. A tutorial on how to make a paper vest using a brown paper bag. Lunch bag bag size = Vest for a stuffie or doll.
Realistic Idealist Blue and Gold 2012
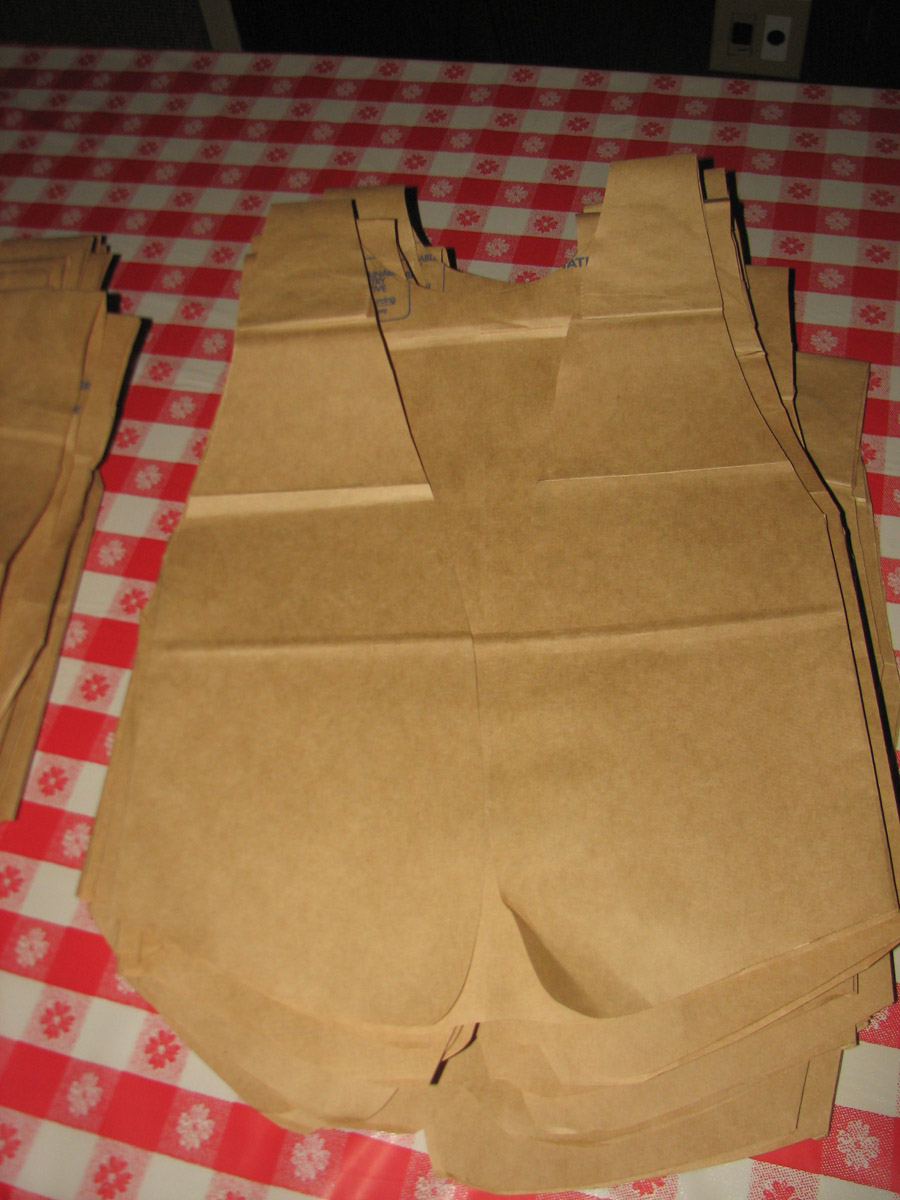
Instructions Lay the paper bag on your work surface with the flap to the back. Line up the pattern with the top of the bag. Staple on the outside of the cutting lines to keep in place. Cutting through all the layers. Cut off the arm holes and back opening. Lay the pattern back in place and cut the front opening only through the front of the bag. Glue Stick Printable Patterns Instructions Lay the paper bag on your work surface with the flap to the back. Line up the patterns with the top of the bag. Staple on the outside of the cutting lines to keep in place. Cutting through all the layers. Cut off the arm holes and back opening.
