Over 70% New & Buy It Now; This is the new ebay. Find Pattern" now! ¡Precios increíbles y alta calidad aquí en Temu. Envío gratuito en todos los pedidos. ¡Solo hoy, disfruta de todas las categorías hasta un 90% de descuento en tu compra.
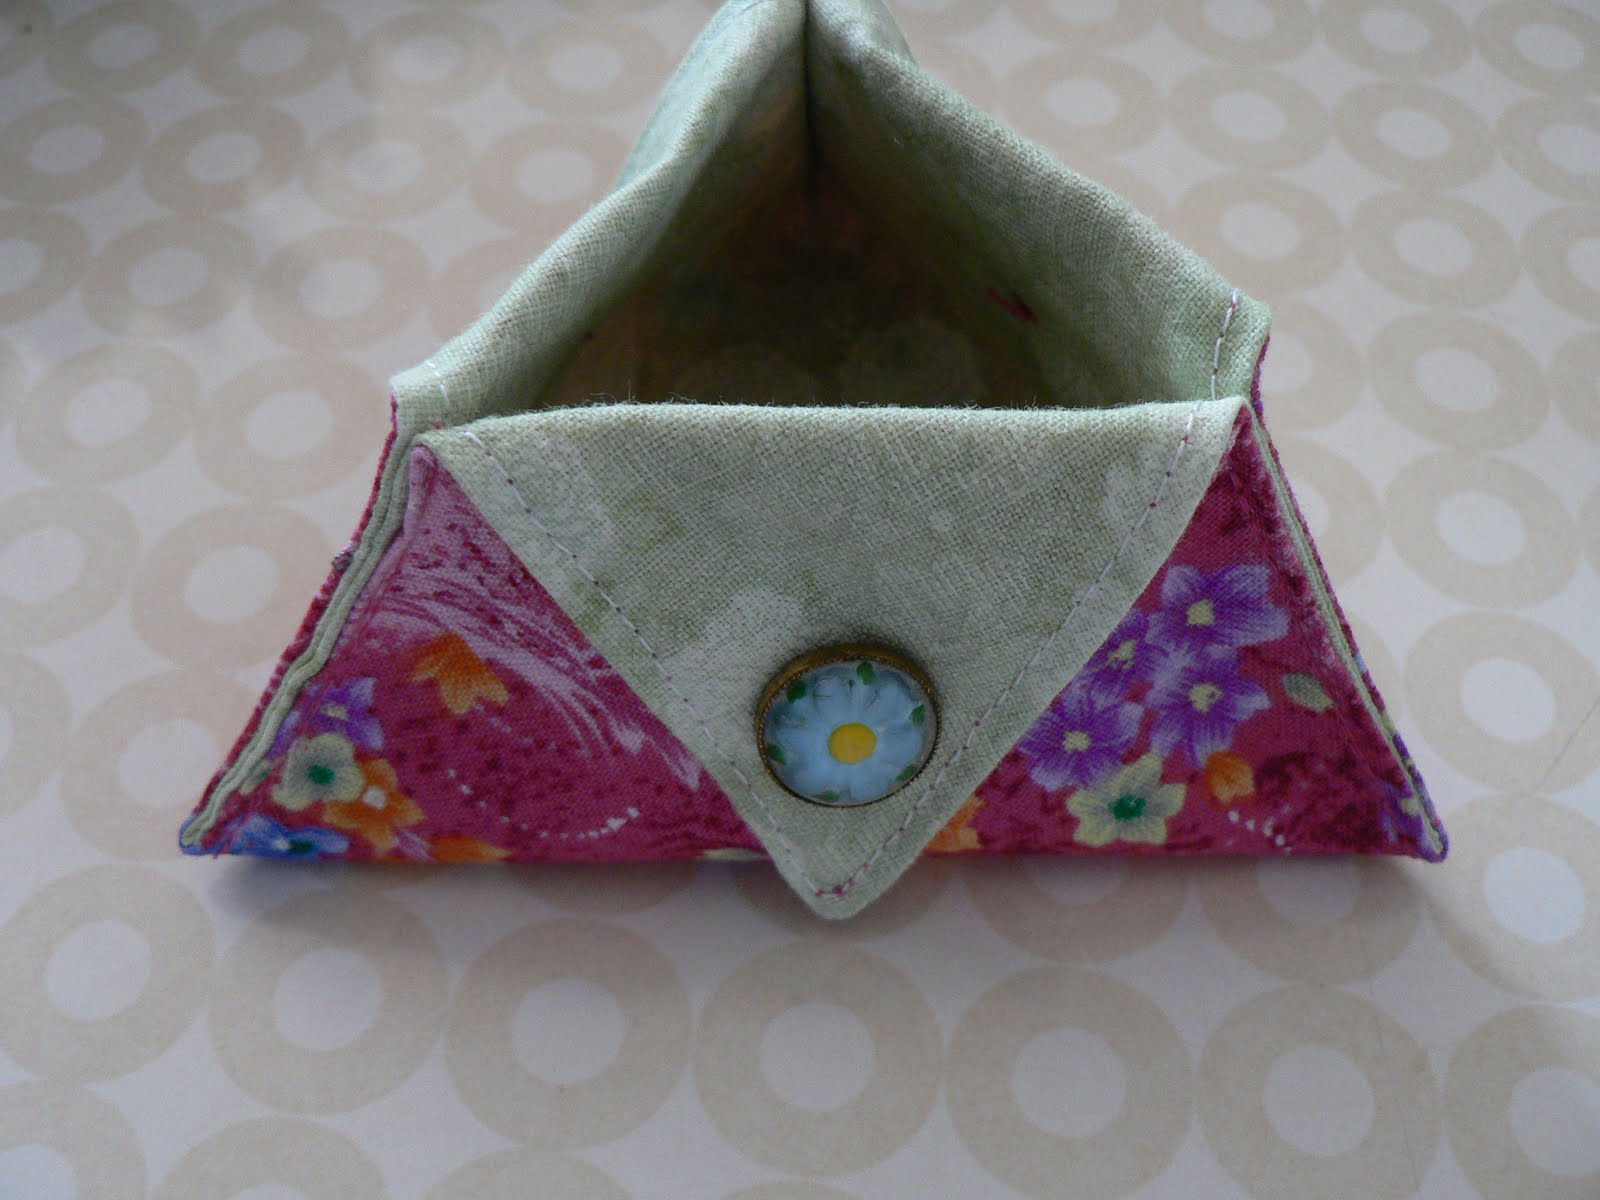
NEEDLING THINGS Triangular Thread Catcher Tutorial
Free Patterns We snip, clip, trim, and then what? Where do all those bits and strings land? The best way to keep your surface clear of debris is to have a handy disposal spot. We love this thread catcher tutorial, because it keeps a disposal point right at hand as well as providing a pin cushion. Of course, we need both!! Thread Catcher Details: So what is a thread catcher? It's basically a super cute trash can with a weighted pin cushion on top. These hang nicely by your sewing machine and come in very handy when it comes to keeping little pieces of thread, and fabric contained. Plus you can quickly access your pins while sewing too. Get Erica's Easy Thread Catcher PDF pattern here:http://bit.ly/2OZNJhIFabric Requirements:1 FQ Outside/Strap/Pillow1 FQ Lining1" x 18" Cotton WebbingWalnut S. My free pincushion thread catcher pattern and tutorial is an easy beginner sewing project and makes a great DIY gift for any sewer. Are you ready to make your own pincushion thread catcher? What is a pincushion thread catcher? A pincushion thread catcher is basically a weighted pincushion on top like this…
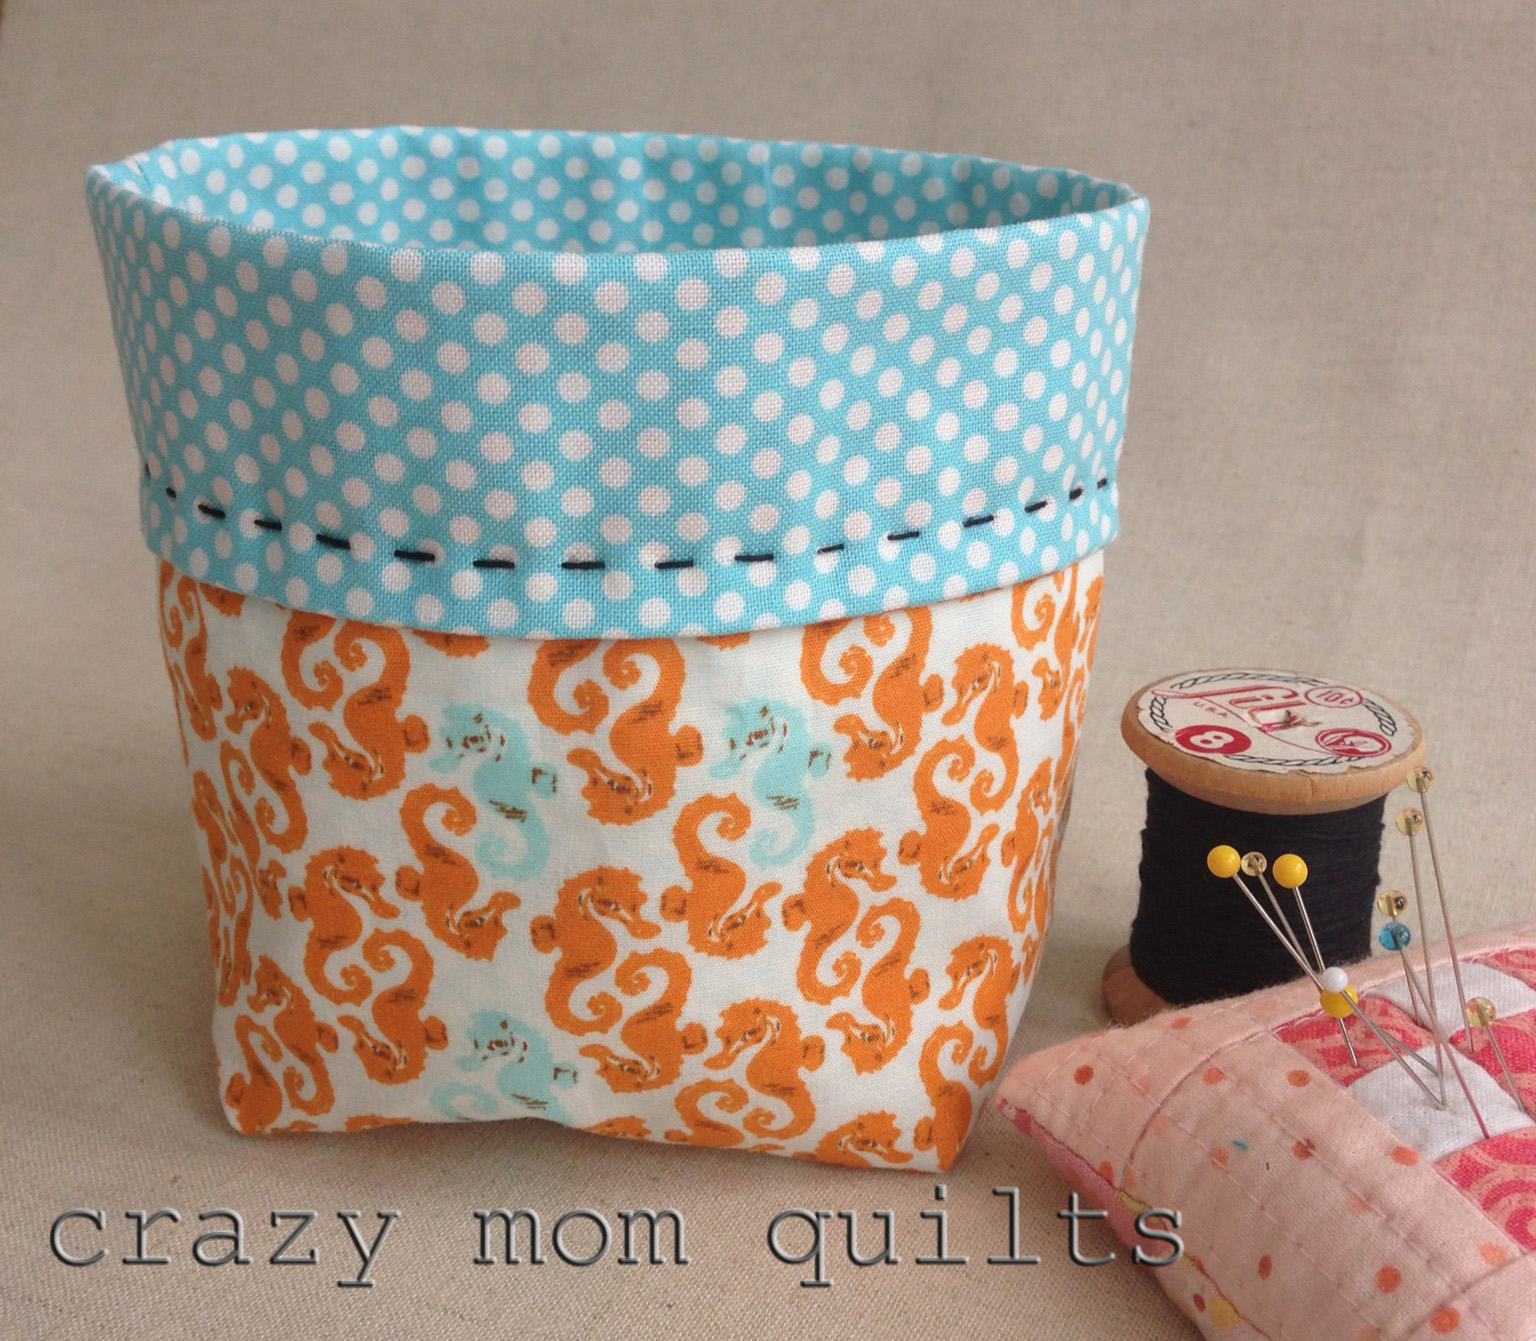
crazy mom quilts thread catcher pattern
Instructions: 1. Mark a dot 1-1/4" from each corner on wrong side of fabric square 2. Following manufacturer's instructions, fuse the batting square to the cardstock. Then fuse the cardstock to the wrong side of the fabric, aligning corners of cardstock to marked corner dots. 3. Fold in each corner of the fabric to reach the batting; press. 4. Fabric thread catchers are small and handy containers designed to keep your sewing space neat and tidy. Their main purpose is to hold discarded thread tails which are snipped while you sew. They can be used in your sewing room, and are also perfect to take on sewing retreats or when you're traveling. Thread Catcher Basket Free Pattern — The Mermaid's Den I'll show you how to make an easy thread catcher to hold all of your thread tails. This post contains a free pattern and tutorial for a thread catcher. Collapsible Thread Catcher Angie Padilla 13.7K subscribers Subscribed 6.3K 521K views 9 years ago Use scraps of fabric and recycled materials to make an easy little thread catcher with this.

Made With Love Thread Catcher Sewing Pattern Now Available for Purchase!
Fold the piece over, and pin two opposing ends of the triangle together at that 2 1/2" mark. You are going to stitch from the fold on the left to the pin. Do this on all three sides of the triangle. In the photo below, I have done two of the three sides, and the third is pinned, ready to be stitched. Download the free serger thread catcher pattern. From the fabric, cut two pattern pieces on the fold. Align the two pattern pieces with right sides together. Stitch the perimeter, leaving a 3″ opening along the short straight edge. Trim the seam allowances and clip the corners.
Perfect for Travel, Quilt Group and Classes! This clever little thread catcher folds up when not in use, keeping loose threads contained. It's small and will easily stow, ready to go, in your bag. This is a super simple project, so make extras. You'll want one next to your favorite chair and one for your quilting bag. What's needed to make a Tool Caddy Thread Catcher:-. Two or more coordinating fat quarters (the designer used a fat quarter bundle of Japanese fabrics), ⅓ yard of heavyweight fusible interfacing, A small scrap of 100% cotton quilt batting, Coordinating thread, Basic sewing supplies, A sewing machine. Check out our RESOURCES PAGE full of.

Thread Catcher Pattern FREE PATTERNS
pattern thread catcher Tools: scisors pins sewing machine Directions: Cut 4 of bag on fold Cut 2 strap Cut 2 pin cushion Cut a 3″x4″ piece of vinyl There is no pattern piece for this because you can not pin vinyl without leaving holes. Draw the measurements on the back and then cut it out. A fantastic project for sewing beginners and more experienced sewers alike, this fantastic Debbie Shore tutorial guides you step-by-step through how to creat.
