Step 10: Assembly: Final Sled. Clamp our Sled Wall pieces to the outside of your sled bottom piece ( Pic 1 ). Double check that your router will fit comfortably but still tightly in between. Pre-drill holes ( Pic 2) and screw in ( Pic 3) your wood screws like you did with the sled base to assemble the sled. 2.DIY Router Sled using Plywood. This plan outlines the steps you need to take to build a router sled using plywood. You will need a sheet of plywood and screws to attach. Also, you will need a drill or driver set, a router collet extender, surfacing bit and Mag Switch. See also 20 DIY Table Saw Workbench Projects: Do It Yourself Easily.
VEVOR Router Sled Slab Jig 64 W/ Locking Function Portable For Wood
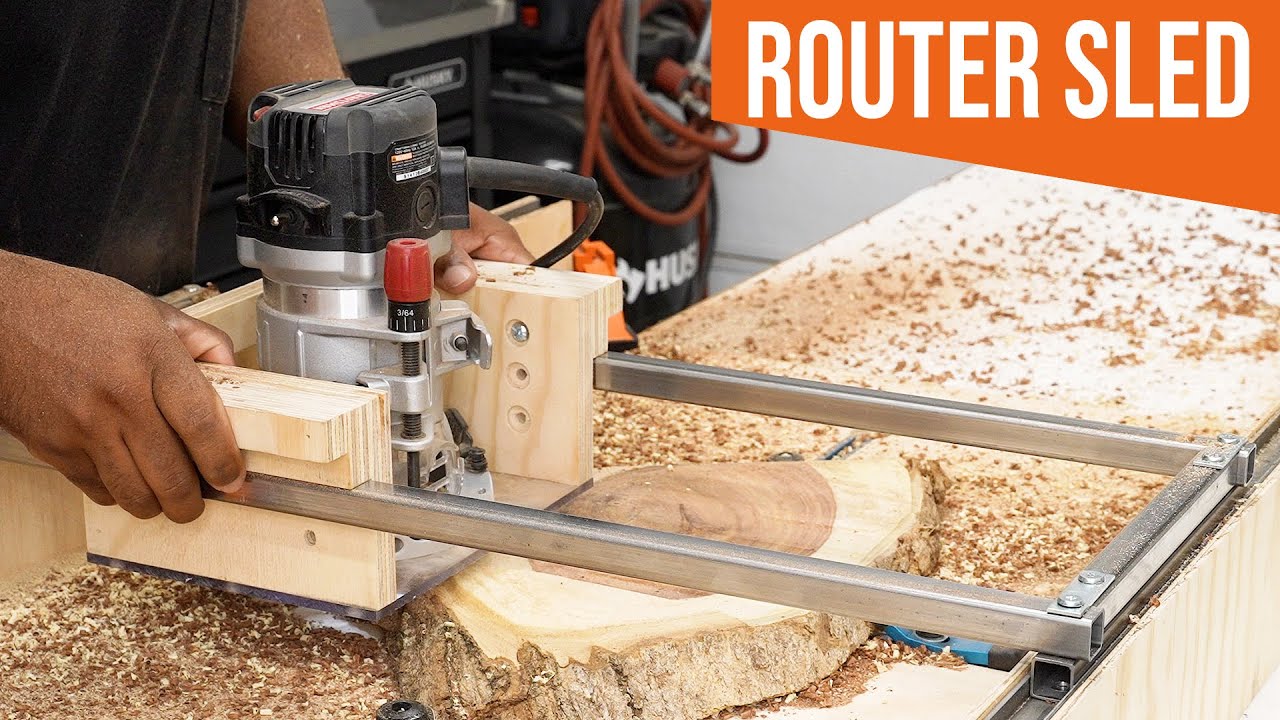
Drill bit large enough for the bolts to fit through (Find a Beginner's Guide to Using a Drill here) 1.5" wood screws. Wood glue. Drill. Jigsaw. Circle saw or table saw. Tape measure. The plans for this sled are made to fit my router. My router has a 6″ base plate, so be sure to adjust the plans according to your router. Lazy Guy DIY Router Sled Demo Featuring: The Bosch MRF23EVS Router. Share. Watch on. DIY Router Sled for Leveling Live Edge Slabs & Cutting Boards. Share. Watch on. 26. If you need to level or flatten a slab of lumber but don't have a planer or drum sander big enough, build this Router Sled! Step 2: Assemble the Pieces. Assemble all the pieces according to the plan using wood glue and screws. After assembly, attach these casters to the bottom of the feet. You can then assemble the whole piece with the bolts, washers, and nuts. The router should now slide freely within the sled. Ask Question. Glue and screw the boards into an "L" shape. To achieve this shape, stand the long edge of one 1¼-inch-wide board on the face of one 2½-inch-wide board. Align the two boards so the edge of.
Adjustable Router Flattening Sled woodworking Jig YouTube
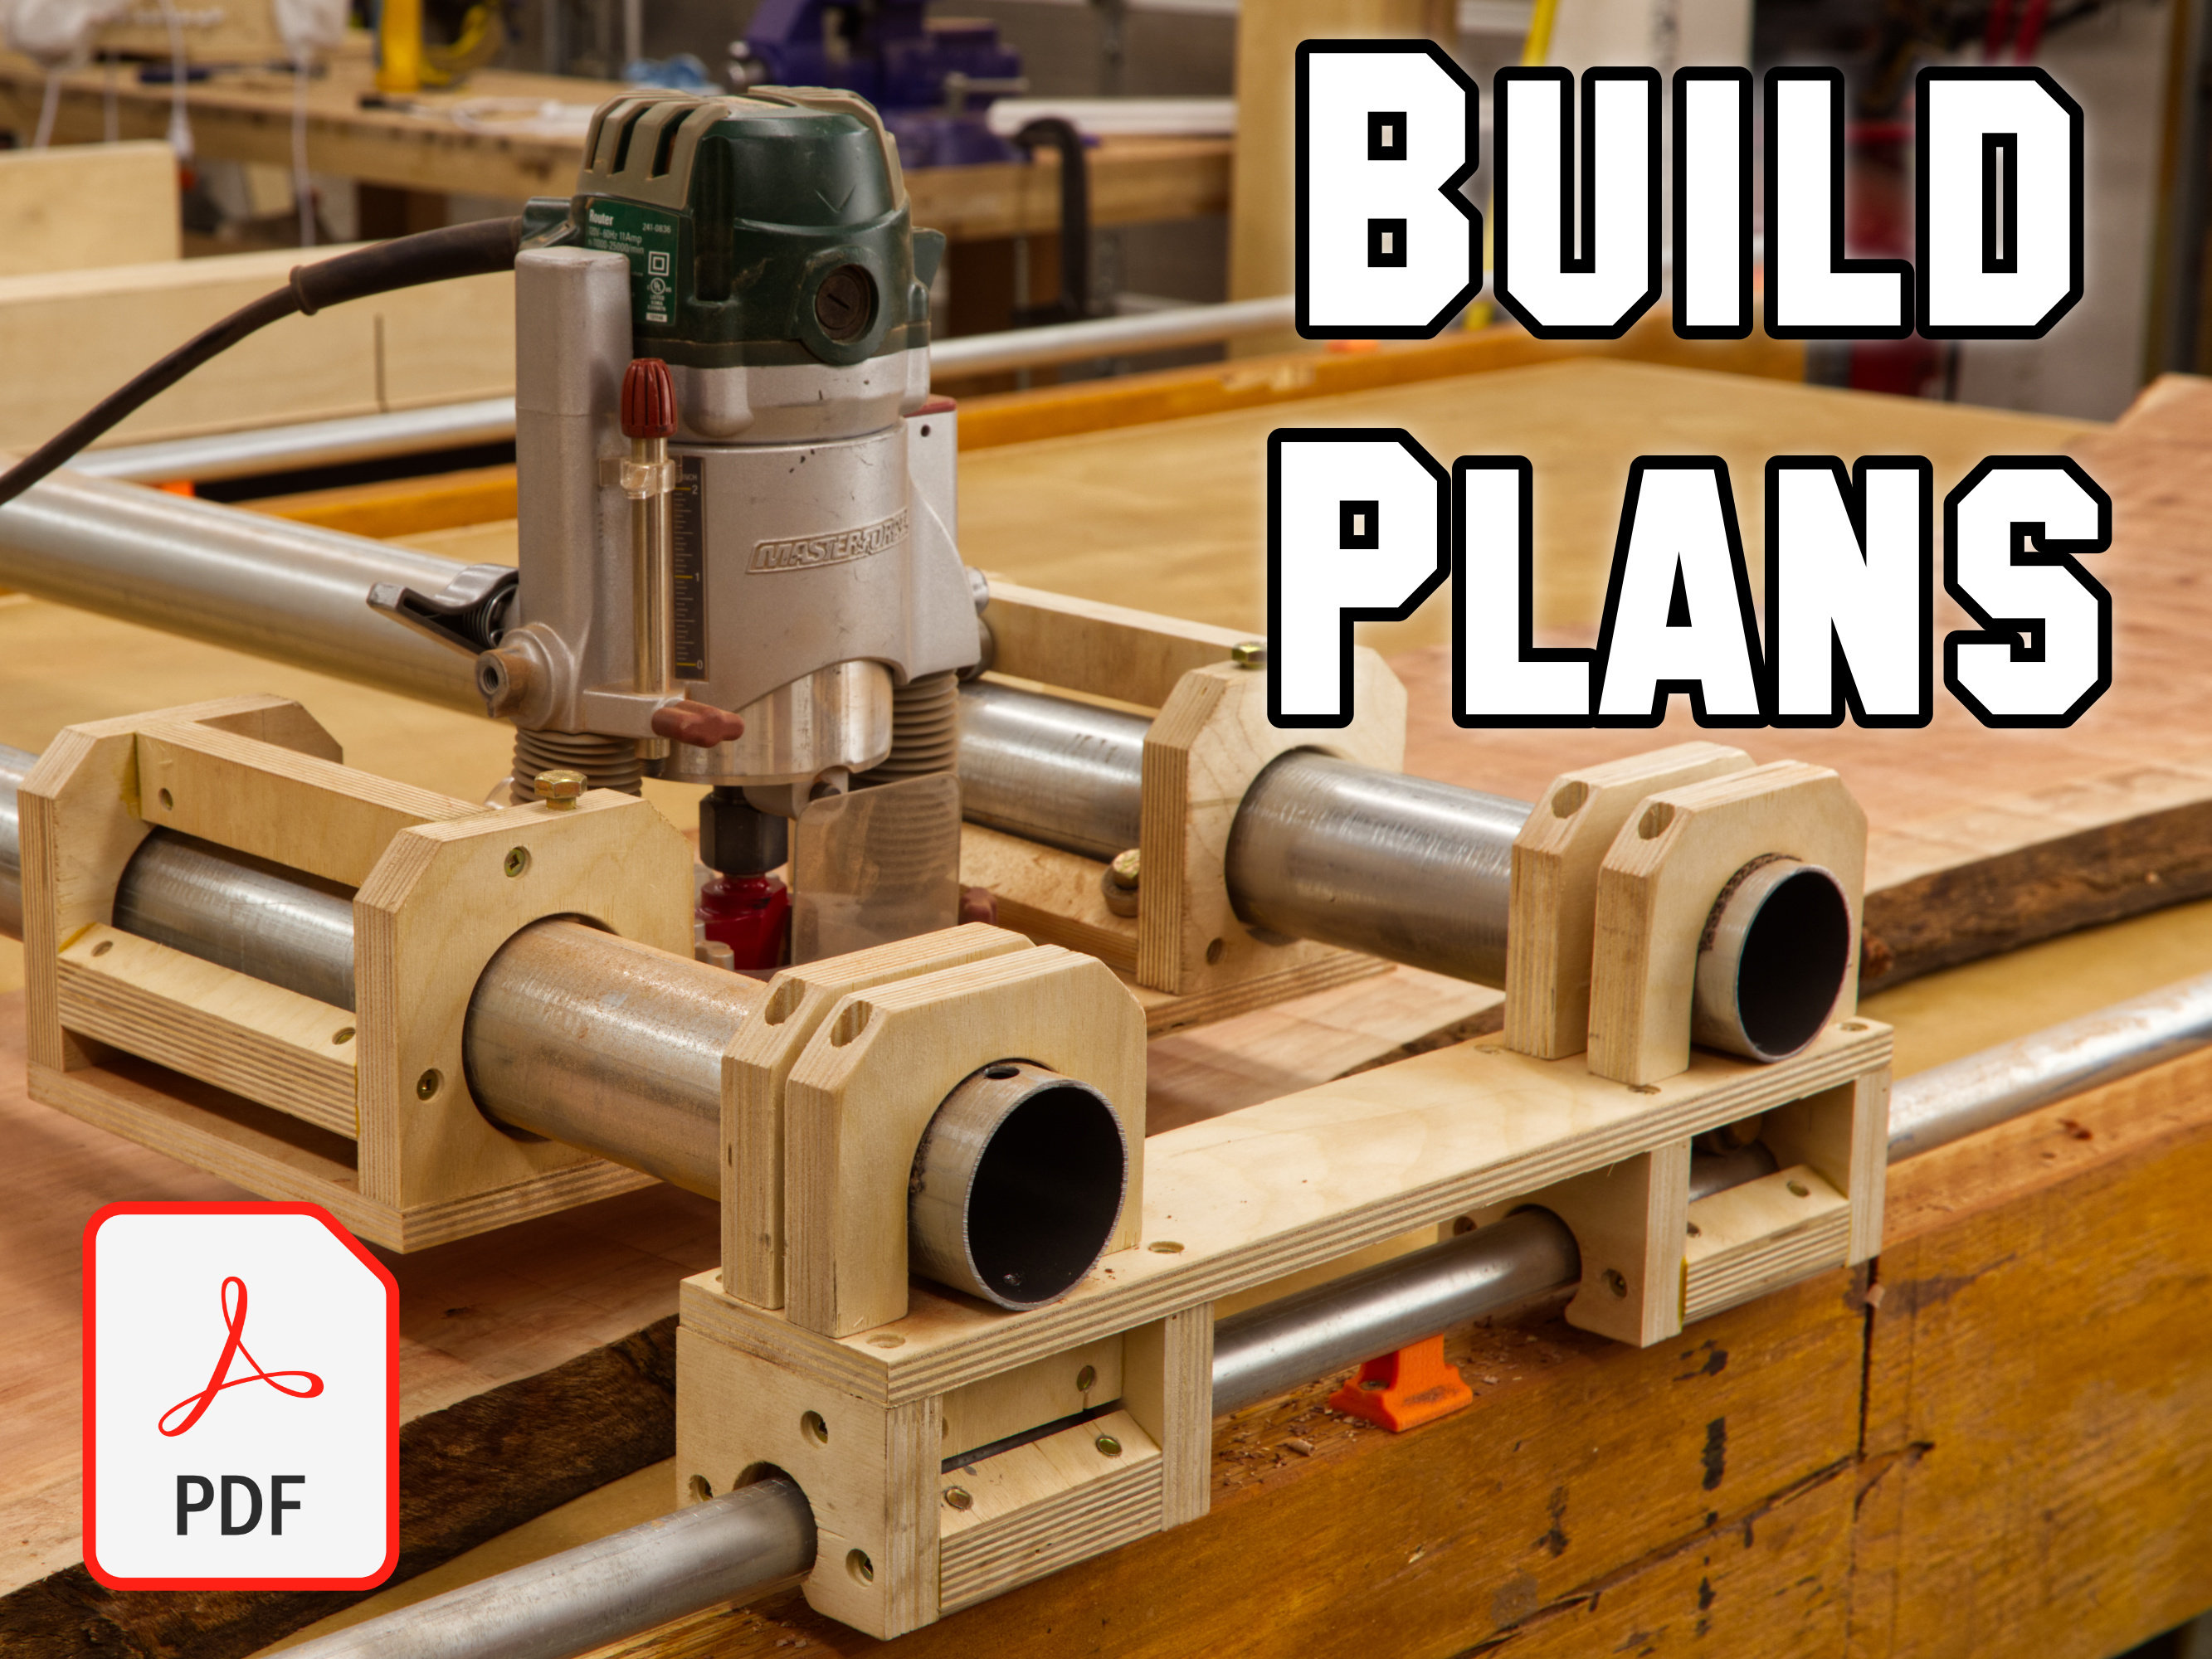
To help keep the sled clean, add a coat of finish. Mask off the areas next to the safety block and paint the block red. The red paint warns you to keep hands clear of this area. When cutting, stop the sled before the blade exits the back end of the safety block, and never use the safety block to push the sled across the blade. 4. Packed with features, this sled makes it easy to rout perfect-fitting joints. Step-by-step instructions, exploded views, materials list, and more—these plans have everything you need to build your own Router Table Sled. What you get (Downloadable PDFs): Standard Plan: 8.5" x 11" PDF of 6 printable (digital) pages of step-by-step instructions Slab Flattening Router Sled - PDF Plans with Dimensions. Slab Flattening Router Sled - Google Sketchup File. Quantity. Add to Cart. Add to Wishlist. Details . Learn how to flatten your own live-edge slab to create a one-of-a-kind table. The plans include cutting and sizing information for building the flattening jig. The above blog will help. Free plans can be found here. Make all your cuts. I used this circle saw and this trac k, but you could use a table saw as well. The bottom of your sled should be the width of the base of your router, plus 1/4". The plans I made fit my router, but you can modify to fit your router. Cut a rectangle out of the middle of this piece so the bit will.

Router Sleds For Slab Surfacing DIY Router Sled Tutorial For The Big
To cut the bottom of the sled, use your router's base to set the width of the cut. Add 1/32″ to this measurement to allow just enough room to prevent binding when the router moves across the sled. Next, cut out the sled sides. I made mine 3″ high. At the drill press, drill two 1 1/2″ holes at either end of the sled bottom. How toward Make a $20 Router Sled. From Workshop Edits in Workshop Accessory. 161,028. 561. 38. Featured. Download Favorite. Introduction: How to Make a $20 Router Sleigh. By Workshop Edits Review out get JT Channels! Follow. Continue by the authors: About: I'm a DIYer and creator favorites to build, capture, and share my creations.
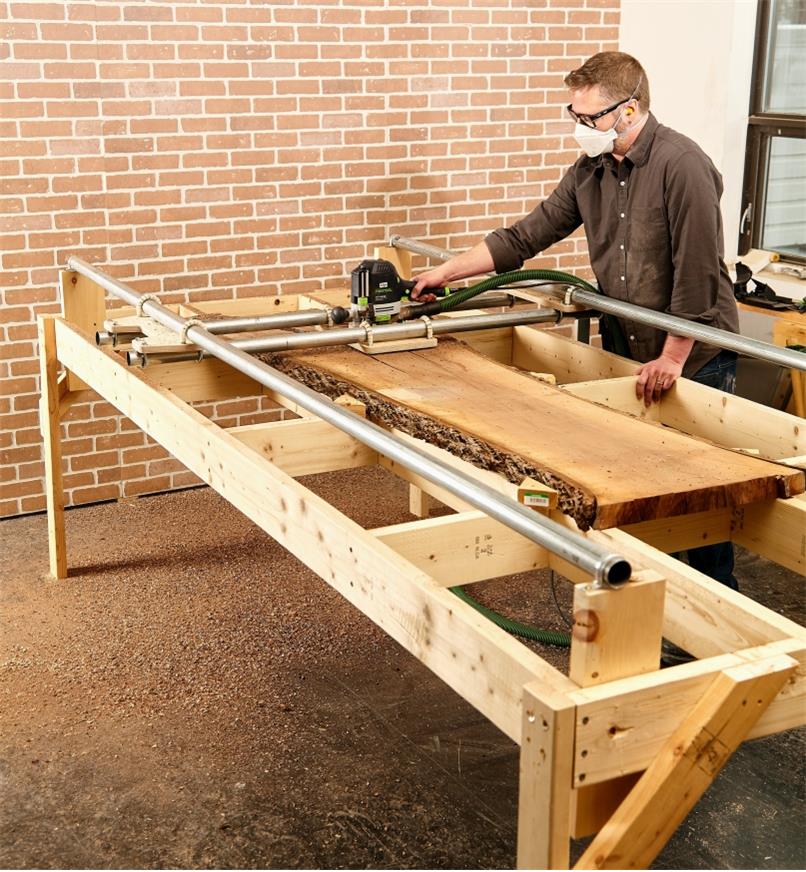
Learn how to make a router sled to flatten any size of wood slabs with this easy-to-follow PDF guide. You will need only a few materials and tools to create your own flattening mill that can handle even the thickest and widest slabs. This PDF also includes photos and diagrams to help you along the way. The plans at the end of these instructions provide the frame dimensions for a 5' × 10' (1.5 m × 3 m) rig. Careful selection of lumber free of crooks, kinks, cupping. Before using the router sled, slide the gantry along the rails from one end of the frame to the other, and back several times. Also slide the carrier along the gantry. Check.
Router Sled Plans for Flattening Slabs Etsy
DIY Router Sledge Tutorial: For The Big Ol' Floor May 30, 2017 by lazyguydiy 26 Comments For one last few months I've been dabbling toward the worldwide of stay edging lumber. Clamp and screw the two long sides of the sled to the bottom. Make sure to pre-dril first. Now fasten the ends to the base with screws. Next, use cyanoacrylate (C.A. glue) to hold the first rail guide to the edge of the base. The CA glue is meant to hold the rail guides in place until they can be fastened with screws.
