The 'traditional' way of doing things is to hook up the signal to the outer lug, and by using the middle lug (the moving part) you can dial in how much of that volume you want. In this case, the pot works as a power divider. But it can be done in a different way. July 13, 2023 1 min read If you're new to guitar wiring, the Les Paul wiring diagram can be a little intimidating. Not to worry, though - with a little knowledge and some basic tools, you'll be able to read and understand the diagram in no time.
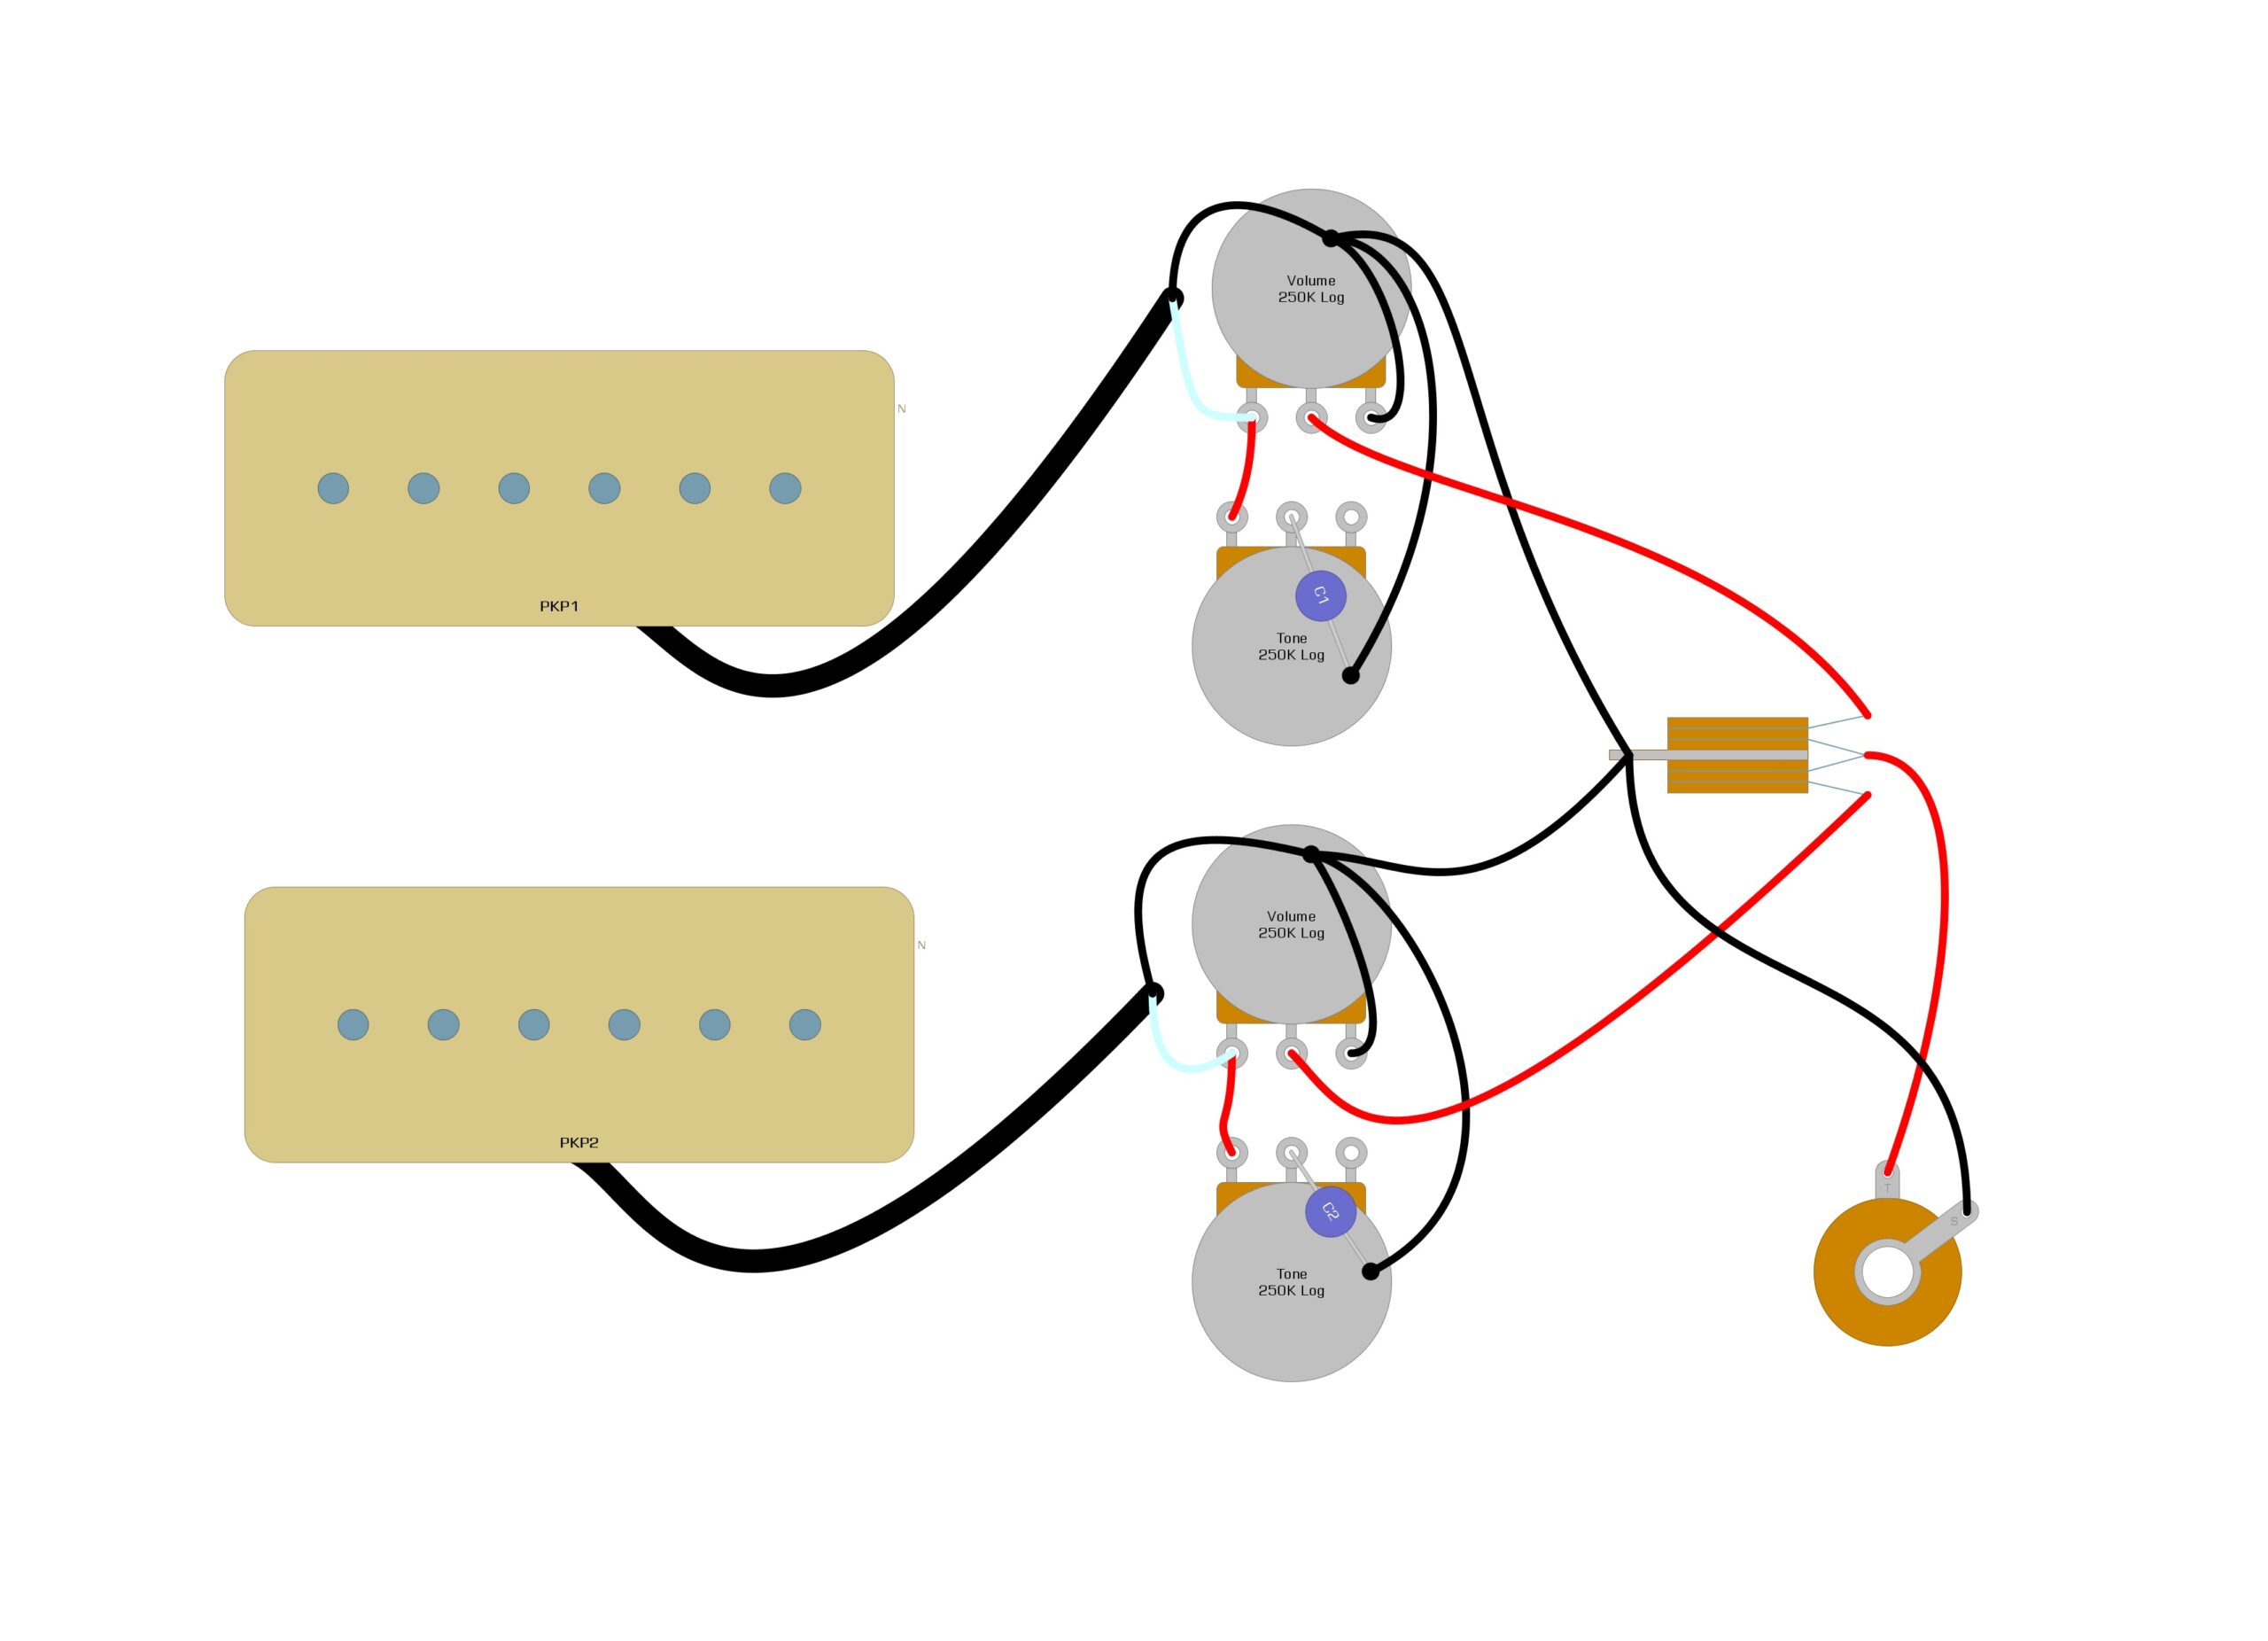
Les Paul P90 Wiring Diagram Humbucker Soup
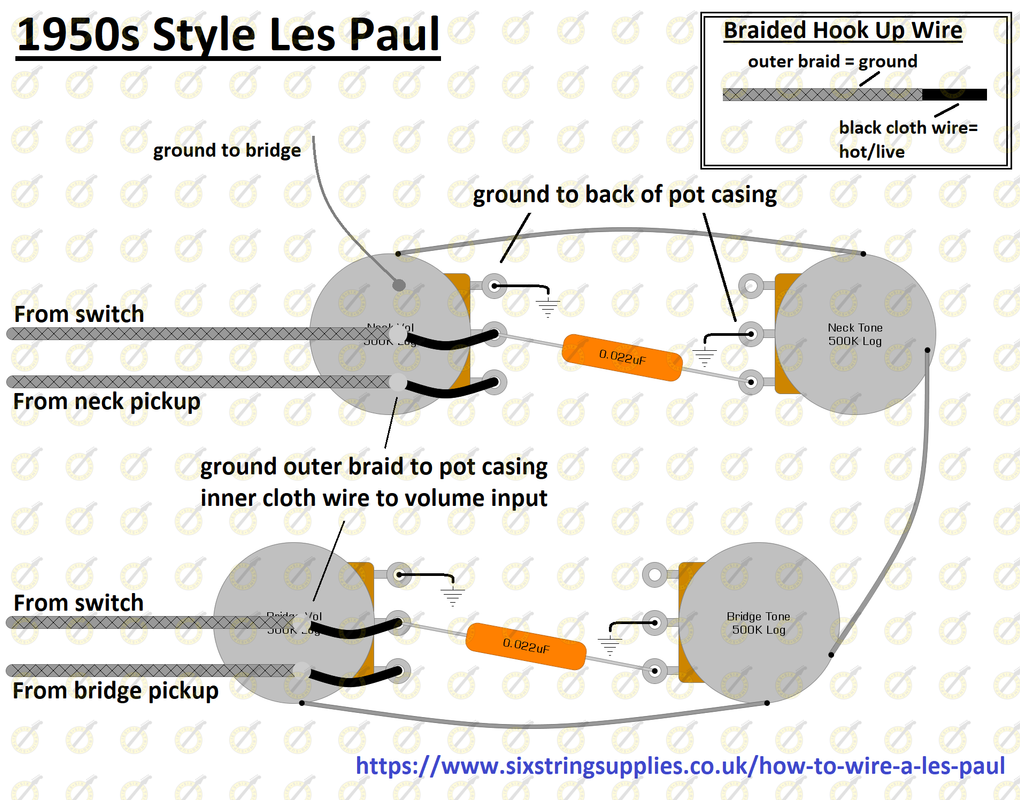
Les Paul Wiring Diagram By Ed Malaker Posted 05/25/2020 Let's take a look at this Gibson Les Paul wiring diagram, so you can use it as a reference when installing new pickups or changing an old component. Guides DIY Workshop: How to rewire a Les Paul Think twice before you install that set of boutique PAF clones - you might be surprised by how much extra clarity you can get from your beloved Gibson by simply upgrading the wiring and components. By Huw Price There are plenty of reasons to rewire a Gibson -style solidbody. Les Paul Wiring diagrams . Hot wire from jack WIRE LENGTH S witchcraft Switch Switch to vol pots 14.25" switch to jack 20" Les Paul Wiring Diagram Neck Pickup Bridge Pickup Wire from the Treble connector on the switch Solder Outer Braid to top of pot Solder inner wire to middle lug BV These Les Paul wiring diagrams are simple to follow and are all based on standard versions and modifications that you may start with. We'll keep this page updated with any modifications we all love. Wiring Diagrams: HH 1V1THH 2V1THH 2V2T

les paul wiring diagram Googlehaku Epiphone, Les paul guitars, Guitar
The below Les Paul wiring diagrams range from the classic to the more exotic and show you how to get even more out of your Les Paul from a simple change in capacitor position to going the full monty and adding push-pull pots for a Jimmy Page wiring setup. 50s Les Paul Wiring (Refer to our guide on wiring a Les Paul) Modern Les Paul Wiring Les Paul Wiring Diagram Les Paul® Standard Wiring Diagram Standard Les Paul wiring configuration, featuring 2 hum buckers, 2 volume/tone controls and a 3-way toggle switch Purchase the Les Paul Standard Wiring Kit here Les Paul® Junior Wiring Diagram Single Humbucker, once volume/ and one tone control Purchase the Les Paul® Junior Wiring Kit here How to Guide - Wiring a Les Paul Replacin g, or in some cases, upgrading your Les Paul's wiring may be a matter of necessity if there are niggling faults like noisy pots or a faulty switch perhaps. A very intriguing, though somewhat unconventional version of this wiring goes one step further by also removing the 3-way toggle switch (Fig. 2). This converts the circuit into a kind of Les Paul blend/mix wiring, similar to the Fender Jazz Bass. With this wiring you can create a lot of different tones by mixing the pickups in exactly the.

Understanding Simple Les Paul Wiring Diagrams WIREGRAM
http://axmaxtremolo.com/blog/wire-a-les-paul-guitar/ Alex shows you a technique to install a ground circuit with a single wire connection to all components o. It's pretty simple and can be reversed easily. With the master tone option, you can use the 50s wiring if you want. With two tone controls though, 50s wiring isn't an option because the tone controls have to come before the switch and volume control.. Les Paul wiring diagram Stock wiring diagram Series Parallel dual pickup Armstrong super.
Another Breja Tone Works DIY video. This video shows how to wire a Les Paul or SG type guitar using the two most comment schemes - Vintage (50's) or Modern.. Time to get the Led out! Look how simple this Jimmy Page mod is! The blue lines are original Les Paul wiring; the red is the only part that changes to create this switchable coil tap. The push-pull pot has replaced the standard tone pot. You'll find a printable version in our Free Info at stewmac.com.
wiring diagram for Gibson Les Paul
Reading Les Paul wiring diagrams is fairly simple. The diagrams are laid out in a grid with the components labeled clearly. Each component is connected to other components through lines and arrows. Follow the lines and arrows to understand how the components are connected together. Additionally, the diagrams often have color-coded wires to help. Lug 1: Input from Pickup HOT Lug 2: Output to switch + Tone Control Circuit Lug 3: Soldered to Ground / Back of Pot The ground wires, or outer braid of vintage style wires is soldered to the back of the pot. The difference for you: Vintage 50's wiring is the easiest way to roll between clean and crunch tones.
