Make some clay snake coil pots as a fun art activity for kids which can turn into a keepsake or a little gift! Fantastic for fine motor skills and creativity, and as satisfying first clay work project for small hands. We have been making more projects with clay recently, which as a former art teacher, I am very happy about! Clay is a fantastic. Coil the clay snake. Coil the snake of clay around the top edge of the clay base, over the scratch marks, then continue coiling the snake around and around. Blend the edges. Use your fingers and a tiny bit of water to blend the edges of the clay coils together a little bit or a lot. Add embellishments.
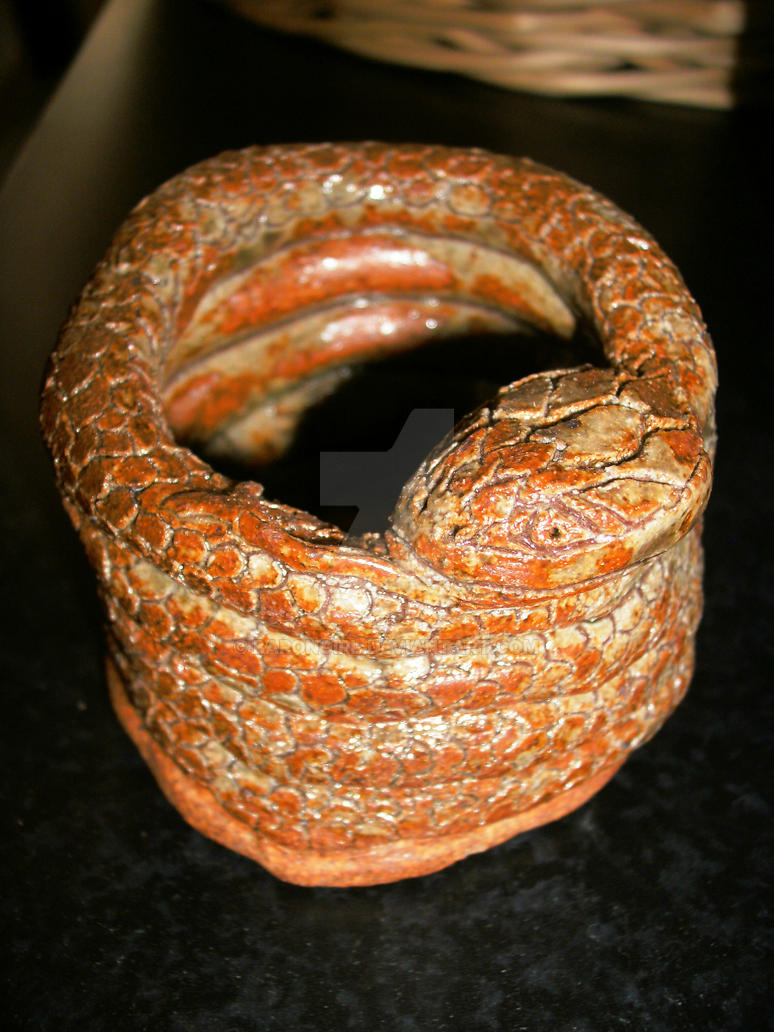
Snake Coil Pot by BaronGirl on DeviantArt
This term we've made coil pots, winding the last coil up to form a snake. Some of the kids went further and wound the last coil around the pot so that their snakes are wrapping themselves around the pot. This was a great activity for my after-school classes, which are multi-age (Prep to year 7 in each class.). This pencil holder that looks like a snake is another fun coil pottery projects you can try. Its entire body is made from a single big coil stacked on itself. Use a little bit of extra clay to give it two small eyes, use a knife to carve out the smiling mouth, and leave the end of the coil at the bottom sticking out to resemble a tail.. Place a ball of clay between your palms and roll back and forth until you have a piece of clay the size of a small sausage. Place "sausage" on mat/table and gentle push the sausage back and forth until it starts thinning out. The trick is to gently slide hands outwards as you roll. This extends the rope. Clay coil pottery is a technique that has been used for centuries to create beautiful and functional vessels. It involves shaping long, snake-like coils of clay and carefully joining them together to build the walls of a pot. This method offers versatility in creating various shapes and forms, making it a favorite among potters.

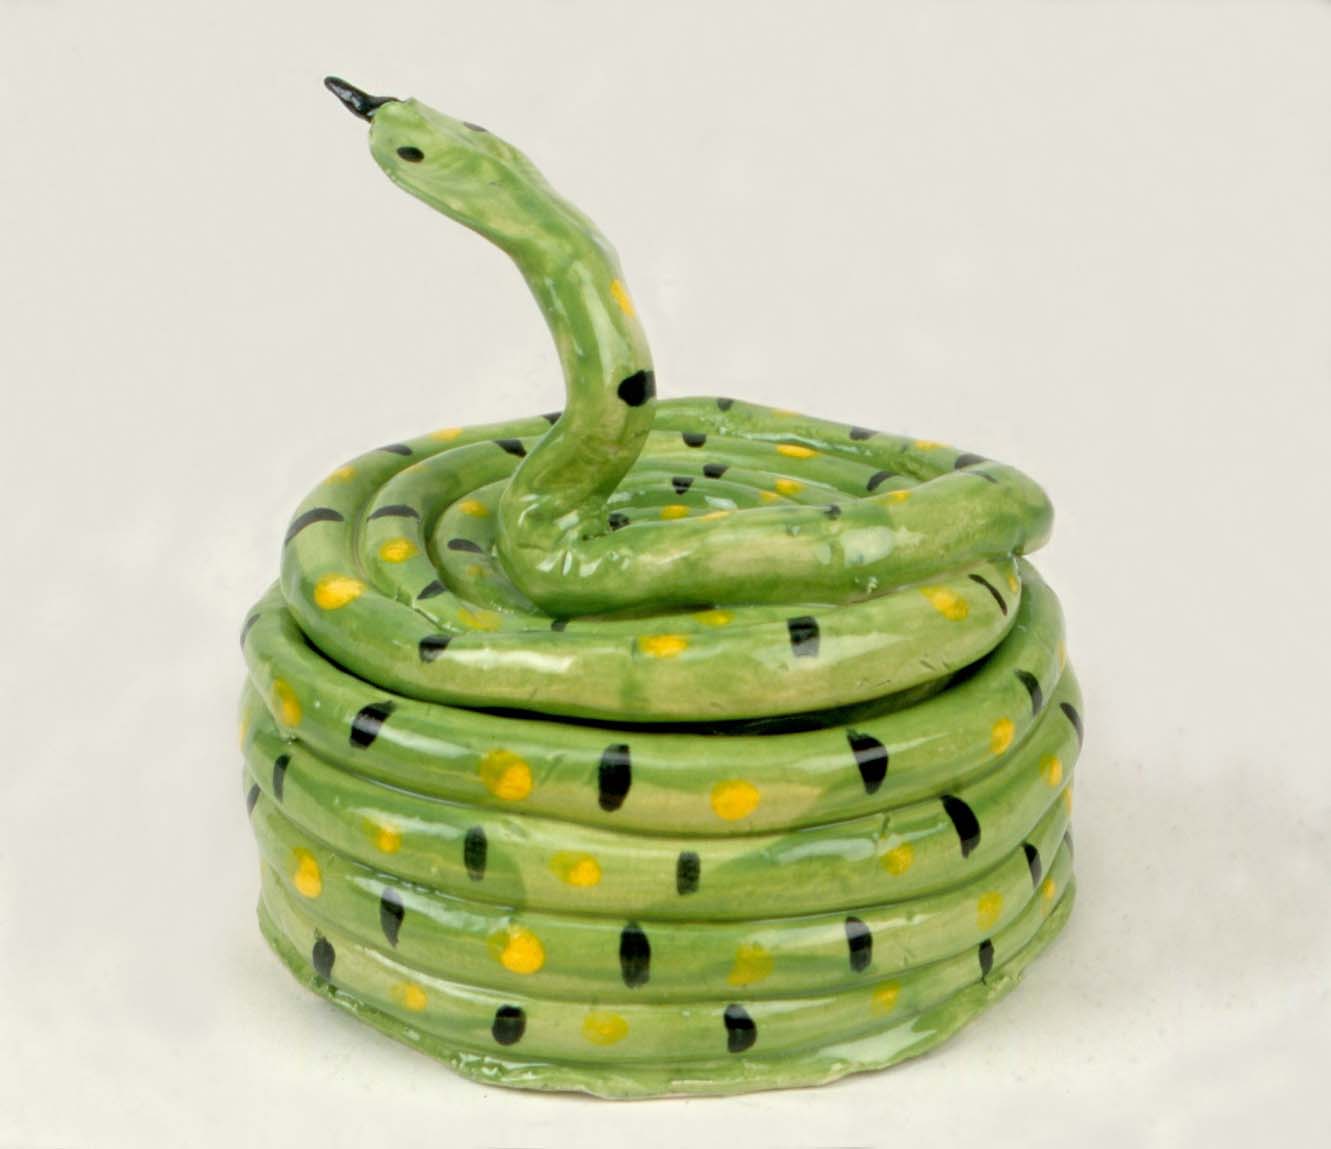
The Green Snake littleleafseeds Pottery, Coil pottery, Flower pots
Learn how to make a simple or more elaborate version of clay coil pots. This is an easy and fun way to work with clay and makes a great keepsake or gift! For. Check out our snake coil pottery selection for the very best in unique or custom, handmade pieces from our shops. The children make clay pots using rolled coils of clay and experiment with the coils moving in different directions. For ages 6 to 13. Plan 3 to 4 sessions. KEY IDEAS.. Break off a large chunk of clay and roll it between your hands to form a thick snake-like shape. Put the "snake" on a flat surface. 2. Build the base of the pot using one of the two following methods. a1.Roll a ball of clay back and forth on a table top to form a "snake" of clay of approximately 1/2" thickness. a2. Lay the "snake" on a table top and coil it into a spiral shaped wheel until the desired diameter is obtained. a3. Smooth out the coils of the "snake" (on both.
Clay projects for kids, Clay art projects, Coil pottery
Hi all! Want to have a go at making your own coil pot? I've made a quick and easy tutorial using air-dry clay, no fancy equipment necessary!This is my very f. Coil Pots. Categories *Grades 3-5, *Grades 6-8, *Grades 9-12, *K-2, Sculpture/Collage.. Coil is a long form of clay that is rolled into a slender snake-like form in order to produce pottery or other ornamental structures. Firing is the hardening of a clay vessel by the application of heat.
Coil pottery is a technique of hand-building clay objects using long, snake-like coils of clay stacked on top of each other and smoothed together. Coil pottery allows for the creation of various shapes and sizes, including bowls, vases, and sculptures. Learn how to create a coil pot with these easy-to-follow instructions! You'll need some modeling clay, a small cup of water, a piece of paper (to protect you.
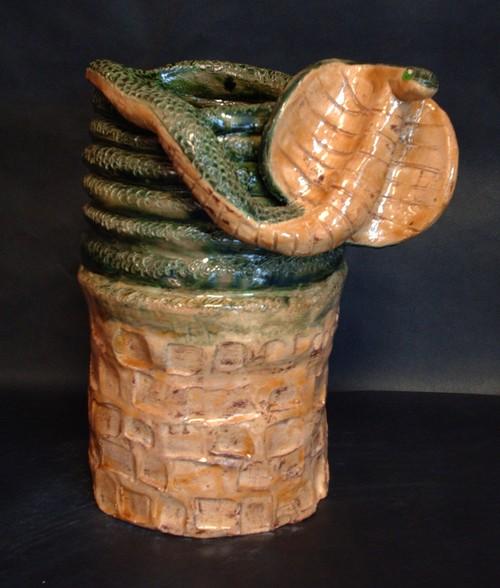
Drake the Snake Coil Pot by SherokuTakari on DeviantArt
STEP 2: Make several coils. Use multiple colors if you like. STEP 3: Roll one snake into a circle (see photos for example). This coil will make the bottom of your pot. STEP 4: Coil the remaining pieces on top of the edge of your first circle/bottom coil. STEP 5: Add more coils up the side of your pot until it is the height you want. Follow along to make clay pots using the coil and pinch methods.Materials:• clay (earthenware, stoneware, modeling clay)• sponge and water• scoring tools (pl.
