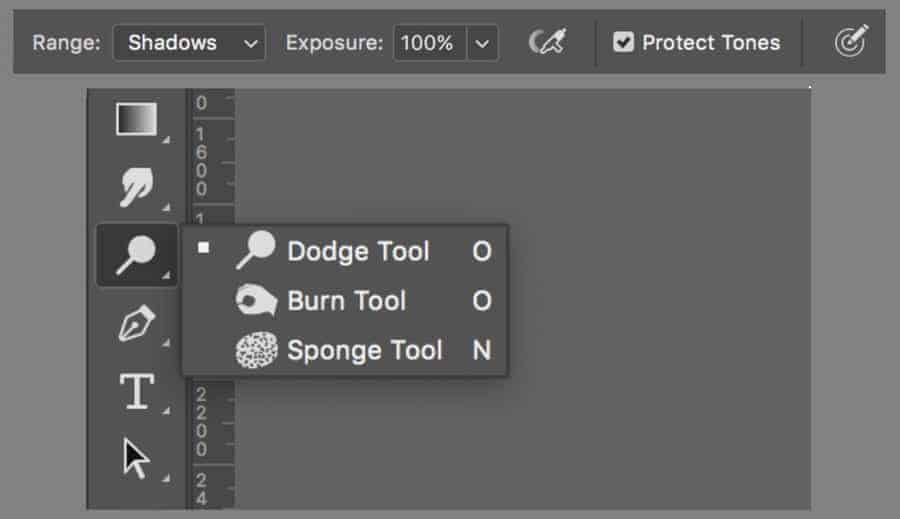
In Adobe Photoshop, use the Dodge tool and the Burn tool to lighten or darken areas of an image. The more you paint over an area with the Dodge or Burn tool, the lighter or darker it becomes. The Dodge and Burn tools in Photoshop are the digital versions of these techniques and are often used to either lighten underexposed areas of a photo or darken overexposed areas. As useful as the Dodge and Burn tools are, however, they both suffer from a serious problem.
Dodging and Burning Pro Tips in Improve Photography
Dodging and burning are photo editing techniques where you selectively brighten (dodge) and darken (burn) different areas of your image. It allows you to control what people will see first and generally make your images look cooler. Let's look at how to do it. Related: What Are Dodging and Burning in Photography? Using the Dodge and Burn Tools in Adobe Photoshop Using the Sponge Tool in Adobe Photoshop What to Know Duplicate the background layer containing the image. Select the Dodge, Burn, or Sponge tool. Paint over the image with the chosen tool. The Dodge tool lightens. The Burn tool darkens. The Sponge tool brightens or tones down color. To work with the Dodge tool and Burn tool, do the following: Tap the Dodge tool from the toolbar or long press the Dodge tool to reveal more tool options and select the Burn tool. In the floating tool options bar that opens, c hoose a brush size, exposure, and hardness for dodging or burning. The Fastest Way to Dodge and Burn in Photoshop PHLEARN 260K views 9 years ago

Simple Dodge & Burn Technique in Sculpting the Face by
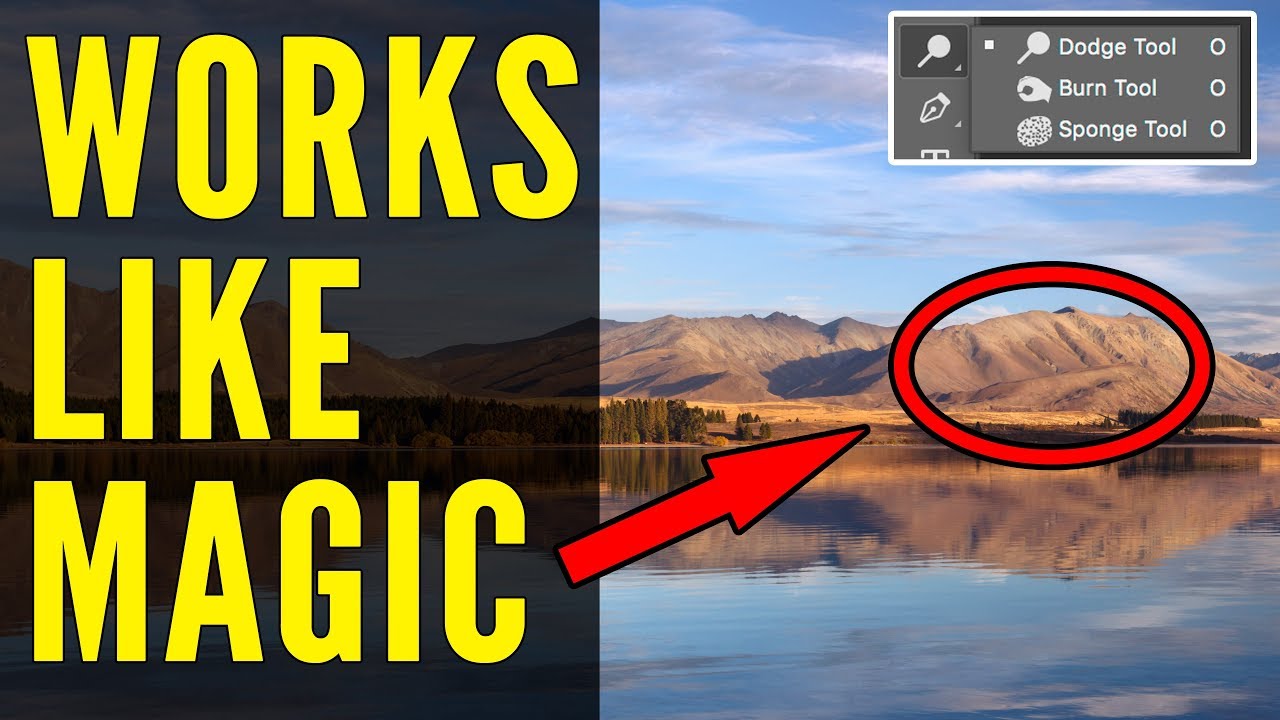
The Dodge and Burn tool will help to lighten and darken certain images without editing the entire photo. Utilizing this method will give your imagery a three-dimensional feel since we are focusing on specific areas. Method 1: Brush Tool I'm going to you how to use a brush to dodge and burn in Photoshop by following the steps below. Dodging and Burning is a great technique to help inject interest and life into your photography. Even relatively small adjustments with the Photoshop Dodge and Burn tools can create a remarkable improvement. You can see the result of my Dodging and Burning, together with selective saturation increases below. What Is Dodge & Burn In Photoshop? In Photoshop, the Dodge Tool lightens specific areas of your image, while the Burn Tool darkens certain areas of your image. These tools can be used together to selectively increase contrast and help draw attention to certain parts of a photo. The dodge and burn tools are great for editing portraits and emphasizing key parts of an image. This tutorial covers the basics of using the dodge and burn tools in Adobe Photoshop. A.
Dodge and Burn Tool Tutorial My 1 Technique for making
The dodging and burning technique are probably, known since the first photographs. This technique allows you to work wonders with light and shadow, rescue underexposed or overexposed images. Or turn simple photos into beautiful paintings. This technique has proven to be so useful that these days there is a digital equivalent. Tutorial Resources Girl Man Step 1 - Accessing Dodge and Burn Tool Basically, this tool Lightens = Dodge and Darken = Burn the areas of the image. It also gives more control over the specific areas of the image as you can target shadows, midtones and highlights with different exposure settings.
0:00 / 9:55 Introduction How to Dodge & Burn in Photoshop | Day 17 PHLEARN 2.14M subscribers Join Subscribe 123K views 3 years ago Every Photoshop Tutorial - Day 17 of 30 Days of. To Dodge is to lighten an area of your picture, to Burn is to darken an area. Digital dodge-and-burn techniques are based on the method photographers use in the traditional darkroom: blocking light from the enlarger (or 'dodging' the light) to create a less-exposed, and therefore brighter, area on the paper, and using more light (or.
:max_bytes(150000):strip_icc()/Image02-57bb2f4d3df78c8763dc0f40.jpg)
How to Use Dodge, Burn and Sponge Tools
Here's how to dodge and burn with both Luminar AI and Luminar 4. Click on the Pro Tools icon and choose Dodge and Burn from the menu. In the top toolbar, choose either Lighten or Darken. Next, adjust the size and feathering of the brush (also in the top toolbar). Remember, a soft brush is best when dodging and burning. Step 1: Curves First, we'll bring back the highlights a bit. I also want them to look warmer. Click on the "Add fill or adjustment layer" icon and select "Curves". This will add a new layer, and the Curves panel will pop up. Open the RGB dropdown menu. Select "Red". Pull the top anchor point slightly to the left.
