184 22K views 10 years ago Blender 2.6 - Particle Systems and Cloth Effects In this tutorial for new Blender users, we take an introductory look at how to use vertex groups and weight paint. 1 Answer Sorted by: 0 Your problem may lie in the fact that you used Cycles render while he tutorial is in, Blender render. This changes the UI and settings.
Trying to make armor Modeling Blender Artists Community
Browsing a Blender Facebook group and a user had a question.generate a weightmap to control how fur is distributedgoto 1:45 to see the weight paint part Blender Tutorial 15 - Basic Hair Particles, Vertex Groups, and Weight Painting Alex Chamberlain 2.11K subscribers Subscribe Subscribed 390 21K views 2 years ago Blender Basics in *about*. I revisited an old tutorial and explain how to set up a weight map to be used with hair particles to control the density.========= LINKS AND INFORMATION=====. I've been meaning to update this video for a very VERY long time. But, we're finally here. Everything you need to know in order to start painting weight laye.

Blender Weight Paint Simply Explained All3DP
4.3K Share 145K views 4 years ago Blender 2.8 ALL FUNDAMENTALS (Speed Tutorials) Hi everyone! Here's everything you need to know about weight painting explained in 3 minutes! This is designed. Published Aug 26, 2019. Weight paint is essential to many aspects of the modeling workflow in Blender such as rigging, applying modifiers, and particle spreading, among other things. Explore this guide as we exlain Blender weight paint and show you how to use it! To Weight Paint in Blender: Select the Object to weight paint and navigate to Properties > Mesh Data > Vertex Groups, click on the + icon to add a vertex group if the object doesn't already have one Set the Object Interaction Mode to Weight Paint 8:45. Free Vertex Groups. 10:42. Tools. 6:14. Bonus Tips. This course is an introduction to weight painting in Blender.

(FREE) Weight Painting Blender Studio GFXLeaks
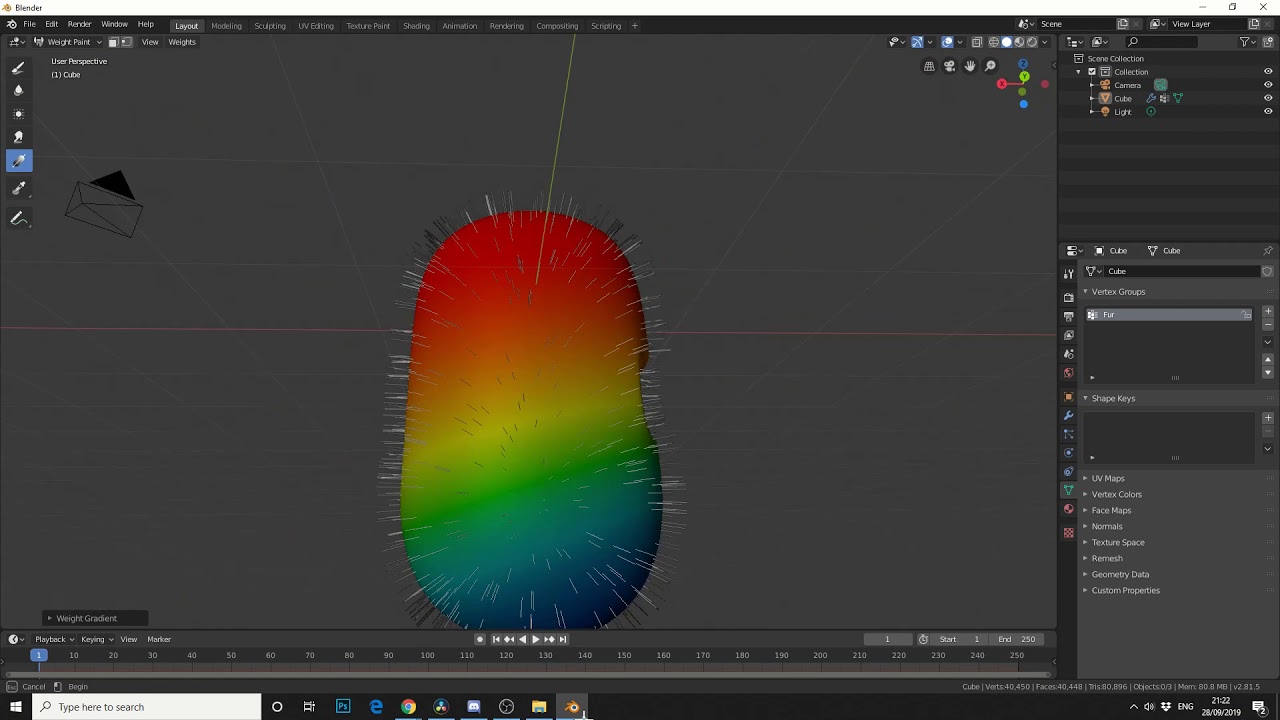
Blender 4.0 Manual. Sculpting & Painting; Weight Paint; Weight Paint. 1 Dear Community! I just modeled my own sh1tface and I'm quite happy with the model (still a sh1tface, asymmetric as a hunk of p00 but yeah, it's my face and I can talk about my face however I want :D). Now I have to get those eyebrows and the scrappy beard to work. So I switched into weight paint mode and turned on the particle system.
Blender 3D computer graphics software Software Information & communications technology Technology. 2 comments. Best. Add a Comment. PublicOpinionRP • 6 mo. ago. In the Interpolate Hair Nodes setup you can set Density Mask to be a vertex group by changing it from a single value to an attribute and then typing in the name of the vertex group. 3. Delete it, then create a new vertex group. Set the weight paint brush's weight to 0.25 or 0.5, leave it on Mix, and paint only where you want hair to grow. If you need to remove weight from the vertex group, set the blend mode to Subtract instead of Mix. A higher weight will remove more.

Weight Paint Tools for blender video guide YouTube
Blender Artists is an online creative forum that is dedicated to the growth and education of the 3D software Blender. Hey everyone, I've been working on getting daz3D characters into Blender, then fit them to the cool rig from the blendercookie video tutes.. I need some help with weight painting the hair though, I don't seem to be able. Weight paint and particle edit (hair) freeze #100889. New Issue. Closed. opened last year by Alessandro Vecchio · 9 comments.
